Resource Time Report
The Resource Time report lists Resource allocated and actual time across a custom set of Projects and Tasks over a specific time period. This report is suitable for importing data into other systems or pivoting/charting the data.
Note: The included columns are entirely customizable. Users running the report can add columns based on Resources, Projects, Project Properties, Tasks, Task Properties, Time, and Numbers (allocations, actuals, costs, etc.). See the procedure below for more information.
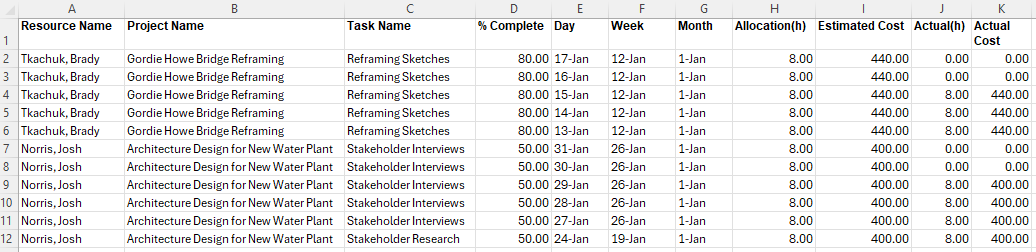
The report contains a row for each Resource allocation / actual entry on the most specific time interval selected. For example, the report above has three time intervals: "Day", "Week", and "Month". Each value in the "Day" column is different, but many of the "Week" and "Month" values are the same. All of the number columns ("Allocation", "Estimated Cost", "Actual", and "Actual Cost") are based on the specific day.
Now, take a look at the same report without the "Day" column included.

"Week" has become the most specific time interval, so the number columns ("Allocation", "Estimated Cost", "Actual", and "Actual Cost") are based on weekly totals instead. For instance, row #2 above shows us that Josh has 40 hours allocated to the "Stakeholder Interviews" Task during the week of January 26th.
Tip: For a similar report that exports this data in a way that is more suitable for report readers, consider the Resource Schedule Sheet report.
To run the Resource Time report:
Before You Start: Users will require the "Resource Reports - Allow" permission from an Application Policy to run this report. Additionally, users will require the "Profile Details - View" permission on at least one of aProject's Policies in order to include the Project's data in the report.
-
Select the Reports icon
 from the Navigation Menu.
-
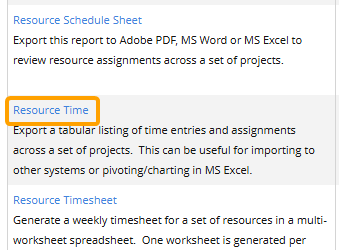
Select Resource Time from the list of Eclipse Reports.
-
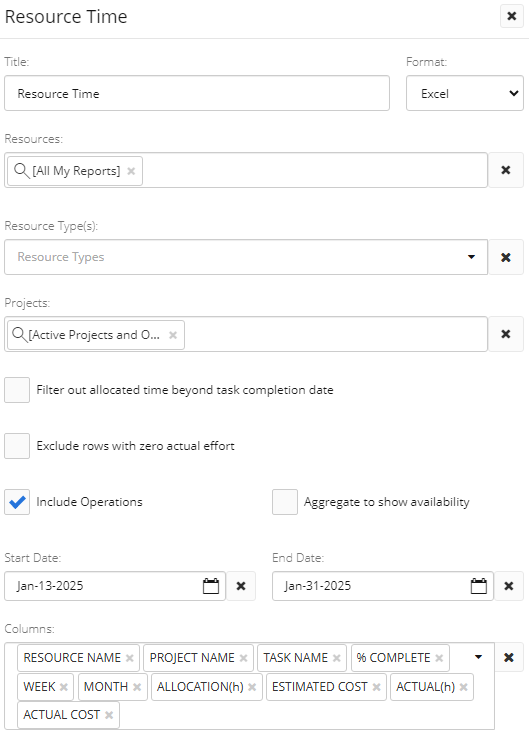
Use the "Resource Time" window to customize your Resource Time report.
-
Title: Enter a custom name for your Resource Time report.
-
Format: Ignore this field for this report; the only available export option is a Microsoft Excel file.
-
Resources: Select which Resources will be included in the report by typing in the name of a Resource or Resource filter and selecting it from the drop-down menu. Repeat this until all of your desired Resources and filters have been added.
Note: These are the same Resource filters that can be found on the Resource Search page. From here, users can create their own custom Resource filters that can be used in the report.
Note: Selected Resources that do not have any assignments on any of the selected Projects (below) will be excluded from the report.
-
Resource Type(s): Use the Organization Structure that appears to select Resource Types that will be used to filter the Resources. Only the Resources with the selected Resource Types on the Project Work Plan will be included. If the field is left empty, Resources will not be filtered by Resource Type.
-
Projects: Select which Projects will be included in the report by typing in the name of a Project or Project filter and selecting it from the drop-down menu. Repeat this until all of your desired Projects and filters have been added. The Tasks from these Projects will be included in the report.
Note: Projects without any of the selected Resources assigned to them will be excluded from the report.
Note: These are the same Project filters that can be found on the Project Search page. From here, users can create their own custom Project filters that can be used in the report.
Note: A message will appear if the selected filter(s) will result in no Projects being included in the report.
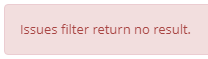
This could be the result of selecting a filter (or multiple) that does not include any Projects. It could also occur if the user running the report does not have permission to view any of them. -
Filter out future allocated effort on completed tasks: If selected, any future allocated time toward a completed Task will not be included in the report.
Example: Brady is assigned to a week long Task from Monday, January 13th to Friday, January 17th. He finishes it early on Wednesday, January 15th and marks it 100% complete.
If this checkbox is not selected, the rest of his allocated time toward the Task will be included in the report.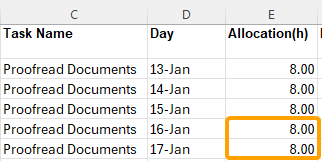
If the checkbox is selected, the allocated time toward the completed Task on the remaining days will not be included because it is allocated after the Task was marked complete.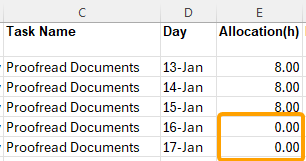
-
Exclude rows with zero actual effort: Select this checkbox to filter out any rows that do not contain actual effort. If a Resource has not entered any time toward the Task in the time interval (day, month, year, etc.), the row will be excluded. Only rows that contain actual effort will be included in the report.
-
Include Operations: Select this checkbox to include Projects that are designated as "Operations".
-
Aggregate to show availability: Select this checkbox to combine (aggregate) all of each Resource's allocated and actual time from all of their assignments, not just from the Projects selected from the "Projects" field. When this is selected, none of the Project-related nor Task-related columns can be added to the report. Additionally, the only Number-related columns that can be added are "Allocation (% or h)", "Actual (% or h)", and "Availability (% or h)".
Note: The "Availability (% or h)" columns can only be added to the report when this checkbox is selected.
When this is selected, the main purpose of this report becomes displaying Resource availability. Allocation and actual values will no longer be Task-specific; they will reflect the Resource's total amount of allocated or actual time on all Eclipse PPM Tasks for the given time interval (day, week, month, etc.). This allows the report to calculate the Resource's current availability for the time interval.
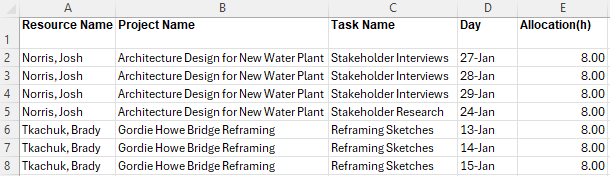
Example: Jack creates a simple Resource Time report to view Brady and Josh's allocated and actual time against the two Projects he manages.
However, Brady expresses concern that he is overallocated for a few days. To confirm this, Jack selects the "Aggregate to show availability" checkbox. This automatically removes the "Project Name" and "Task Name" columns from his report, but it allows him to add the "Availability (h)" column to see each Resource's total availability per day.
Once he runs the report, he discovers that Brady is correct; Brady's total allocation between January 13th-15th is 16 hours per day. A workday is only 8 hours, so his availability is "-8.00" for each of these days.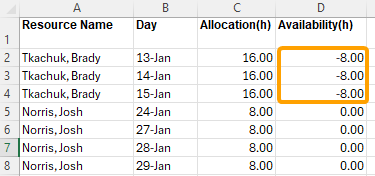
Jack can now readjust his Project Schedule to accommodate Brady's availability. -
Start Date / End Date: Use these fields to determine a date range for the report. Only time intervals (days, weeks, months, etc.) that fall within the date range will be included.
Note: Even if an interval on the report goes past the "End Date", only time from within the date range will be included. For example, imagine the shortest selected interval is "Week" and the "End Date" is set to January 27th. If the week starts on January 26th, the "Week" value for a Resource will not include any time beyond the 27th. If a Resource has any allocations on the 28th-31st, they will not be included in the "Week" total.
-
Columns: Use the drop-down menu to determine which columns will be included in the report.
Note: If "Aggregate to show availability" is selected, none of the Project-related nor Task-related columns can be added to the report. Additionally, the only Number-related columns that can be added are "Allocation (% or h)", "Actual (% or h)", and "Availability (% or h)". If it is not selected, the "Availability (% or h)" columns cannot be added to the report.
-
-
Select the Run button.

After selecting Run, the report will automatically download onto your device as a Microsoft Excel spreadsheet.