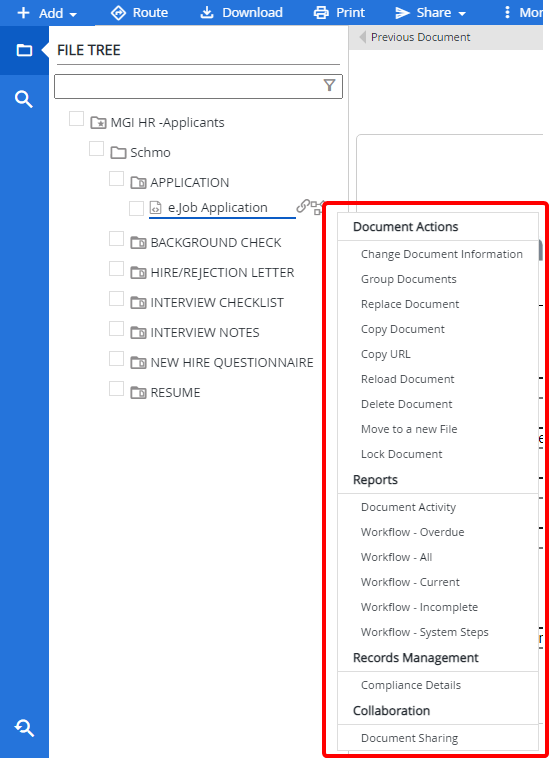
Document Actions are the functions that can be carried out at the document level.
To access Document Actions, right click a document in the File Tree.
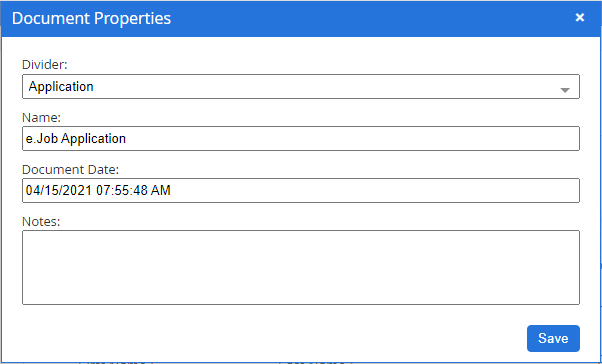
You can change the information related to a document such as the separator and divider the document belongs to, the name of the document, and notes.
-
In the Document Actions menu, click Change Document Information.
-
In the Document Properties dialog box, update document information as needed, then click Save.
You can group single page BMP, JPEG, PDF, PNG, and TIFF documents into a document group. Single page TXT files can also be grouped, but only with other TXT files. The multiple pages will display as a single document node in the File Tree.
Document Grouping must be enabled for your site in Main Options - General Settings.
-
Select the check box next to the documents you want to group.
-
In the Document Actions menu, click Group Documents.
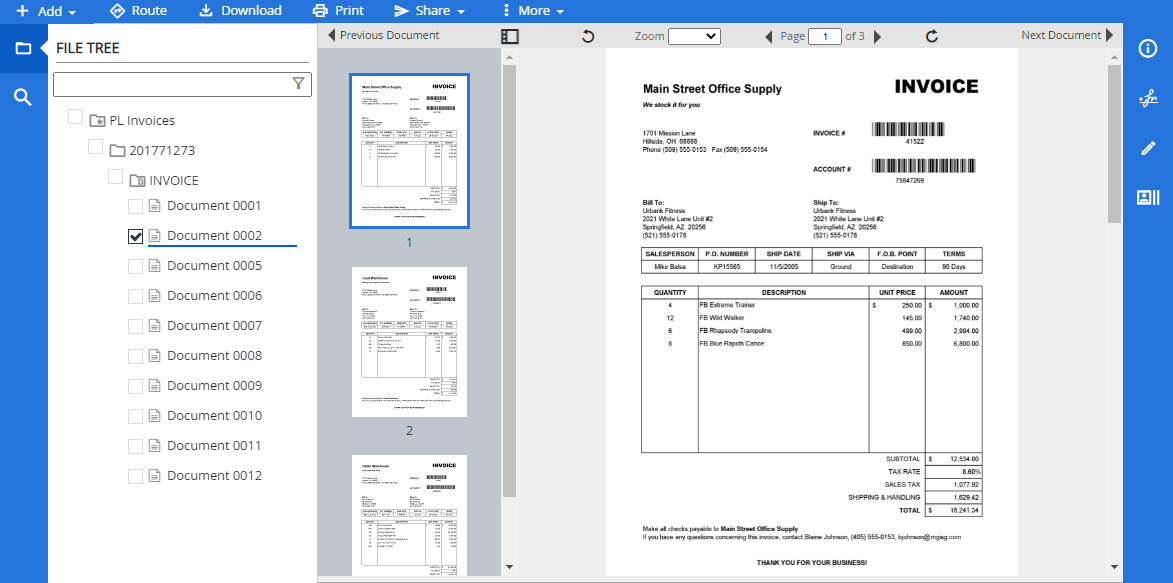
Document groupings are displayed a little differently in the Web Viewer. On the left is the thumbnail view, which displays thumbnails of each document within the grouping. The right side displays the selected document.
Once documents have been grouped in the Web Viewer, they can be ungrouped. The documents will appear as separate nodes in the File Tree again.
-
In the Document Actions menu, click Ungroup Documents.
You can replace a document displayed in the File Contents pane with another document that has the same file format. The name of the document remains unchanged.
-
In the Document Actions menu, click Replace Document.
-
In the Replace Document dialog box, click Browse to locate the document(s) you want to use to replace the selected document or move the document(s) to the upload area using a drag-and-drop operation.
-
Click Save.

Allows you to copy and paste documents from one divider to another separator or divider.
- In the Document Actions menu, click Copy Document.
To paste the document, right click the separator or divider that you want to place the document under, then select Paste Document as Copy or Paste Document as Link from the Divider Actions menu. See Separator Actions and Divider Actions for more information.
Tip: You can copy and paste documents between separators and dividers in different files if you are viewing multiple files in the viewer.
You can copy a link or URL to a document in the File Contents pane of the Web Viewer and paste the link to any editor. You can send the link or URL to other users. Other users can click the link or URL to open the document within FileBound. The users must have a valid user name and password to open FileBound and view the document.
- In the Document Actions menu, click Copy URL.
Loads the document in the Web Viewer again.
- In the Document Actions menu, click Reload Document.
-
In the Document Actions menu, click Delete Document.
-
Click Continue to confirm the deletion.
You can move documents from a file and paste it into a newly created file with the same name and the same set of dividers and separators available in the current file. The document is pasted within the same separator and divider in the new file, it was originally moved from.
- In the Document Actions menu, click Move to new File.
A file with the same name and set of separators and dividers is created. The document is moved to the new file.
Tip: You can select the check box next to the multiple documents before clicking Move to new File to move multiple documents to the new file.
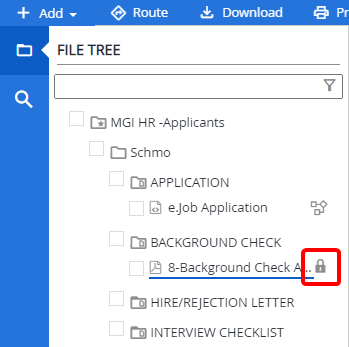
FileBound allows a user to lock or unlock a document from a viewer. A locked document can be updated only by the user who has locked it. A document can only be unlocked by a System Administrator, a Project Administrator, or the user who originally locked the document.
This option will only be available if an Administrator has enabled document locking rights for the project and you are assigned to a group with the File/Document Locking Rights right.
- In the Document Actions menu, click Lock Document or Unlock Document.
- Click Continue.
A padlock icon will appear next to locked documents.
Reports
You can view workflow and file activity reports quickly from the Web Viewer.
You can view reports if you are assigned to a group that has the Print and View All Reports group right.
The following reports are available:
- Document Activity: Displays the File Activity report. See Document Activity Report for more information.
- Workflow - Overdue: Displays the Workflow Status report for items with a status of Overdue. See Workflow Status Report for more information.
- Workflow - All: Displays the Workflow Status report. See Workflow Status Report for more information.
- Workflow - Current: Displays the Workflow Status report for items with a status of Current. See Workflow Status Report for more information.
- Workflow - Incomplete: Displays the Workflow Status report for items with a status of Incomplete. See Workflow Status Report for more information.
- Workflow - System Steps: Displays the Workflow Status report for items with a status of System Steps. See Workflow Status Report for more information.
Records Management
The Compliance Details dialog box allow you to view any record and its current status. You can change the status of a record, place it on hold, or remove it from hold. You can also view, assign, or change the destruction date of the record. The Compliance Details dialog box is available to all the FileBound users; however, some functionalities are specific to certain users.
- In the Document Actions menu, click Compliance Details.
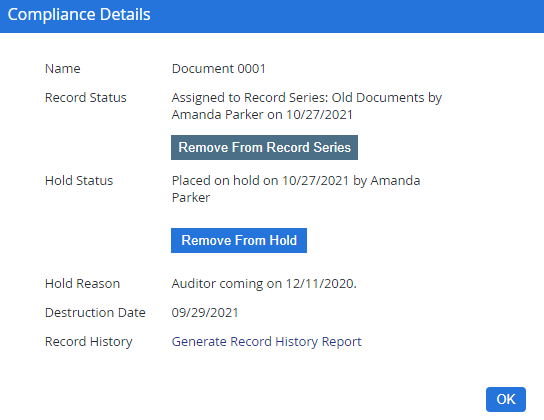
A Record Administrator or Record Manager can declare a document as a record and place it under a record series. When a document has been declared as a record, it cannot be deleted or modified.
This option will only be available when the Manual Declaration Settings option is set to 'Allow manual declaration of Records'. See Project Settings - Retention Tab for more information.
- In the Document Actions menu, click Declare Record(s).
-
Select a record series from the list, then click OK.

-
View confirmation message.
An icon will show next to the document in the File Tree indicating that is has been declared as a record.
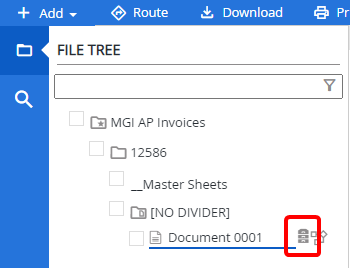
A Record Administrator or Record Manager can remove a record from a record series. You can un-declare a record at any time before destruction of the record from the database.
- In the Document Actions menu, click Un-Declare Record(s).
Placing a legal hold on a record halts its destruction process. A user with Record Administrator, Record Manager, or Legal Hold Manager rights can place a record on hold. Holds can only be applied to documents that have been declared as records. You can apply a hold on the record at any time before destruction of the record from the database.
- In the Document Actions menu, click Apply On Hold.
-
Enter a reason for the hold, then click Continue.
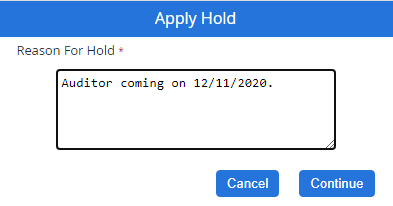
-
View confirmation message.
Note: Records can also be put on hold in the Compliance Details dialog box.
A user with Record Administrator, Record Manager, or Legal Hold Manager rights can remove a legal hold on a record. Any user with Legal Hold Manager rights can remove a legal hold done by another user. Removing a legal hold from a record will remove any protection against its destruction process. You can remove a hold on the record at any time before destruction of the record from the database.
- In the Document Actions menu, click Remove On Hold.
-
If a disposition has been set for the record series, select one of the following options to set the destruction schedule for the record:
- Use Current Schedule: Proceed with the current destruction schedule set for the record.
- Add Time to Current Schedule: Extend the current destruction schedule by the duration specified by you. You need to specify the day(s), month(s), and year(s) to be added to the current destruction schedule
- Set Specific Date: Set a particular date for the record destruction. You need to select a specific date from the calendar option to specify the destruction date.
- Click Continue.
Collaboration
Once a document has been shared externally from the Web Viewer, a Document Sharing option will be available in the Collaboration section of the Document Actions menu. Using this option, you can modify expiration dates, delete external URLs, and view expired external URLs.
- In the Document Actions menu, click Document Sharing.
-
Edit expiration dates for external URLs as needed, then click Save.

-
To delete an external URL, select the check box next to an external URL and click Delete or click Delete. Once deleted, the URL will be moved to the Expired External URLs section and will no longer be accessible externally.

- Click Cancel to exit the External Sharing Information dialog box.