This article covers the importing of a fiscal calendar.
- From the Icon Bar click Setup
 .
. - From the Navigation Menu click Financial to expand the corresponding menu.
- From the Financial menu items, click System.
- Upon the Financial System page displaying, click Financial Calendars.
- Upon the Calendars list page displaying, click the New button located on the far left of the table header.
- Enter the required information:
- The Name is a mandatory box, wherein you enter the name of the calendar, which must be unique.
- The ID is another optional identifier that can be designated to this specific calendar. Both boxes accept alphanumeric entries.
- Ensure the Type is set to Fiscal Calendar.
- Enter a description in the Description box.
Note:
- There is no validation behind the ID box.
- The Start Date box can never be blank as it automatically resets to the last entered date when the set date is deleted.
- Once you have clicked Save, to create the new calendar, the Type is set to read-only, therefore cannot be changed.
- If the Type has to be changed, you will have to delete the calendar and create a new one.
- The roll up will be generated from weeks >months >quarters >years for the next 100 years.
- Click Save to apply your changes.
- Click Import.
- On the Import Fiscal Calendar page, click Download Import Template.
- Save and open the Fiscal Calendar Excel Import Template, and then complete it as required.
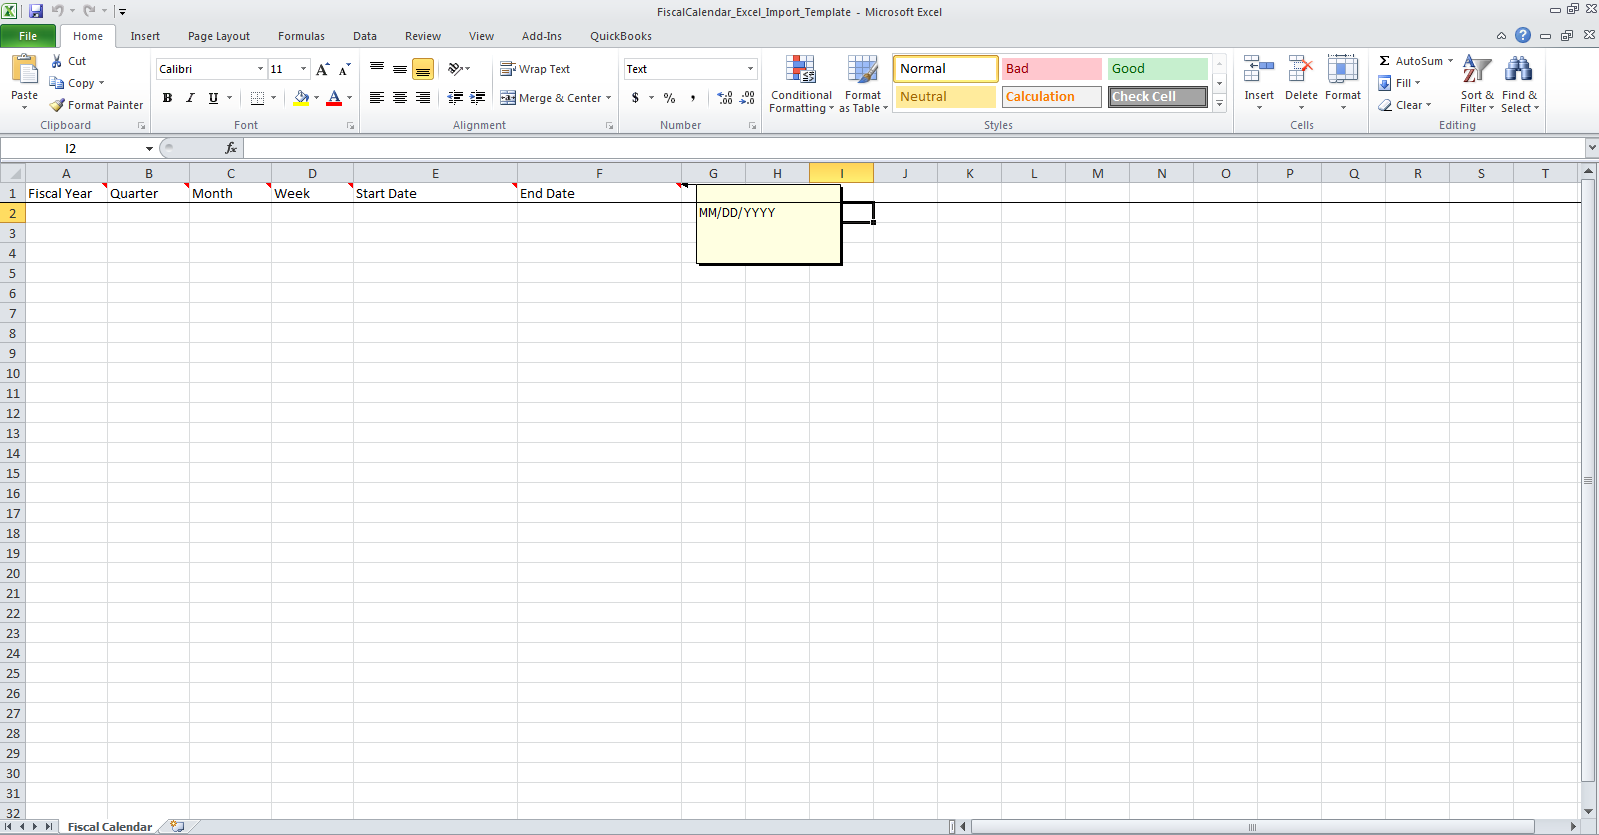
Note: Hovering over the first row of headings displays the required format in which the information must be entered.
-
Once completed you can upload the saved Excel file by: Click the File ellipsis, then in the Choose File to Upload dialog box follow the prompts and select your completed fiscal calendar excel file having used the Fiscal Calendar Excel Import Template.
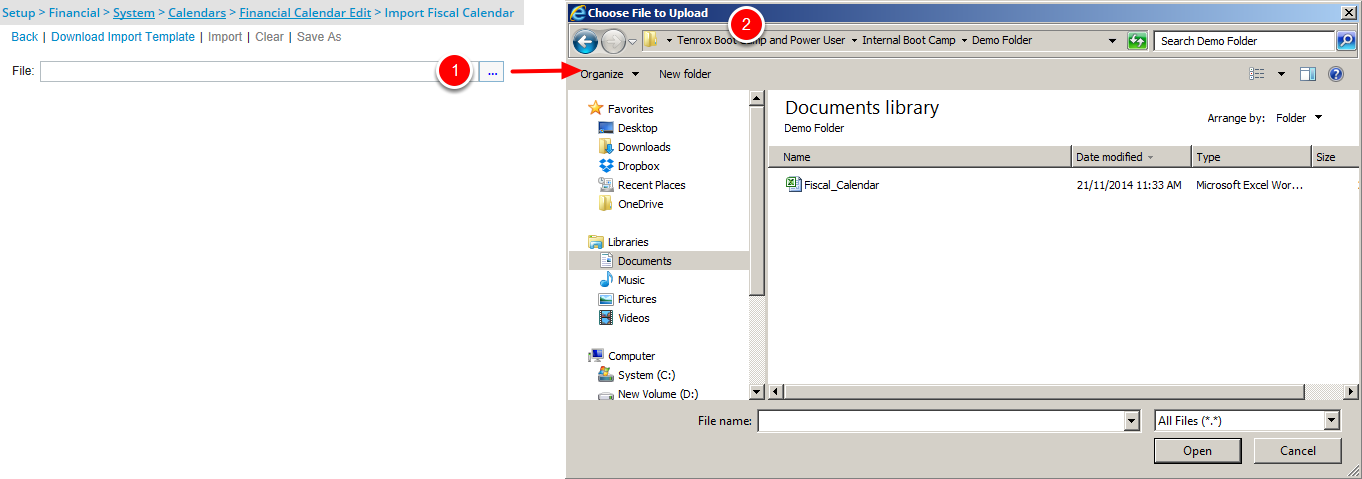
- Click Import.
- When the import process is completed, click Back to return to the previous page.
- The newly imported Fiscal Calendar will be displayed in the bottom grid.