You can easily add or update your skills and proficiency levels to keep your profile accurate and up to date by creating a User Skill Update Work Item entry.
When a User Skill Update Entry is in an Approved State, it can’t be modified. However, you can create a new Entry to update your existing Skills or Proficiency levels.
This article explains how to modify existing user Skills through a new User Skill Update Work Item Entry and provides step-by-step instructions to ensure your profile reflects your most current expertise.
- From the Icon Bar click Entries
 .
. - From the Navigation Menu click Work Item Manager.
- Click Create Work Item and choose User Skill Update Workflow from the list of available Work Items Workflows
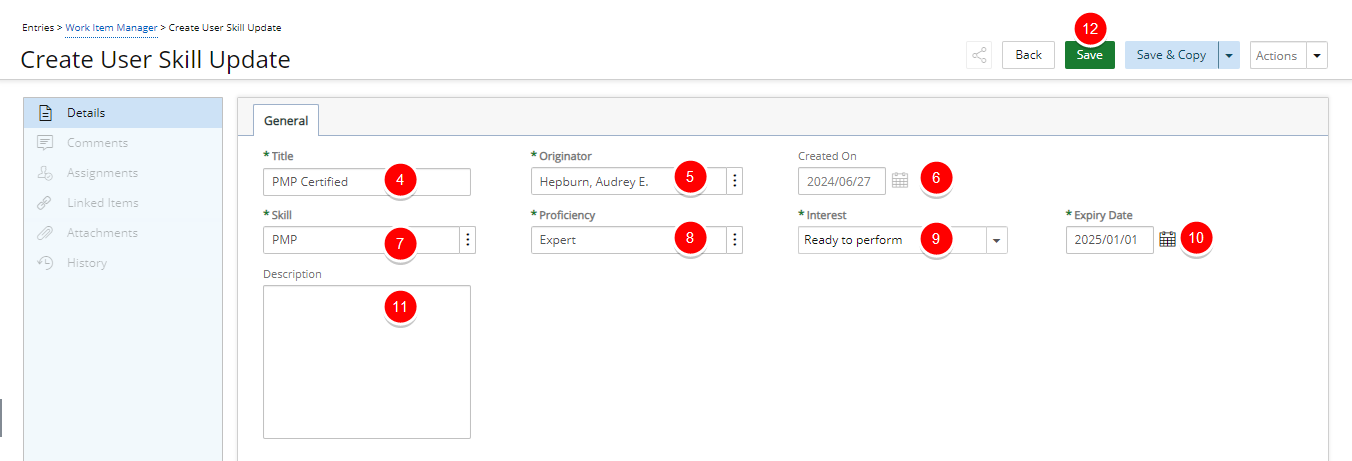
- Enter a short descriptive Title for your Entry.
- The Originator field defaults to creators' User Name.
Note: You can choose to create an Entry on behalf of another user provided you have the right to Can create Work Items on behalf of others permission (Setup > Organization > System > Security > Security Profile Edit > Entry > Work Item).
- The Created On field is read-only and defaults to current date.
- Enter a brief Description.
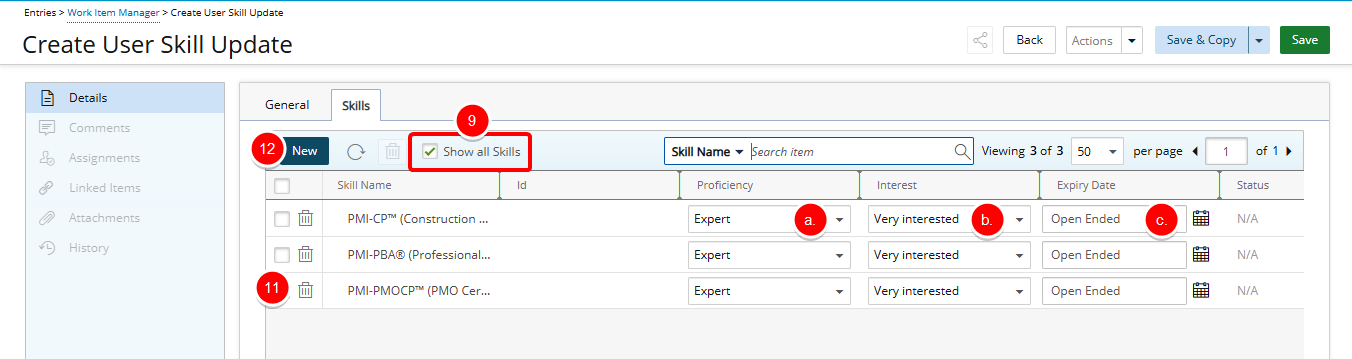
- Navigate to the Skills tab.
- Note that the Show all Skills checkbox is selected by default when creating a new User Skill Update Entry and your existing Skills will be listed in the table. You can modify them or add new Skills.
- For each skill you want to update, select the required Proficiency, Interest, or Expiry Date:
- Proficiency — Select the appropriate proficiency level from the Proficiency List page. Available options: Not applicable, Beginner, Basic, Intermediate, Informed, and Expert.
- Interest — Click Interest and select one of the following options: Not specified, Not interested, Ready to perform, Somewhat interested, Interested, Very interested, or Career goal.
- Expiry Date — If applicable, click the Calendar button to modify the expiry date.
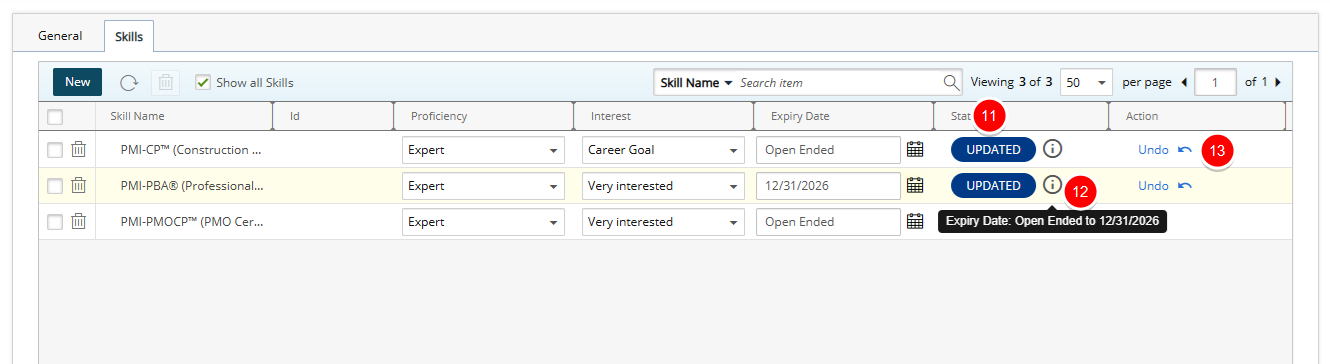
- After you modify a skill, the Updated Status indicator appears in the Status column.
- Hover over the Information icon to display a tooltip that shows the details of the changes you made.
- To revert any modifications, select Undo.
- To delete a Skill click the Delete
 button
 - To add new skills click New. Follow the steps 9 to 18 in Creating a User Skill Update Work Item Entry.
- Click Save.
Note: If a Skill has an expired End Date and a user attempts to update only its Interest or Proficiency levels, the system prevents the save and displays an error message: Skill details cannot be changed on expired Skill Associations without also changing the Expiry Date to a current or future date.
- Note that:
- The Comments, Assignments, Linked Items, Attachments and History tabs are now available to you.
- The State and Tracking# of the Entry are now visible in the header area.
- You can choose to Share it with colleagues. For further details refer to Sharing Pages.
- When finished click Actions and then choose Submit.
- Click Back to return to the corresponding Work Item Entry list page.
Submission and Approval Process
Upon saving and submitting the Entry, it will be assigned to your Approval Manager who will receive an automatic notification whenever you submit changes to your skills. The Approval Manager can either approve or reject these skill changes, ensuring they align with team objectives and resource requirements.
When the entry is approved, your skill will be updated accordingly. You can verify the updated or new skill by navigating to the Skills tab on your Settings page.