Creating a new Invoice
This article details how to create a new invoice from the Invoice Manager page.
Note: Before creating an invoice make sure:
- To set the invoice options for the Client being invoiced.
- That the Time, Expense, and Charge Entries, to be included in the invoice, are all approved.
- From the Icon Bar click Financial
 .
. - From the Navigation Menu click Invoice Manager.
Note: You must have the appropriate rights to access the Invoice Manager.
- Navigate to the Invoices tab
- Click the Create Invoicebutton.
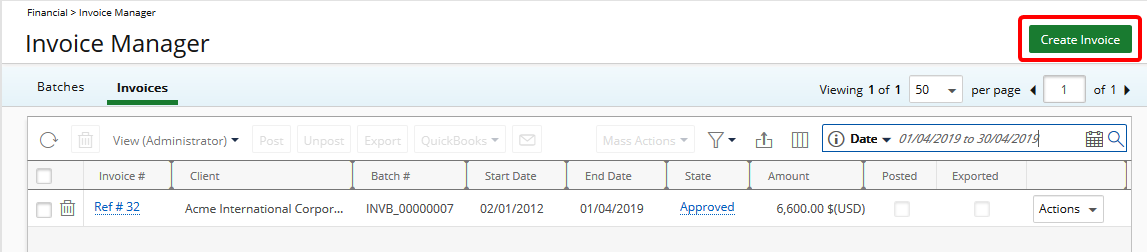
Note: The Invoice Number and Invoice reference number are read-only boxes, which are automatically populated once the Invoice is saved.
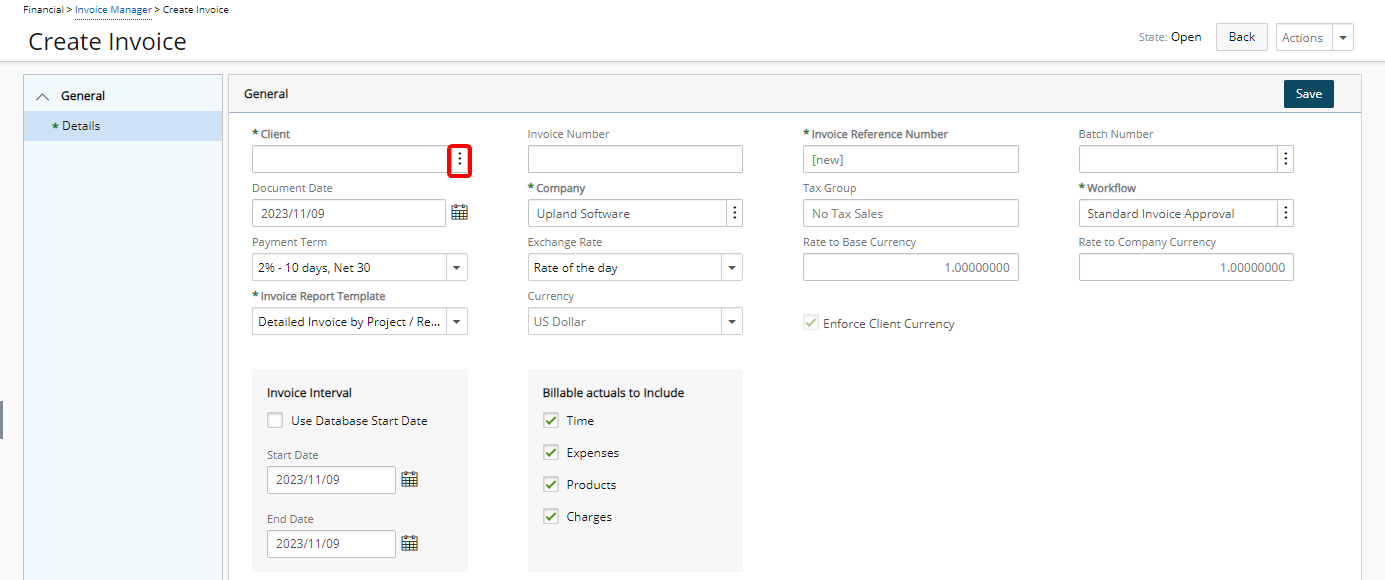
- On the Create Invoice page, click the Client ellipsis button to select the desired client.
Note: Suspended Clients are hidden by default on the Clients List page. To display them, simply check the Show Suspended Clients box. However, please note that suspended clients cannot be selected when creating an invoice.
- Edit, enter and/or select the desired invoice information in the respective boxes, if necessary:
- Batch Number: Click the Batch Number ellipsis button to include the invoice in an Invoice Batch. The Multi Client Invoice Manager dialog box will be displayed from where you can search and choose a Batch. For further details refer to Accessing and Viewing the Multi Client Invoice Manager dialog box.
- Document Date: Click the Calendar icon beside the Document Date and select the date when the document was created. By default, the Document date defaults to the current date.
Note: The read-only Document Date field in the Information section of the Summary tab on the Invoice Edit page pulls it’s value from this Document Date box.
- If required, click the Company ellipsis button to select the desired Company.
- View the read only Tax Group information.
- Workflow: workflow used to track the invoices of an organization; to change the invoice workflow, click the browse button (...) to open the Invoice Workflow List page and then select another invoice workflow for generating the invoices
- Payment term determines when a client pays for the services. You have the following choices:
- 2%—10 days, Net 30: two percent (2%) is deducted if the invoice is paid within 10 days; the full payment is due within 30 days
- 90 days Multiple Payments: Multiple payments totaling the net amount must be made in 90 days.
- COD Terms: The payment must be made in cash on delivery of products.
- Due by Invoice Date: The net payment is due on the invoice date.
- Net 30 days: The net payment must be made in 30 days.
- Exchange rate determines the calculations performed on the invoice, which is chosen from the drop-down list that contains the following options:
- Rate of the day: The current day’s rate.
- Invoice start date: The rate on the Start Date of the Invoice.
- Invoice end date: The rate on the End Date of the Invoice.
- Entry date rate: The rate on the day the entry is made.
- User defined: The User enters the rate.
Note: The Currency Exchange is determined and updated from the URL specified in the URL field on the System page accessed by clicking Setup>Financial.
- View the read only Rate to Base Currency information.
- View the read only Rate to Company Currency information.
- Invoice Report Template: invoice report template used at the global level, options include Detailed Invoice by Project/Resource, Detailed Invoice by Project/Task, Detailed Invoice by Resource and Detailed Invoice by Project/Task with Notes.
- View the read only Currency.
- Choose the Enforce Client Currency selection box if required:
- The Invoice Interval choose either to:
- Use Database Start Date
- Or select the Start Date/End Date by clicking the respective Calendar button to select the Start/End Dates
- Billable actuals to Include: Select the selection boxes against the type of Billable actuals you wish to include in your Invoice. The available options are:
- Time
- Expenses
- Products
- Charges
- Click Save. Note that the page will refresh and show all the other invoice elements that can now be completed.
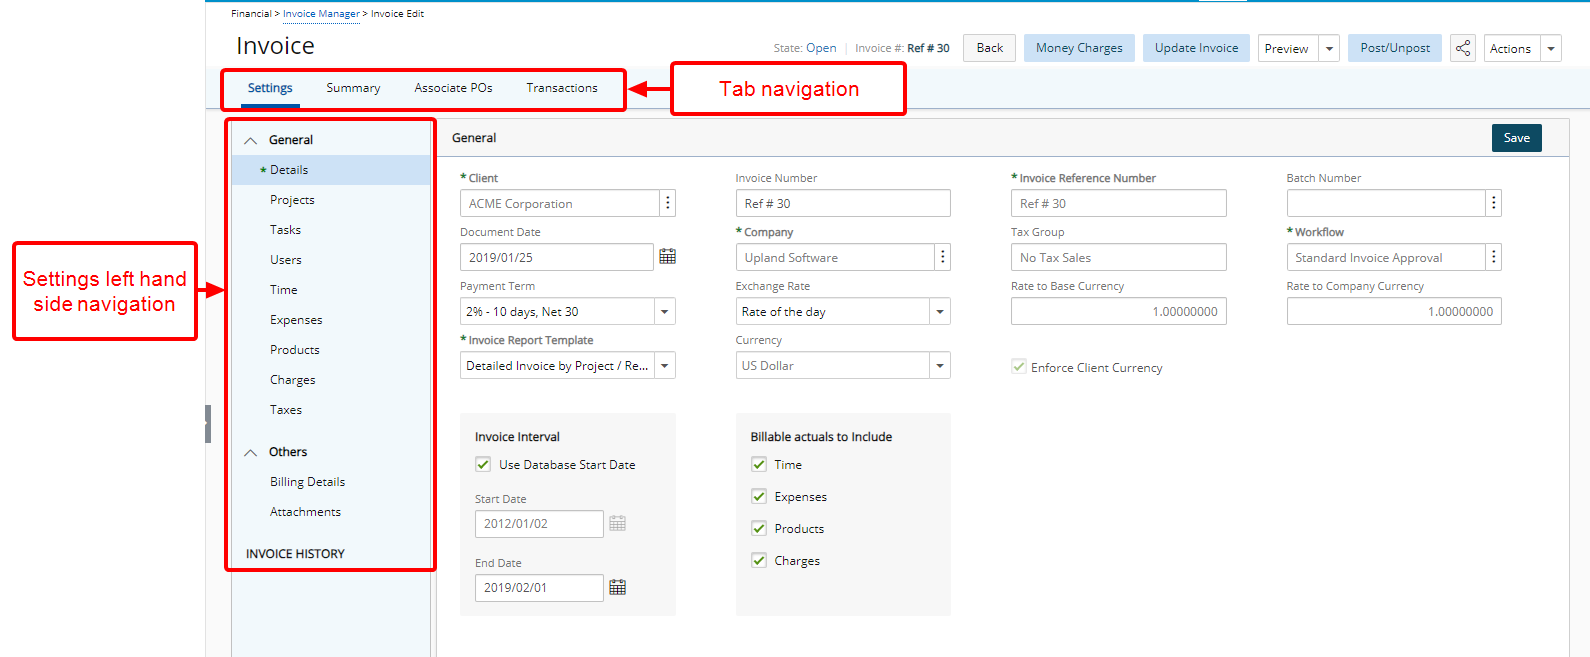
- From the tab navigation you can access:
- Setting tab
- Summary tab
- Associate POs tab
- Transactions tab
- Payments tab
- The Settings left hand side navigation is broken down into three major sections; General, Others and Invoice History each of which are further broken down into components:
- Under General, you can find the Details, Currencies, Projects, Tasks, Users, Time, Expenses, Products, Charges and Taxes.
- Under Others, you can find the Billing Details and Attachments.
- From Invoice History, you can view a list modifications made upon Posting and Unposting an Invoice. For further details refer to Viewing the Invoice History.
- From the tab navigation you can access:
- From the Settings left hand side navigation, click Currencies. If required modify the Currency
Note: The Currencies menu item is available when the Client Currency is different from System Currency and the Exchange Rate is set to User-defined.
- Click Projects.
- Note that by default Invoice all Projects is selected.
- If required, clear the selection and then remove any Projects that are not be included in your invoice.
- Click Tasks.
- Note that by default Invoice all Tasks is selected.
- If required, clear the selection and then remove any Tasks that are not be included in your invoice.
- Click Users.
- Note that by default Invoice all Users for selected Projects is selected.
- If required, clear the selection and then remove any Users that are not be included in your invoice.
- Click Time.
- Review the listed Time Entries made by the users previously chosen for work done on the selected projects.
- The Total Included Hours (Total hours + adjustments of the selected users) is visible within the Time tab. Providing you with an overview of the combined hours worked by all selected Users across the chosen Projects.
- Note that Invoice all Time for selected Projects is unchecked by default.
- Click Expenses.
- Review the listed Expense Entries incurred by the selected Users who have declared expenses on the selected Project(s).
- Note that Invoice all Expenses for selected Projects is unchecked by default.
Note: When Project Currency is enforced on Invoices, two Net Amount columns are displayed showing the Client Currency and the Project Currency.
- Click Products.
- Review the listed Product Entries incurred by the selected Users who have declared Products on the selected Project(s).
- Note that Invoice all Products for selected Projects is unchecked by default.
Note: When Project Currency is enforced on Invoices, two Net Amount columns are displayed showing the Client Currency and the Project Currency.
- Click Charges.
- Review the listed Charge Entries incurred by the selected Users who have declared Charges on the selected Project(s)
- Note that Invoice all Charges for selected Projects is unchecked by default.
- Click Taxes to review the listed tax(es), with their respective information
- Click Billing Details.
- Based on the number of projects selected to be invoiced, you either review the pre-filled, or enter the, client billing address.
- When you select one project, by default the Use Project Contact option is selected, and the client contact configured at the project level for invoicing is used. Review all the respective boxes that are pre-populated with the information for the selected contact, and note the To the attention of box is set in read-only format.
Note: To prevent an empty contact information field when no Project Contact is selected, the contact details on invoices will default to displaying the client contact (To the attention of) upon generation.
- When you select more than one project, the Use Project Contact option is not selected and is unavailable to change. The Billing Address boxes are empty, with the exception of the Organization name. Enter the contact and the billing address information.
Note:
- If you had initially selected two projects, and then you clear a project, you must first save this change before the Use Project Contact option becomes available to select.
- Conversely, if you had initially selected one project, and then you select another project and save this change, the Use Project Contact option becomes unavailable to select.
- Click Notes. Enter the desired notes in the respective boxes, to appear on the invoice.
Note: Maximum of 4000 characters with spaces can be entered.
- Click Attachments from where you can attach Notes as well as Documents & Links.
- When finished, click Save.