Project Managers can associate their project(s) with an existing Template or customize the settings at their project level by choosing Override Template. Templates that are thus overridden are only available at the Project level.
This article details how to override the Financial Planner Template at Project level.
Note: The Override Template link is available to users with the Financial Planner Setting Modify permission (Setup > Organization > System > Security > Security Profile > Setup > Work).
. This access right grants users permission to:
- Select a different Template for the Financial Planner.
- Override the Financial Planner Template at the Project level.
- From the Icon Bar select Project List
 .
. - From the Project List page, select the Project you wish to edit by following one of these steps:
- Click the Project context menu button
 to expand it. From the available options click Edit.
OR - Click the name of the Project you wish to access.
Tip: Use the search capability for an efficient way of finding the specific project. For further details refer to Searching for a Project within the Project List page.
- Click the Project context menu button
- From the Project Edit page, hover your mouse over the Planners tab and select Financial Planner from the available options.
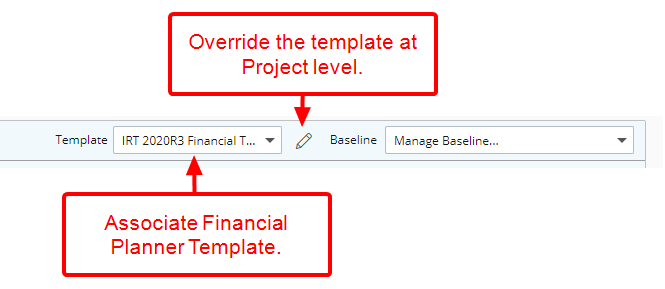
- Click Override Template.
- Enter a name for the overridden Template.
- Click Save.

Note: The overridden template will only be available for this project.
- Note that the Forecastingand View Settings tabs are now available to you where you can further set up your Financial Planner overridden Template.

The steps to configure an overridden Financial Planner Template are the same as the ones for creating a Template and further details can be found here:- Financial Planner Template - General tab
- Financial Planner Template - Forecasting tab
- Financial Planner Template - View Settings tab
Note: The Associations tab is unavailable for an overridden Financial Planner Template.