Edit a View
After you create a view, you can edit its Basic Information, Change the View Name, Add, Remove or Edit Fields within the Schema as well as apply SQL Filters.
Note: Each user's profile is uniquely configured and permissioned. Your view and options may differ slightly depending on the permissions granted.
Warning: You must have a clear understanding of the database schema to be able to manage Upland Analytics Sources and Views. Database schemas are blueprints of how the data is organized in the database. Upland Analytics allows for great flexibility in managing the Sources and Views but it is only recommended for users with knowledge and understanding of the Database schemas and its administration.
1. Access Upland Analytics Views

Access the Upland Analytics Views:
- Click the Analytics Settings button from the Main Menu Bar.
- Then select Views from the menu.
2. Click Edit
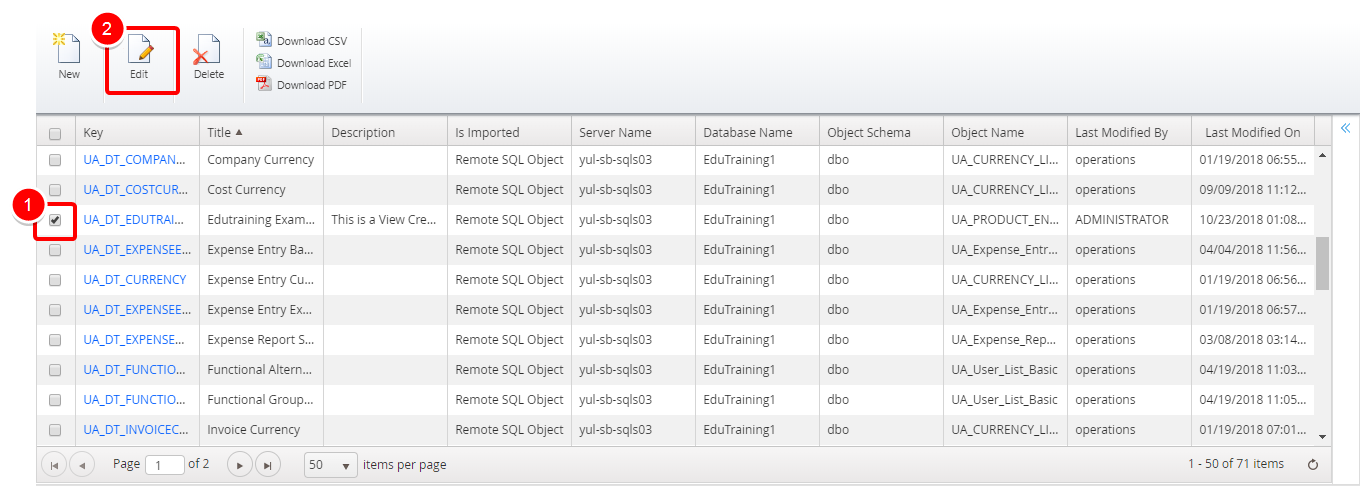
- Select the View you wish to edit.
- Click Edit.
3. Edit as Necessary
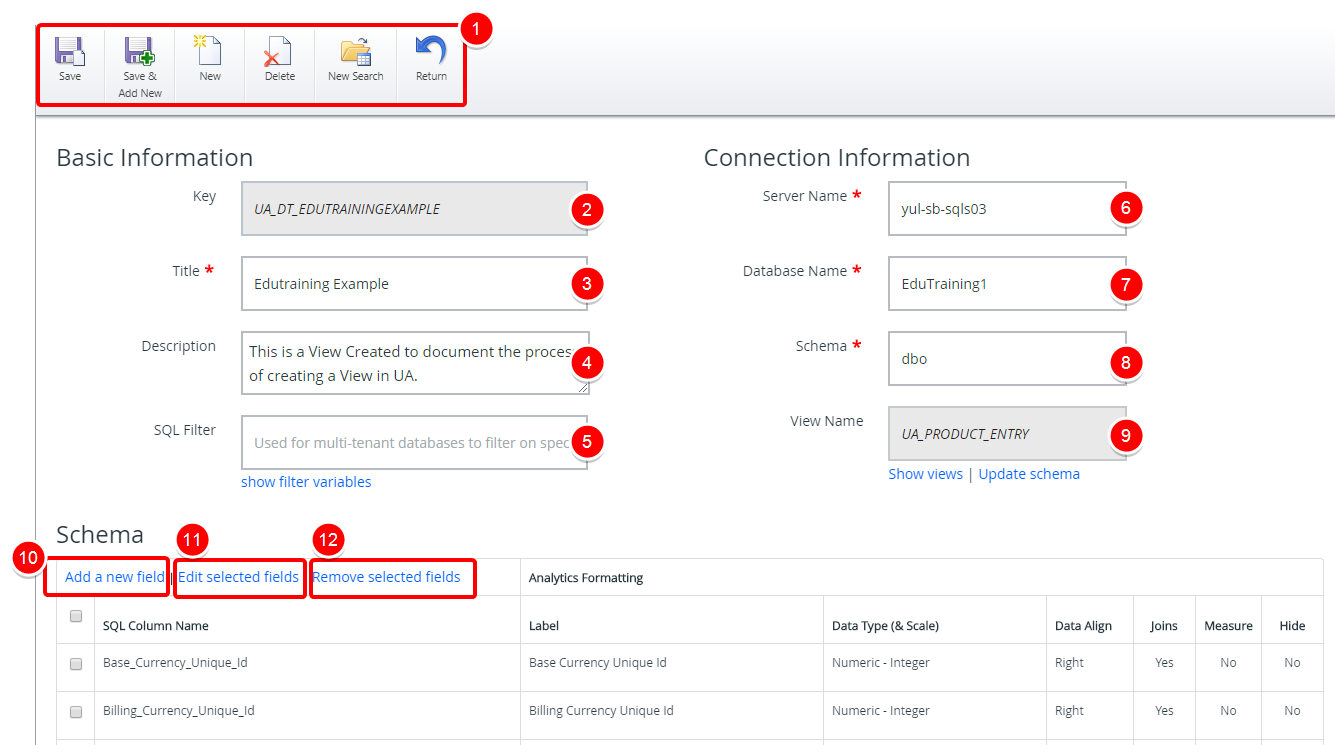
- Quickly access common actions such as
- Save: Click Save, to apply your changes.
- Save & Add New: Click Save & Add New, to apply your changes and then create a new View.
- New: Click New to create a new View.
- Delete: Click Delete, to remove current View.
- New Search: Click New Search, to return to the previous page and search for another view.
- Return: Click Return, to discard any changes and return to the previous page.
- Key: The Key is generated automatically.
- Title: This is the name of the View, which is a required entry. Click the Title box to edit.
- Description: This field allows entering a description for the View. Click the Description box to edit.
- SQL Filter: Click Show Filter Variables to view a list of all available filter variables. You can then define variables and their respective values that can be used to apply a filter on the current data view. Useful for multi-tenant databases to filter the views data by client.
- Server Name: This is the database server name where the database resides. It is a required entry. Click the Server Name box to edit.
- Database Name: This is the database name, which is a required entry. Click the Database Name box to edit.
- Schema: This is the database schema, which is a required entry. Click the Schema box to edit.
- View Name: This is the name of the View.
- Show Views: Click to see a list of all available Views.
- Update schema: Click to refresh the schema with your recent changes.
- Add a new field: Click to add a new field.

- Edit selected fields: Click to enable inline editing for the selected fields.
- Remove selected fields: Click to delete selected fields.
Note: The Title, Server Name, Database Name and Schema are mandatory fields. These fields are the same across all Views within the same site. Therefore, it's recommended to take note of the Server Name, Database Name and the Object Schema.
4. Click Save
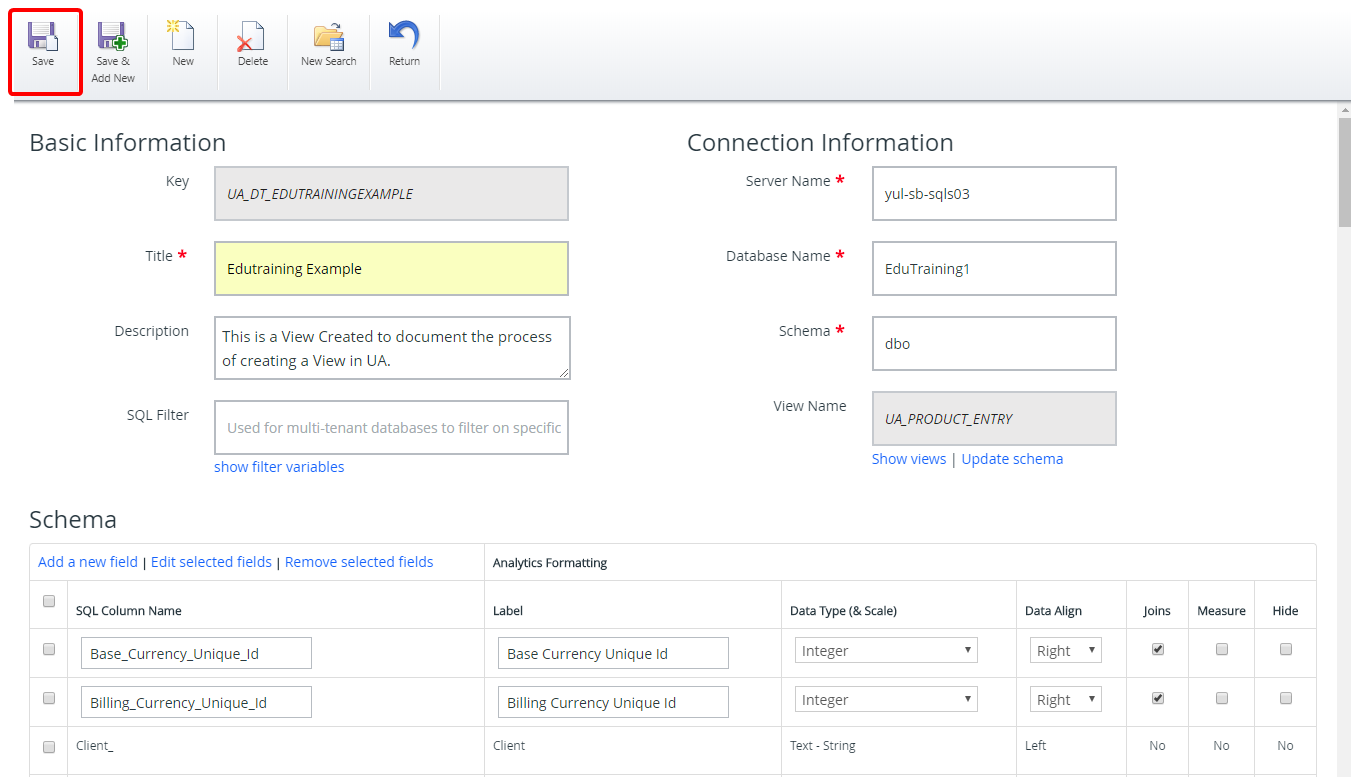
- Click Save, to apply your changes.
- or click Save & Add New, to apply your changes and then create a new View.
Note: In order for users to be able to use a View, it must first be added to the Available Views in a Data Source. For more information on how to add a View to the Data Source visit: Add a New View to a Data Source
Menu