Add and Manage Expenditures
Eclipse PPM users can add and edit their Project's Expenditures through the Financial Plan.
Simply put, an Expenditure is a purchase of a product, good, or service. Expenditures result in costs being deducted from the Financial Plan's Budget. Eclipse PPM Financial Plans allow users to enter two basic types of Expenditures: Committed and Actual.
-
Committed Expenditures: Any costs that are expected to be paid out on behalf of the Project, including to employees, vendors, subcontractors, etc. However, these costs have not yet been paid.
-
Actual Expenditures: Any costs that have been paid in the form of an invoice, bill, etc.
This page covers the following topics about Expenditures:
Note: Eclipse PPM users will require certain Financial-related permissions before making changes to Financial Plans. Have a look at the "Before You Start" messages before each procedure to ensure that you are able to carry it out. If you do not have the required permissions, speak to an Eclipse PPM administrator.
Adding Expenditure Items
Eclipse PPM users can add Committed or Actual Expenditures to their Financial Plans while editing them.
Before You Start: Eclipse PPM users will require the "Modify" Expenditure permission from a Project Policy before adding Expenditures to the Financial Plan.
Also, "Expenditures" will need to be enabled under the Financial Settings of the Project's Configuration page: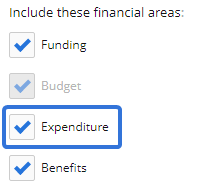
To add Expenditure Items to a Financial Plan:
-
Navigate to a Project.
-
Open the Project Menu in the top right-hand corner of the screen:

-
Select Financial Plan from the "Views" section:

-
Select which Financial Plan you would like to edit:
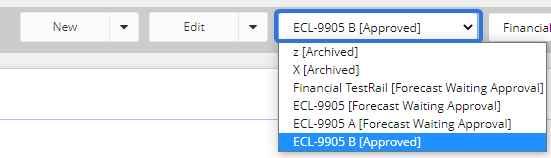
Tip: Be sure to take the Financial Plan Type into account when choosing a Financial Plan. This is indicated by the bracketed term in the plan title ("[Approved]" in the selected example above). If you are unsure about the Financial Plan Types and what they mean, speak to an Eclipse PPM administrator.
-
Select the Edit button:

-
Select the drop-down arrow next to either "Committed" or "Actual" under the "Expenditures" section:

OR
Select the Add Committed or the Add Actual button in the top right-hand corner:

Tip: If you are unsure whether you new Expenditure Item should fall under "Committed" or "Actual", see the definitions of both at the top of the page.
Note: If the "Expenditures" section cannot be seen on the Financial Plan, it has probably not been enabled on the Project. It will need to be enabled under the Financial Settings of the Project's Configuration page:
-
Select Add from the drop-down menu:

-
(Optional) Enter an "Expenditure #" for your new Expenditure:
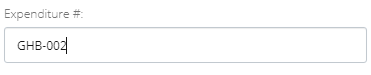
Tip: Some organizations use Expenditure Numbers to keep track of all their Expenditures.
-
Enter a "Document #" for your new Expenditure:

Tip: Many organizations use the "Document #" as a way to track invoices. On Eclipse PPM Financial Plans, they are used to organize Expenditure Items. If you are unsure, speak to a financial representative to find out how your organization should best make use of the "Document #" field.
-
Select the "Expenditure Date" fields to select the date the expenditure was ordered/paid:

-
Select an "Expenditure Type" from the drop-down menu:

Note: Eclipse PPM administrators have the ability to add and manage Expenditure Types through Committed Expenditure Document Types and Actual Expenditure Document Types.
Tip: Hover your cursor over the blue clipboard icons to view a description of the Expenditure Type:

-
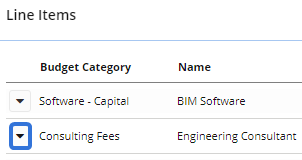
Click directly under the "Budget Category" column header to open the drop-down menu and select a Budget Category for the Expenditure item:
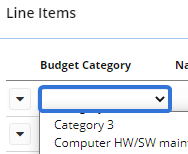
Note: The drop-down menu will not appear until you click in the empty space under "Budget Category".
Note: Eclipse PPM administrators have the ability to add and manage Budget Categories.
-
Click directly under the "Name" column header to enter a name for the Expenditure item:
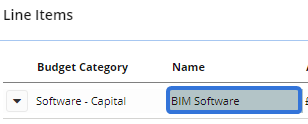
Note: The field will not appear until you click in the empty space under "Name".
-
Click directly in the "Amount" field to enter the cost of the Expenditure Item:

Note: Eclipse PPM administrators can determine which currency is displayed by using the Currency Settings page.
-
(Optional) Select the pencil button
 under "Link Budget Items" to link a Budget Item to the Expenditure Item:
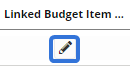
Note: Linking an Expenditure Item to a Budget Item will indicate where the money for the Expenditure is coming from. After selecting the button, you will be prompted to select a Budget Item on the plan of the same Budget Category:
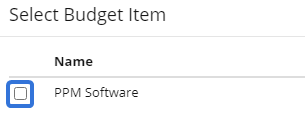
In this example, "PPM Software" is a Budget Item that has been entered under the "Software - Capital" Budget Category, which is the same as this Expenditure Item: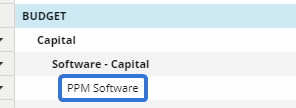
Note: "Link Budget Items" will only be available if Budget Details has been set to "Category and Item" under the Financial Settings of the Project's Configuration page:

-
Repeat steps 12-15 to add any additional Expenditure Items at the same time.
Note: Eclipse PPM administrators have the ability to add more available rows for additional Expenditure Items through the Financial Settings page.
-
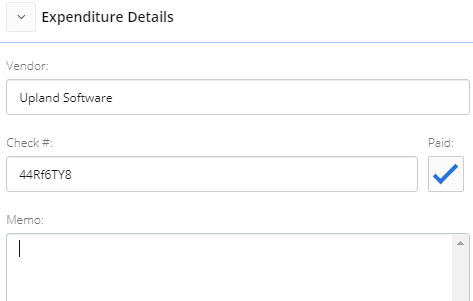
(Optional) Enter any additional details under "Expenditure Details":
-
Vendor: Enter the name of the enterprise/organization that provided the good or service.
-
Check #: Enter in a number that identifies the check that was sent to the vendor (if applicable).
-
Paid: Select the checkbox if the Expenditure Item(s) has/have been paid for.
Tip: Keep in mind that Committed Expenditures commonly have not been paid for yet while Actual Expenditures commonly have been.
-
Memo: Enter any additional information that should be noted about the Expenditure Item(s).
-
-
Select the Add button:

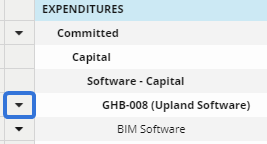
After selecting Add, your new Expenditure Item(s) will appear in the Financial Plan. It will appear under either "Committed" or "Actual" (based on which type of Expenditure it is) as well as its Document Number/Vendor, Budget Category, and Category Type:

Editing Expenditure Items
Expenditure Items can be edited at any time after creation. Users can edit any of the details that were inputted when the Expenditure Items were created.
When users edit an Expenditure Item, a window appears that enables them to edit the entire Expenditure Document. In this window, they can edit any of the Expenditure Items on the document as well as any document details. Also, they can add more Expenditure Items to the same document.
Before You Start: Eclipse PPM users will require the "Modify" Expenditure permission from a Project Policy before editing any Expenditures on the Financial Plan.
Also, "Expenditures" will need to be enabled under the Financial Settings of the Project's Configuration page:
To edit Expenditure Items:
-
Navigate to a Project.
-
Open the Project Menu in the top right-hand corner of the screen:
-
Select Financial Plan from the "Views" section:
-
Select which Financial Plan you would like to edit:
Tip: Be sure to take the Financial Plan Type into account when choosing a Financial Plan. This is indicated by the bracketed term in the plan title ("[Approved]" in the selected example above). If you are unsure about the Financial Plan Types and what they mean, speak to an Eclipse PPM administrator.
-
Select the Edit button:
-
Select the drop-down menu next to an Expenditure Item or the document it belongs to:

Note: Selecting Edit from either of these will open the same window.
-
Select Edit:

-
Edit any of the document details in the "Edit Expenditures" window:

-
Expenditure #: Enter a tracking number for the Expenditure.
Tip: Some organizations use Expenditure Numbers to keep track of all their Expenditures.
-
Document #: Enter the Document # for the Expenditure Document. This field is required and must contain a value.
Tip: Many organizations use the "Document #" as a way to track invoices. In Eclipse PPM Financial Plans, they are used to organize Expenditure Items. If you are unsure, speak to a financial representative to find out how your organization should best make use of the "Document #" field.
-
Expenditure Date: Select the date the listed Expenditures were ordered/paid.
-
Expenditure Type: Select an Expenditure Type from the drop-down menu.
Note: Eclipse PPM administrators have the ability to add and manage Expenditure Types through Committed Expenditure Document Types and Actual Expenditure Document Types.
Tip: Hover your cursor over the blue clipboard icons to view a description of the Expenditure Type:
-
-
Edit any of the document's Expenditure Items using the Line Items table:
Tip: From here, users can also delete Expenditure Items from the document using the drop-down menu(s):
Alternatively, they can add more Expenditure Items by filling in the following values on an empty line item.Note: Eclipse PPM administrators have the ability to add more available rows for additional Expenditure Items through the Financial Settings page.
-
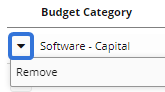
Budget Category: Select the "Budget Category" value of any listed item to change it:
Note: The Budget Category cannot be changed if the Expenditure Item has a Linked Budget Item. The Linked Budget Item will have to be removed first. See the "Linked Budget Item" bullet point below for more information.
-
Name: Select the "Name" value to change an Expenditure Item's name:
-
Amount: Select the "Amount" field to change the Expenditure Item's cost:
-
Linked Budget Item: Select the pencil icon
next to any Expenditure Item's Linked Budget Item to change it to a new one OR select the Delete button  to remove it:
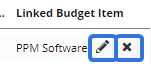
Note: Linking an Expenditure Item to a Budget Item will indicate where the money for the Expenditure is coming from. After selecting the button, you will be prompted to select a Budget Item on the plan of the same Budget Category:
In this example, "PPM Software" is a Budget Item that has been entered under the "Software - Capital" Budget Category, which is the same as this Expenditure Item:Note: "Link Budget Items" will only be available if Budget Details has been set to "Category and Item" under the Financial Settings of the Project's Configuration page:
-
-
Edit any additional details under "Expenditure Details":
Note: All of these fields are optional.
- Vendor: Enter the name of the enterprise/organization that provided the good or service.
-
Check #: Enter in a number that identifies the check that was sent to the vendor (if applicable).
-
Paid: Select the checkbox if the Expenditure Item(s) has/have been paid for.
Tip: Keep in mind that Committed Expenditures commonly have not been paid for yet while Actual Expenditures commonly have been.
-
Memo: Enter any additional information that should be noted about the Expenditure Item(s).
-
Select the Apply button:

After selecting Apply, your changes will be saved to the Expenditure Document.
Deleting Expenditure Items
If an entry error occurs, Expenditures can be removed from the Financial Plan at any time. Users can either remove an entire Expenditure Document or remove Expenditure Items from documents.
Before You Start: Eclipse PPM users will require the "Modify" Expenditure permission from a Project Policy before deleting any Expenditures on the Financial Plan.
To remove an entire Expenditure Document:
Caution: Deleting Expenditure Documents will delete them from ALL Financial Plans on the Project, not just the current one. This method should only be used to remove Expenditure Documents that should be totally eradicated from the Project.
-
Navigate to a Project.
-
Open the Project Menu in the top right-hand corner of the screen:
-
Select Financial Plan from the "Views" section:
-
Select a Financial Plan:
Tip: Be sure to take the Financial Plan Type into account when choosing a Financial Plan. This is indicated by the bracketed term in the plan title ("[Approved]" in the selected example above). If you are unsure about the Financial Plan Types and what they mean, speak to an Eclipse PPM administrator.
-
Select the Edit button:
-
Select the drop-down menu of the Expenditure Document you would like to delete:
Tip: Expenditure Document rows are the first bolded-font row directly above the Expenditure Items (which are listed in non-bold font).
-
Select Delete:

-
Select Yes from the window that appears to confirm the deletion:

After selecting Yes, the Expenditure Document will be deleted. It will be removed from every Financial Plan on the Project, not just the current plan.
To remove individual Expenditure Items:
-
Navigate to a Project.
-
Open the Project Menu in the top right-hand corner of the screen:
-
Select Financial Plan from the "Views" section:
-
Select which Financial Plan you would like to edit:
Tip: Be sure to take the Financial Plan Type into account when choosing a Financial Plan. This is indicated by the bracketed term in the plan title ("[Approved]" in the selected example above). If you are unsure about the Financial Plan Types and what they mean, speak to an Eclipse PPM administrator.
-
Select the Edit button:
-
Select the drop-down menu next to an Expenditure Item or the document it belongs to:
Note: Selecting Edit from either of these will open the same window.
-
Select Edit:
-
Select the drop-down menu next to the Expenditure Item you would like to delete:
-
Select Remove:

-
Repeat steps 8-9 for any other Expenditure Items you would like to delete from the document.
-
Select the Apply button:
After selecting Apply, the Expenditure Item will be deleted from the Financial Plan.
Reconciling Expenditures
In finance, reconciliation refers to the process of matching actual expenses with accounting entries. It is used to ensure that business expenses match what was recorded in the internal accounts. On Eclipse PPM Financial Plans, this is done by matching Actual Expenditures (costs that have been paid for) with their Committed Expenditure (costs that are expected to be paid in the future) counterparts.
Example: Jorge is in charge of purchasing software for his organization. He has decided to purchase "BIM Imagine", which will cost the organization £3,500.00. He orders the annual license from the vendor, but the bill is not issued right away. Therefore, he creates a Committed Expenditure for "BIM Imagine":
A few days later, the bill finally arrives and is paid by the organization immediately. He now needs to reconcile the "BIM Imagine" Committed Expenditure as an Actual Expenditure.
There are a few ways that Eclipse PPM users can reconcile their Committed Expenditures on Financial Plans:
-
Reconcile Against New: This should be used if an Actual Expenditure Item does not exist for the Committed Expenditure Item that needs to be reconciled. This process will create a new Actual Expenditure Item while reconciling the Committed Expenditure Item against it at the same time.
-
Reconcile Entire Document Against New Document: This should be used when multiple Committed Expenditure Items from a single Expenditure Document should be reconciled against Actual Expenditures that do not exist yet. This process will create a new Actual Expenditure Document that will include any necessary reconciliations to the existing Committed Expenditure Items.
-
Reconcile Against Existing: This should be used if an Actual Expenditure Item already exists for the Committed Expenditure Item that needs to be reconciled. This process will link the Committed Expenditure to its Actual Expenditure counterpart.
Before You Start: Eclipse PPM users will require the "Modify" Expenditure permission from a Project Policy before reconciling any Expenditures on the Financial Plan.
To reconcile a Committed Expenditure against a new Actual Expenditure:
-
Navigate to a Project.
-
Open the Project Menu in the top right-hand corner of the screen:
-
Select Financial Plan from the "Views" section:
-
Select which Financial Plan you would like to edit:
Tip: Be sure to take the Financial Plan Type into account when choosing a Financial Plan. This is indicated by the bracketed term in the plan title ("[Approved]" in the selected example above). If you are unsure about the Financial Plan Types and what they mean, speak to an Eclipse PPM administrator.
-
Select the Edit button:
-
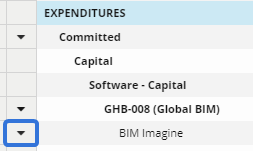
Select the drop-down menu of the Committed Expenditure Item that you would like to reconcile:
-
Select Reconcile Against New:

Note: This will begin the process of creating a new Actual Expenditure.
Tip: Selecting Reconcile Committed from the drop-down menu and selecting a Committed Expenditure Item will also open up the same window:

-
(Optional) Edit any of the document details in the "Edit Expenditures" window:
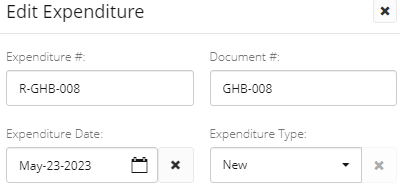
Note: All of the details pictured above except for "Expenditure Type" will be the same as the original Committed Expenditure. Also, there will be an "R-" placed in front of the existing Expenditure Number, which can be removed if desired.
Tip: See Editing Expenditure Items for more information.
-
Edit the "Amount" value of the existing Committed Expenditure Item that is being reconciled:

Example: If the Committed amount is £3,500.00 but only £3,000.00 has been paid, enter "3000":

Click thumbnail to play.Note: This should only be done if the actual amount is different than the committed amount.
-
(Optional) Edit any of the new Expenditure's Line Items.
Tip: See Editing Expenditure Items for more information.
Tip: Users can add new items to the Actual Expenditure during the reconciliation process. However, only the original line item will be reconciled. Any new line items will exist as standalone Actual Expenditure Items.
If the original item is deleted by selecting Remove from its drop-down menu, the process will no longer be a reconciliation process. Instead, it will simply add a new standalone Actual Expenditure.Note: Eclipse PPM administrators have the ability to add more available rows for additional Expenditure Items through the Financial Settings page.
-
(Optional) Edit any of the "Expenditure Details" for the new Actual Expenditure.
Tip: See Editing Expenditure Items for more information.
Tip: In particular, you might want to consider selecting the "Paid" checkmark because this is creating a new Actual Expenditure. However, some users prefer to only select the checkmark if the Expenditure is paid in full, so if this is only a partial reconciliation you might want to keep it unselected.
-
Select the Add button:

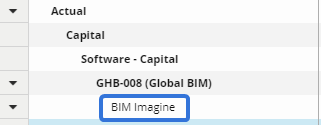
After selecting Add, the new Actual Expenditure will be added to the Financial Plan:
You will notice that the amount entered in during reconciliation (step 9 above) has been subtracted from the original Committed Expenditure Item. For example, the original "BIM Imagine" Committed Expenditure Item had £3,500.00 committed to it. While reconciling, only £3,000.00 was paid. If you look at the original Committed Expenditure, you will see that only £3,000.00 has been taken from it and only £500.00 remains:
If you open up the Edit Expenditure window for the Committed Expenditure, you will see that the item has a "Remaining Committed" of £500.00:

To reconcile a Committed Expenditure Document against a new Actual Expenditure Document:
-
Navigate to a Project.
-
Open the Project Menu in the top right-hand corner of the screen:
-
Select Financial Plan from the "Views" section:
-
Select which Financial Plan you would like to edit:
Tip: Be sure to take the Financial Plan Type into account when choosing a Financial Plan. This is indicated by the bracketed term in the plan title ("[Approved]" in the selected example above). If you are unsure about the Financial Plan Types and what they mean, speak to an Eclipse PPM administrator.
-
Select the Edit button:
-
Select the drop-down menu of the Committed Expenditure Document that you would like to reconcile:
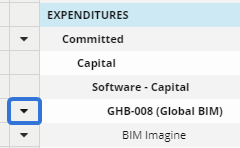
Note: The Expenditure Document row is the first bold-font row directly above the non-bold-font row (which is the Expenditure Item).
-
Select Reconcile All Items Against New:
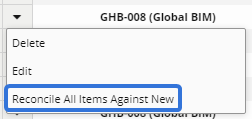
Note: This will begin the process of creating a new Actual Expenditure Document.
-
(Optional) Edit any of the document details in the "Edit Expenditures" window:
Note: All of the details except for "Expenditure Type" will be the same as the original Committed Expenditure. Also, there will be an "R-" placed in front of the existing Expenditure Number, which can be removed if desired.
Tip: See Editing Expenditure Items for more information.
-
Edit the amounts of the existing Expenditure Line Items:
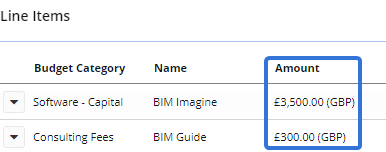
Note: The amounts entered will be the amounts of the Actual Expenditure Item counterparts of the original Committed Expenditure Items. If the actual amounts will be the same as the committed amounts, leave them alone.
Example: If the Committed amount is £3,500.00 but only £3,000.00 has been paid, enter "3000":
Click thumbnail to play. -
(Optional) Edit any of the new Expenditure Document's Line Items.
Tip: See Editing Expenditure Items for more information.
Tip: Users can add new items to the Actual Expenditure Document during the reconciliation process. However, only the original line item will be reconciled. Any new line items will exist as standalone Actual Expenditure Items.
Users can also delete any of the existing line items. Any items that are deleted will obviously not be reconciled with anything. If all of the existing line items are deleted, it will no longer be a reconciliation process. The new document will exist as a standalone Actual Expenditure.Note: Eclipse PPM administrators have the ability to add more available rows for additional Expenditure Items through the Financial Settings page.
-
Optional) Edit any of the "Expenditure Details" for the new Actual Expenditure.
Tip: See Editing Expenditure Items for more information.
Tip: In particular, you might want to consider selecting the "Paid" checkmark because this is creating a new Actual Expenditure. However, some users prefer to only select the checkmark if the Expenditure is paid in full, so if this is only a partial reconciliation you might want to keep it unselected.
-
Select the Add button:
After selecting Add, the new Actual Expenditure will be added to the Financial Plan:

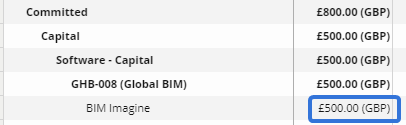
Note: Both Expenditure Items share the same contract (GHB-008 in the example above) even though they are organized by Category Types and Budget Categories.
You will notice that the amounts entered in during reconciliation (step 9 above) have been subtracted from the original Committed Expenditure Items. For example, the original "BIM Imagine" Committed Expenditure Item had £3,500.00 committed to it. While reconciling, only £3,000.00 was paid. If you look at the original Committed Expenditure, you will see that £3,000.00 has been taken from it and only £500.00 remains:
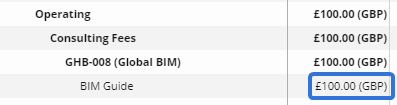
Also, the original "BIM Guide" Committed Expenditure Item had £300.00 committed to it. While reconciling, only £200.00 was paid. If you look at the original Committed Expenditure, you will see that £200.00 has been taken from it and only £100.00 remains:
To reconcile a Committed Expenditure against an existing Actual Expenditure:
-
Navigate to a Project.
-
Open the Project Menu in the top right-hand corner of the screen:
-
Select Financial Plan from the "Views" section:
-
Select which Financial Plan you would like to edit:
Tip: Be sure to take the Financial Plan Type into account when choosing a Financial Plan. This is indicated by the bracketed term in the plan title ("[Approved]" in the selected example above). If you are unsure about the Financial Plan Types and what they mean, speak to an Eclipse PPM administrator.
-
Select the Edit button:
-
Select the drop-down menu of the Expenditure Item that you would like to reconcile:
Note: When reconciling against existing Expenditure Items, users can select either the Committed Expenditure Item or the Actual Expenditure Item.
-
Select Reconcile Against Existing:

-
Select the checkbox of the item you would like to reconcile with:

Note: Expenditures can only be reconciled against each other if they share the same Budget Category. If the Expenditure Item does not have any counterparts (Actual to Committed or vice versa) that share the same Budget Category, nothing will be available for reconciliation:

-
Select the Reconcile button:

After selecting Reconcile, the Committed Expenditure Item and the Actual Expenditure Item will be reconciled against one another.
You will notice that the amount of the Actual Expenditure Item will be subtracted from the amount of the Committed Expenditure. For example, the "BIM Imagine" Committed Expenditure Item had £3,500.00 committed to it. The "BIM Imagine" Actual Expenditure has an amount of £3,000.00. If you look at the original Committed Expenditure, you will see that £3,000.00 has been taken from it and only £500.00 remains:
If you open up the Edit Expenditure window for the Committed Expenditure, you will see that the item has a "Remaining Committed" of £500.00: