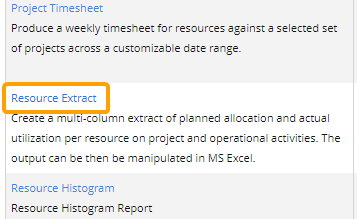
Resource Extract Report
The Resource Extract report displays data on Resources and their assignments. It includes columns that expose information on the Resources themselves (Name, Position, Resource Type, Resource Status, etc.), as well as the Projects (Project Name, Status, Portfolio, etc.), and the Tasks (Task Name, Assigned By, Task Properties, etc.) they are assigned to.
Note: Resources will only appear on the report if they have allocated or actual time on one of the Project's Tasks within the selected date range.


This report also displays the Resource allocated and actual time, effort, and cost toward each of the assignments. For instance, notice how there are five rows (rows 2-6 in the examples above) for Josh's assignment to the "Consolidation" Task (column W) on the "Real Property Committee Convention" Project (row M). This is because the "Daily" tab is selected on the spreadsheet.

The selected period is "Daily" and the Task is scheduled for five days from October 7th to Octover 11th. Each row for the "Consolidation" Task displays the allocated and actual values for each day.

In the example above, we can see that Josh had 8 hours allocated to each working day of the Task (column AQ), which led to an Estimated Cost of $200 per day (column AR). However, he only entered 4 hours each day toward the Task on his Timesheet (column AT), which led to an Actual Cost of $100 per day instead (column AU).
Note: Additional rows might appear if any Actual Time exists outside of the Task's date range. For example, if Josh were to submit time toward the Task on October 14th, an additional "Josh Norris" row would appear for the "Consolidation" Task. This row would contain values of 0 for allocations and "Estimated Cost", but it would contain numbered values in the "Actual" columns.
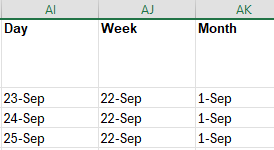
Notice in the examples above that there is a column for "Week" (column AJ) and a column for "Month" (column AK) even though "Daily" is the selected period. The values are all the same in both columns, which indicates that the "Consolidation" Task takes place in the same week and month. This changes when the "Weekly" tab is selected.

The "Day" column has been removed from the spreadsheet. Also, the "Consolidation" Task has been condensed to one row because all of the allocated and actual time takes place within the same week.

The same is expected to happen when the "Monthly" tab is selected; both the "Day" and "Week" columns will be excluded and one row will exist for the "1-Oct" month because all of the "Consolidation" Task's allocated and actual time takes place within October.
Report readers will find columns for each Task Property to the right of the allocation and actual columns.
Tip: This report can also be run for individual Projects. See Managing Project Reports for more information.
To run the Resource Extract report:
Before You Start: Users will require the "Resource Reports - Allow" permission from an Application Policy to run this report. Additionally, users will require the "Profile Details - View" permission on at least one of a Project's Policies in order to view the Project's data in the report.
-
Select the Reports icon
 from the Navigation Menu.
-
Select Resource Extract from the list of Eclipse Reports.
-
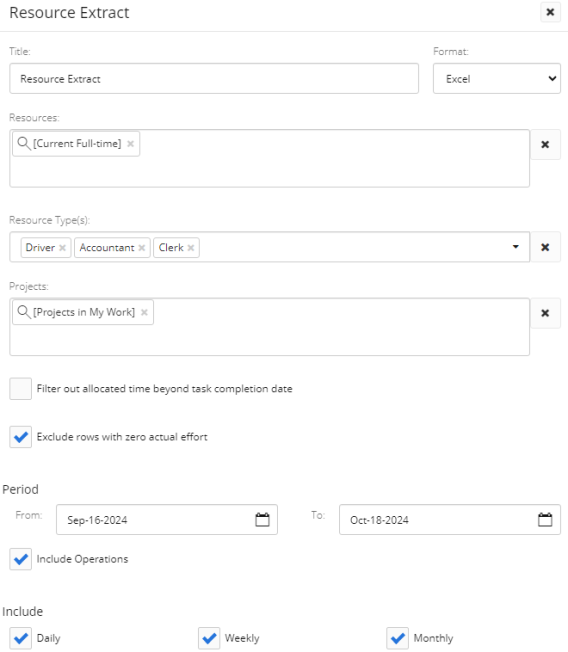
Use the "Resource Extract" window to customize your Resource Extract report.
-
Title: Enter a custom name for your Resource Extract report. This title will appear at the top of the report.
-
Format: Ignore this field for this report; the only available export option is a Microsoft Excel file.
-
Resource: Select which Resources will be included in the report by typing in the name of a Resource or Resource filter and selecting it from the drop-down menu. Repeat this until all of your desired Resources and filters have been added.
Note: These are the same Resource filters that can be found on the Resource Search page. From here, users can create their own custom Resource filters that can be used in the report.
Note: If a value is not selected for this field, the report will not contain any data after running.
Tip: Select the "[All Resources]" filter to prevent any Resources from being filtered out.
-
Resource Type(s): If you would only like Resources of specific Resource Types to be displayed on the report, click on this field and use the drop-down menu to select the name(s) of the Role(s) you would like to display. Leave this field empty to display the names of all Resource Roles on the report.
-
Projects: Select which Projects will be included in the report by typing in the name of a Project or Project filter and selecting it from the drop-down menu. Repeat this until all of your desired Projects and filters have been added.
Note: These are the same Project filters that can be found on the Project Search page. From here, users can create their own custom Project filters that can be used in the report.
Note: A message will appear if the selected filter(s) will result in no Projects being included in the report.
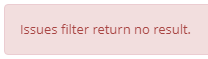
This could be the result of selecting a filter (or multiple) that does not include any Projects. It could also occur if the user running the report does not have permission to view any of them. -
Filter out allocated time beyond task completion date: If selected, the report will not contain any rows for allocated time after the day the Task was completed.
Example: Jack was assigned to a Task that was scheduled from October 1st to October 18th. His time is allocated to each working day of the Task.
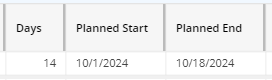
However, he finishes the Task two days early. The Task is marked 100% complete on October 16th.
If this checkbox is selected, the report will exclude Jack's allocations toward the Task on days after the Task was complete (October 17th and 18th).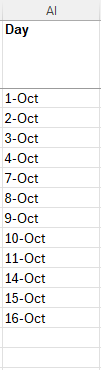
If this checkbox is not selected, the allocations toward the days after the completion date will still be included.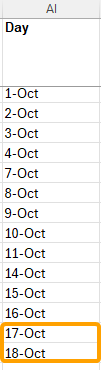
-
Period: Use the "From" and "To" fields to determine a date range for the report.
Note: Resources will only appear on the report if they have allocated or actual time on one of the Project's Tasks within the selected date range.
-
Include Operations: Select this checkbox to include Projects marked as "Operations" in the report.
-
Include: Select the "Daily", "Weekly", and / or "Monthly" checkboxes to include tabs for them in the report.
Note: Each tab will still include colums for larger time periods. For example, the "Daily" tab includes rows for each allocation and actual time submission made against each day. As well as a "Day" column, it also includes both a "Week" and a "Month" column to display which week and month the day belongs to.
On the other hand, the "Weekly" tab includes rows for the allocations and time submissions made against each week. The "Day" column is not included.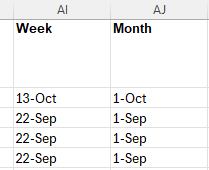
The same goes for the "Monthly" tab; the "Daily" and "Weekly" columns will not be included.
-
-
Select the Run button.
After selecting Run, the report will automatically download onto your device in a Microsoft Excel spreadsheet.