Adding a smart campaign
Note: Smart Campaigns is an add-on feature. To add Smart Campaigns to your company account, contact your mobile strategist or Technical Support.
Smart Campaigns is helpful if you want to send messages to certain subsections of your subscribers in different ways. The group must meet the following requirements:
-
The group must be made up of active subscribers.
-
The campaign must message these subscribers according to the terms they opted-in with, for example, the estimated number of messages that will be sent per month. For more information, contact your mobile strategist or Technical Support).
To work with a Smart Campaign:
Creating a filtered group
To create a filtered Smart Campaign group:
-
Select
 Home in the left pane, and then select Groups.
 -
Above the Groups table, on the right, select
 New Group.
The Create a New Group form opens.

-
Enter a descriptive name.
Note: Even though this name is available to internal users only, take the opportunity to assign a descriptive name that is meaningful to your organization.
-
Select Using filters to select profiles.
-
Select Create.
The Setup Group Filters form opens.

-
In the This group will contain field, select Active Subscribers from the drop-down list.
-
To filter the profiles that match the selected type:
-
Select ALL from the drop-down list to narrow the match to include every one of the filters you select.
-
Select ANY from the drop-down list to expand the match to include any one of the filters you select.
-
-
Select Add a filter and then select a profile field from the drop-down list.
-
To build a filter, select an operator and then enter a value.
-
To see the results of your selections, select Preview.
You see the total number of profiles that will be included and excluded, as well as the total number of profiles that will be added to the group.
-
Adjust your selections as needed.
-
When you are done, select Create Group.
Creating a Smart Campaign
To create a Smart Campaign:
-
Select
 Text Messaging → Campaigns from the left pane menu:
-
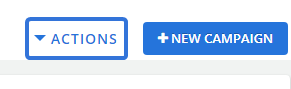
Open the Actions menu:
-
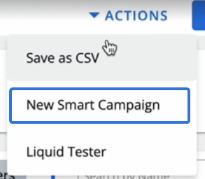
Select New Smart Campaign:
-
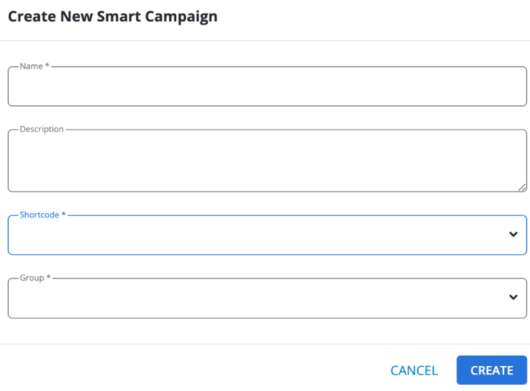
Enter information for your new Smart Campaign:
-
Name (required): Enter in a unique name for the Smart Campaign.
-
Description: Write a description for the Smart Campaign.
Tip: Include as many details as possible so users know how they should interact with the Smart Campaign.
-
Shortcode (required): If more than one shortcode is available for your company, use the drop-down menu to select which shortcode the Smart Campaign will belong to.
-
Group (required): Use the drop-down menu to select a filtered Group created for the Smart Campaign.
-
-
Select the Create button:
After selecting Create, your new Smart Campaign will be added to Mobile Commons. The Campaign Details page will open for the new Smart Campaign:

The following information is available at the top of the Campaign Details page:
-
Campaign name
-
Type is Smart campaign
-
Description
-
Smart campaign criteria
-
Number of current subscribers, plus a link to the full campaign report
The tabbed sections display additional sections in the campaign:
-
Recently updated broadcast: After a user responds to the opt-in message with consent to receive text messages from your company, you can send broadcast messages promoting your company or organization. For full instructions, see Adding a broadcast message.
-
Recent CMS rows: You can set up a schedule to send a group of messages at an exact time and date or relative to a set date stored in the subscriber's profile. For more information, see Setting up scheduled messaging and Working with scheduled messages.
The campaign status will be ![]() upon creation.
upon creation.
Note: Smart Campaigns are just like other campaigns, except that users have already consented to receive messages, so an opt-in path message is not needed. As a result, you can add broadcast messages to the campaign right away.
Tip: Each item is automatically tagged with the email of the user who created the item. Additional tags are added below the Tag field. For more information, see Organizing campaigns using tags.
Editing a Smart Campaign
To edit a Smart Campaign:
-
Select
Text Messaging in the left pane, and then select Campaigns.Tip: In the Campaigns table, the Type column identifies Smart Campaigns as Smart.
-
Locate the Smart Campaign to edit in the Campaign table, and then select the campaign name link.
The Campaign Details page opens.
-
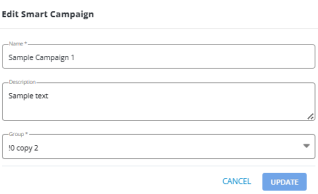
Select Actions at the top of the page, and then select Edit Smart Campaign.
-
Review the settings for the campaign, making changes as needed.
Field Action Name Change the name of the campaign. Description Update the description of the campaign. Smart campaign based on group Change the filtered group of subscribers who will receive campaign messages. -
When you are done, select UPDATE.
Note: The UPDATE button enables (turns blue) when you make any changes to the fields.
You return to the Campaign Details page.
Deactivating a Smart Campaign
Use caution when deactivating a Smart Campaign:
-
All subscriptions to that campaign will end, pending broadcasts are removed, and message schedules are deactivated.
-
Subscribers to the Smart Campaign will no longer be filtering into the Active Subscribers group as their subscription will end.
To deactivate a Smart Campaign:
-
Select
Text Messaging in the left pane, and then select Campaigns.Tip: In the Campaigns table, the Type column identifies Smart Campaigns as Smart.
-
Locate the Smart Campaign to deactivate in the Campaigns table, and then select the campaign name link.
The Campaign Details page opens.
-
Select Actions at the top of the page, and then select Edit Campaign.
The Editing campaign form opens.
-
In the Campaign Actions panel on the right, select
 Deactivate Campaign.
Caution: Deactivating a campaign is permanent. You cannot reverse it.
-
To confirm, select OK.
The campaign status is
 . For more information, see Reviewing ended campaigns.