Address a Gate Approval Request on the Summary Page
Once a Gate's Pre-Advance Conditions have been satisfied, users can request Gate approval in order to advance to the next Gate. All users that are assigned to the Gate will be notified once the approval has been submitted. Instead of responding to the request directly from the Inbox notification, approvers can visit the Summary page to approve or reject the request.
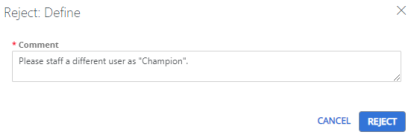
Tip: Approvers who reject requests from the Summary page will be prompted to leave a comment explaining the rejection.
Note: For more information on how Gate approvers are selected, see Assign Approval Roles.
To address a Gate approval request from the Summary page:
-
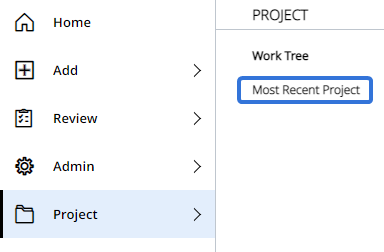
Navigate to the Gated Project's Summary Page.
Tip: Selecting Most Recent Project from the "Project" menu will bring you to the most recent work item you have visited:

-
(Optional) Select Show More directly under the Gate panels to view the completed Pre-Advance Conditions:

-
Select either Approve or Reject from directly under the Gate panels:

-
(If Reject was selected) Enter a comment explaining why the Gate approval was rejected and select Reject:

-
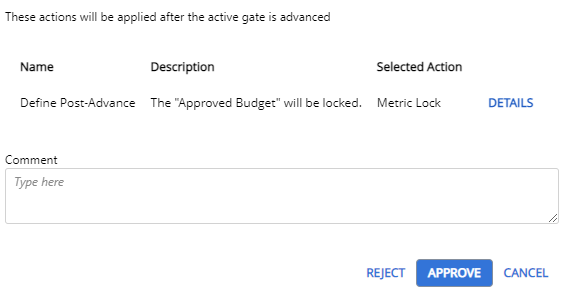
(If Approve was selected) Review the Post-Advance Actions that will take place once the Gate is advanced and select Approve or Reject:

Note: Administrators can attach Post-Advance Actions to Gates.
Tip: Selecting Details next to a Post-Advance Action will display additional details of the action that will take place.
Tip: From here, approvers can also leave a comment along with their approval.
If Approve was selected, the Gate can be advanced.
If Reject was selected, the Gate will receive a "Needs Attention" status. Approval will need to be requested again.