Setting up Charges is a crucial step in accurately managing the financial aspects of a project. Charge items allow you to track both incoming amounts — such as client billing for services, overhead, or interest charges — and outgoing costs — such as employee bonuses, salaries, or discounts provided. Proper configuration ensures that all project-related expenses and revenues are clearly recorded, making financial reporting, client invoicing, and internal budgeting more accurate and transparent.
This article details how to set up Charges to accurately track project-related costs and billable amounts.
- From the Icon Bar click Setup
 .
. - From the Navigation Menu click Financial to expand the corresponding menu.
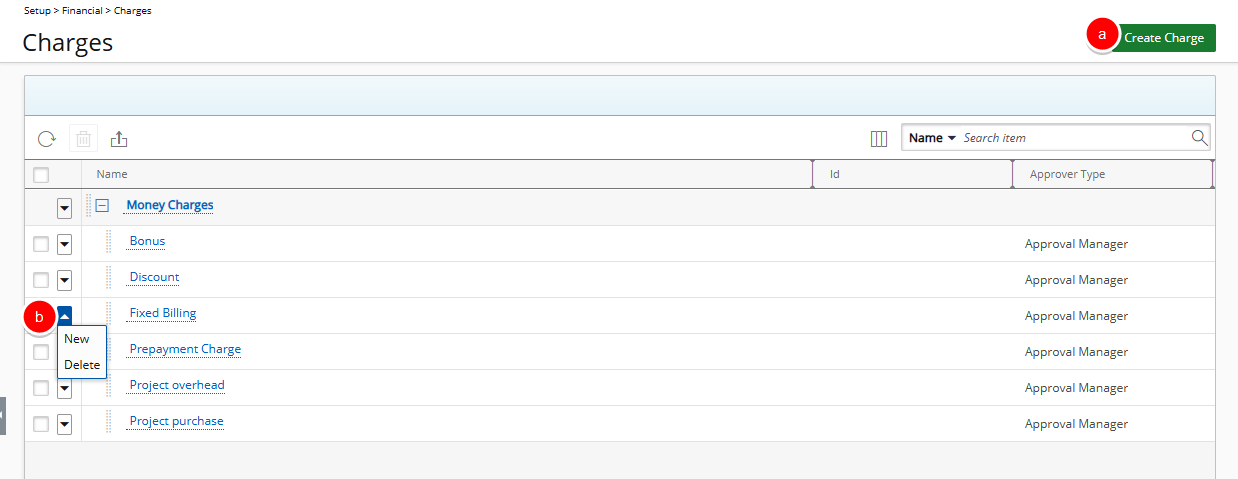
- From the Financial menu items, click Charges.
- Select New:
- Click Create Charge from the top right corner of the page.
OR - Click the down arrow located against a Money Charges from the available options click New.
- Click Create Charge from the top right corner of the page.
- Complete the settings and select the options as required:
- Name *: Enter a name for the Charge.
- Id: Enter an Id for the Charge.
- Parent: Click the browse button located against the Parent box, to select and designate, from the Charges list page, under which the Charge is to be displayed.
- Approver type: Select from the drop-down, the type of user approving the entries made for this Charge item:
- Approval Manager
- Functional Manager
- None
- Project Manager
- User with Name Note that if User with Name is selected, another list box will appear on the page allowing you to select a named User.
- From the Attributes section, select the appropriate option(s):
- Payable (selected by default): Check this option to mark this Charge as a cost to the company.
- Billable (selected by default): Check this option to indicate that all costs incurred by this Charge are paid by a client; generally generates profit for the company.
- Capitalized: Check this option to consider this Charge item as part of the organization’s assets.
- Funded: Check this option to indicate that funding for this Charge item is received from outside the company.
- R&D: Check this option to flag this Charge item as being part of research and development. Often it is possible to receive government grants for R&D Charges, which requires keeping accurate information of all actuals that relate to R&D Charges.
- Select the Use for Prepayment option to:
- Indicate that the Charge entry created for this item is an amount that is prepaid by the Client
- Allow this Charge item to be set as a project's Default Pre-billing Charge.
- Suspend: Select this option to suspend use of this Charge item, while still maintaining the entries and history associated to it.
- Is a placeholder: Select this option to set this Charge item as a placeholder.
- Is Taxable: Select this option to set this Charge item as taxable.
- Description: Enter additional details/information regarding this Charge item.
- Select Save, and then Back to return to the Charge Edit page.
Note: Upon saving, the flowing buttons are now available to you:
- Accounting; for more information, see Financial Setup: Associating Accounts and Pay Codes to Money Charges
- Pay Codes; for more information, see Financial Setup: Associating Accounts and Pay Codes to Money Charges
- When the logged user is granted View security rights to the Recognition Schedule component the Recognition Schedule button will be available.