To create and manage Announcement Notifications based on your security permission, you can access the newly added Announcement Notifications list page from Setup > Notifications.
Note: By default, the page lists all Announcement Notifications in alphabetical order.
This article details:
- Creating an Announcement Notification
- Adding Users to the list of Recipients
- How It Works
- Announcement Notification History
Creating an Announcement Notification
- From the Icon Bar click Setup
 .
. - From the Navigation Menu click Notifications to access the Notification List page.
Note: By default System Notifications is selected.
- From the Notification Type options, select Announcement Notifications.
- From the Announcement Notifications List page click New.
- Enter a descriptive Name.
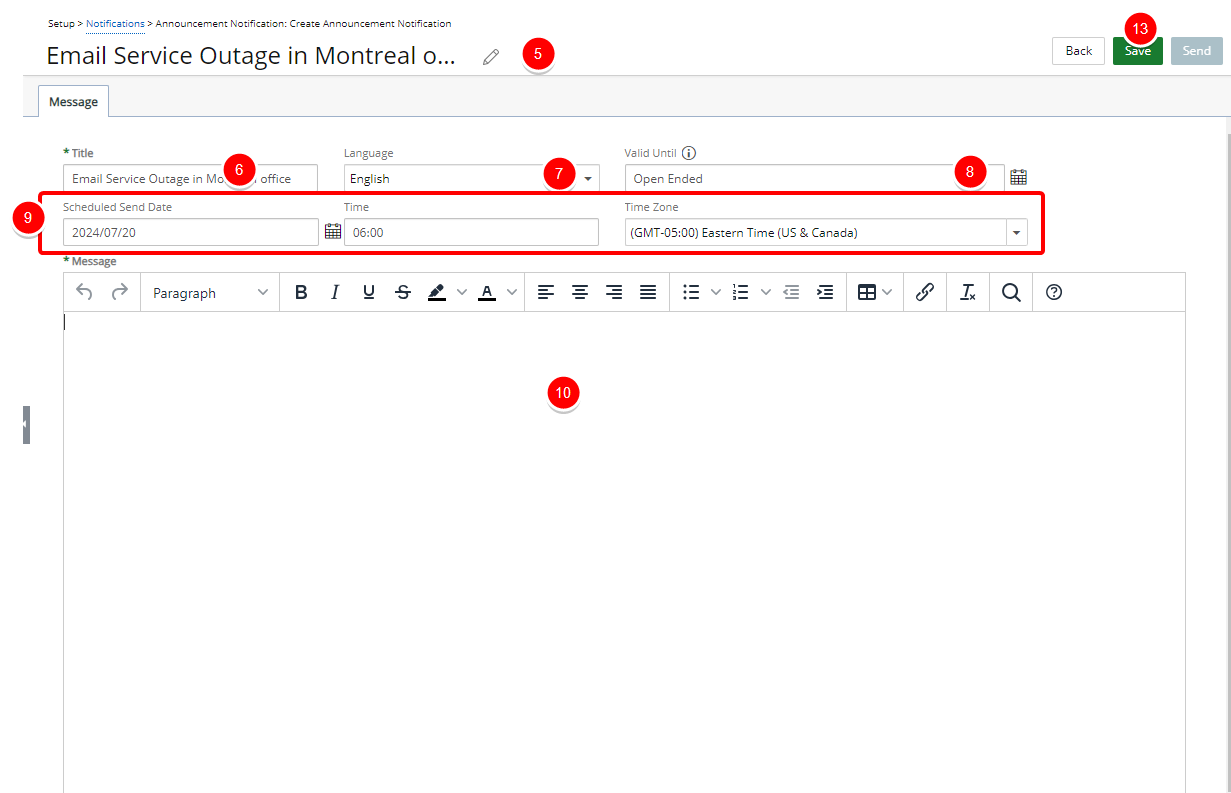
- Enter the subject line of the notification in the Title box.
Note: HTML tags are not supported in the Title box.
- Select the Language (English or French).
- Choose a Valid Until date.
Note: The Announcement Notification will not be sent after this specified date.
- Choose a Delivery Method from the available options:
- Email (default selection): Targeted recipients receive the announcement by email.
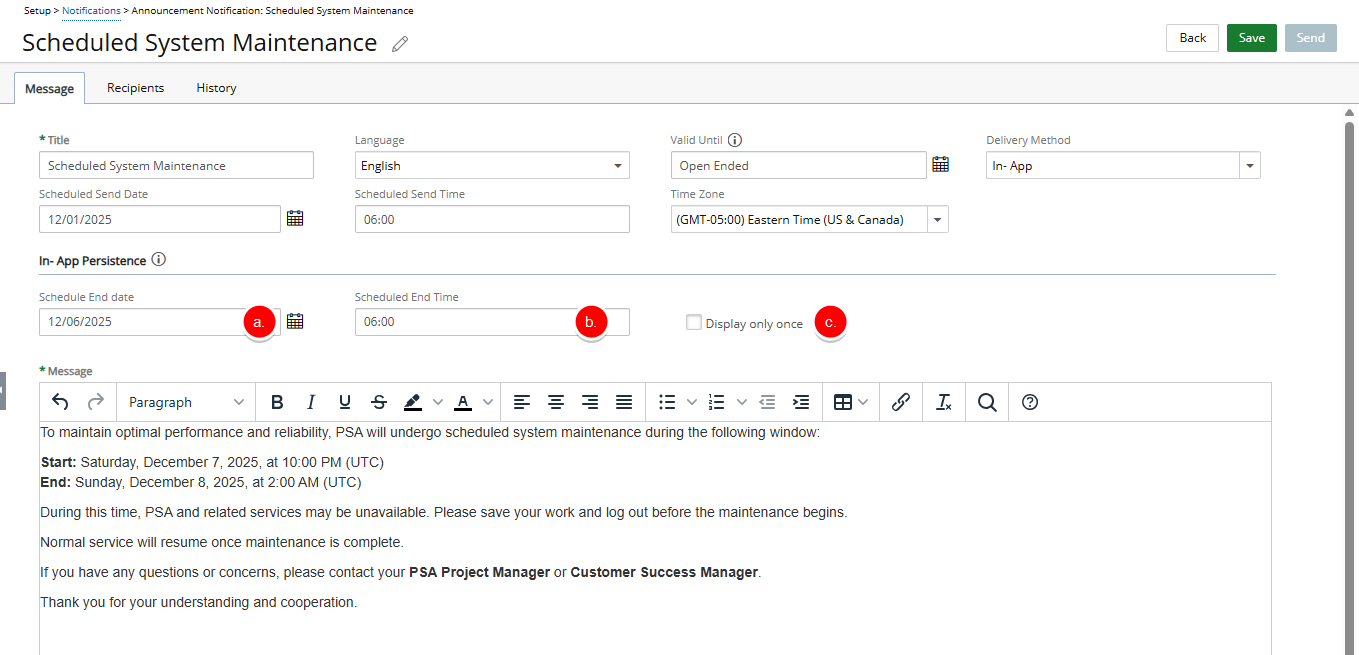
- In-App: Targeted recipients receive the announcement in the application. See In-App Delivery Method.
- Or both: Targeted recipients receive the announcement by email and in the application.
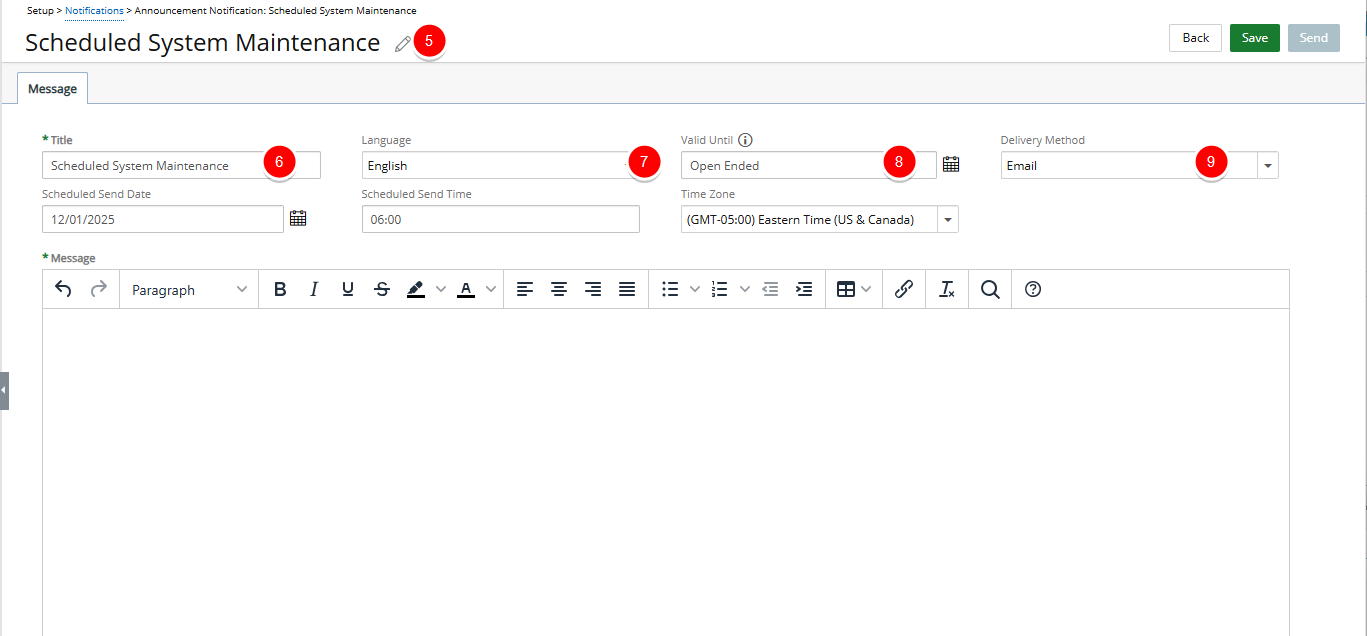
- Select a Scheduled Send Date: This is the date on which the Announcement Notification is scheduled to be sent.
Note: By default, this field is empty, allowing you to choose the desired date for sending the notification.
- Select the required Scheduled Send Time: The specific time, represented in military format, at which the Announcement Notification is scheduled to be sent.
Note: By default, this field is set to 00:00.
- Select the required Time Zone: The geographic region or area where the scheduled time for sending the announcement notification is based.
Note: By default, this field is set to (GMT -05:00) Eastern Time (US and Canada).
- Enter the required Message. You can customize the message body using the Rich Text Editor. For formatting options and features, see Rich Text Editor.
Note: Pasting text into the rich-text editor should preserve most formatting, but some types of unsupported formatting, such as colored text, may need to be added manually in the editor after pasting.
- Click Save.
- Upon saving, the following tabs become available:
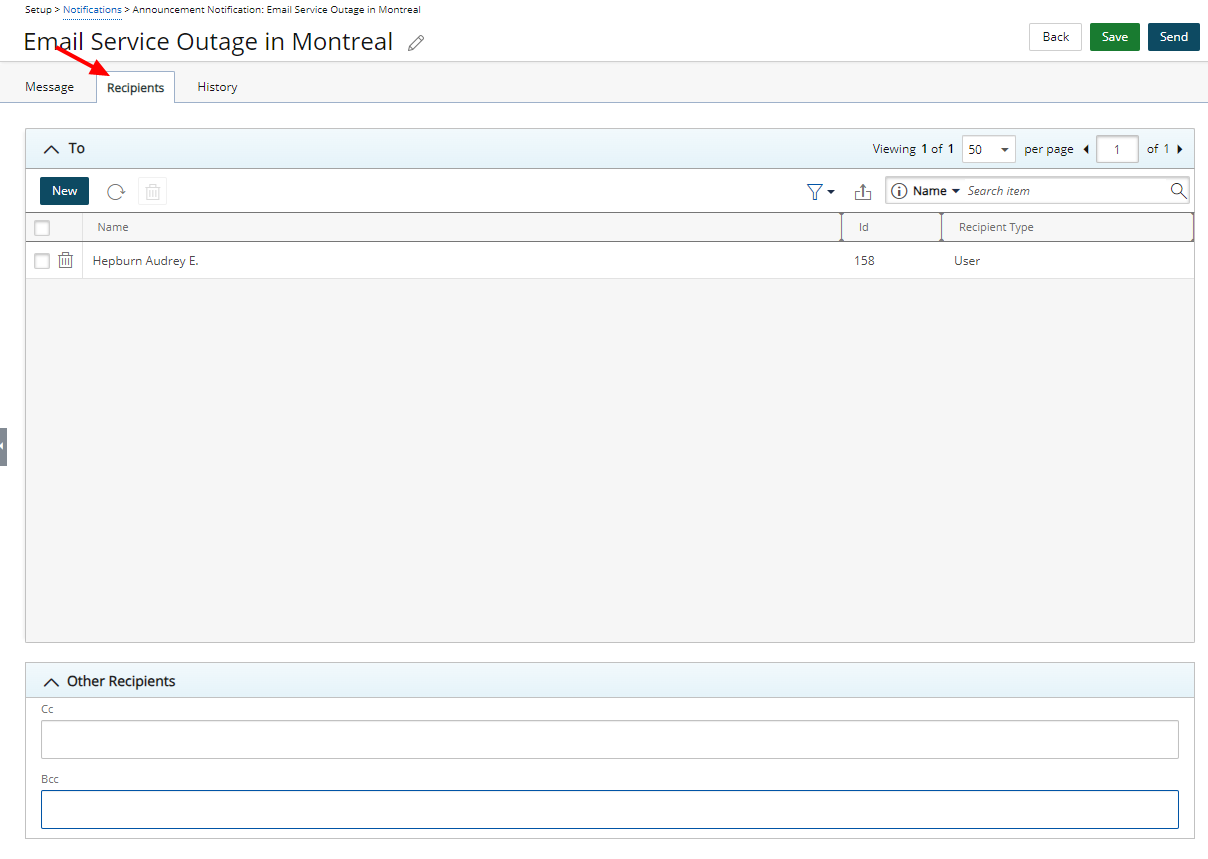
Recipients – Select the Users, Functional Groups, Resource Groups, Approval Groups, Clients, Security Profiles, Sites, and/or Timesheet Templates that will receive the notification.
History – View notification details, including Date Sent, Sent By, Message, and Sent To.
In-App Delivery Method
When you select In-App from the Delivery Method dropdown, a new section titled In-App Persistence appears. An information icon is displayed next to this title. Hovering over the icon shows the message: This announcement will be displayed upon login until the selected Date and Time. In this section, you can define the following settings:
- Scheduled End Date:The date when the announcement will stop appearing to users in the application.
- Scheduled End Time: The time on the Scheduled End Date when the announcement will no longer be shown.
- Display Only Once: When selected, the announcement appears only once to each user upon login.
Note: This option is unchecked by default.
Adding Users to the list of Recipients
- Navigate to the Recipients tab.
- From the To section click New.
- Choose the Recipient type: On the Scheduled Send Date, the system will identify Users (or Client Contacts for Clients) associated to the selected Recipient type to receive the Announcement Notification.
- Users: Selected Users.
- Functional Groups: Users associated with the selected Functional Groups.
- Resource Groups: Users associated with the selected Resource Groups.
- Approval Groups: Users associated with the selected Approval Groups.
- Clients: Client Contacts for selected Clients.
- Security Profiles: Users associated with the selected Security Profiles.
- Sites (User's Active Site): Users associated with the chosen Site.
- Timesheet Templates: Users associated with the selected Timesheet Templates.
- Depending on your choice above the page will refresh and the selected list will be displayed.
Tip: To narrow the list down you can search the list based on Name or Id.
- Select the required option from the Available list on the left and Add them to the Selected list on the right .
- Click Close to return to the edit page.
- If required Enter the CC or BCC recipients email addresses separated by a semicolon within the Other Recipients section.
- Click Save to apply your changes.
- If you have scheduled the Announcement Notification for future delivery then click the Back button. Your Notification will be sent according to the schedule of the Notifications Delivery Automation Service.
Caution: As a precautionary note, please be advised that delays might occur depending on the schedule settings of your Notifications Delivery Automation Service.
Example: If you have set an Announcement Notification to be sent at 13:30, and your Notifications Delivery Automation Service runs every 60 minutes, with the most recent operation at 13:00, your Announcement Notification will be dispatched at the next execution time of the Automation Service, which is 14:00.
- Otherwise, click Send to immediately deliver the notification to the selected Users.
Note: By clicking Send, the Announcement Notification will be immediately sent to the designated recipients regardless of the schedule.
How It Works
The way an announcement is delivered depends on the selected Delivery Method, the targeted Recipients, and whether the Display only once option is enabled. Use the scenarios below to understand how each combination behaves in the application. Select a case to view details.
- If recipients are logged in when the notification is sent, a blue banner appears at the top of their screen.

- When recipients log in, a dialog box lists all in-app notifications. The background is disabled until the dialog box is closed.
- The announcement dialog box reappears at each login until the scheduled end date and time set in Announcement Settings, unless Display only once is selected. In that case, the notification appears only once and does not return after being closed.
Note: If a user clicks Don’t Show Again in the notification pop-up, the announcement will not appear again for that user, even if the End date has not yet been reached.
- All targeted recipients receive the announcement by email.

- Logged-in recipients see a blue banner immediately.
- On login, recipients see a dialog box listing all in-app notifications.
- The dialog box appears only once and does not return after being closed.
Additional behavior notes
- Announcements remain marked as unread until the Scheduled End Date/Time.
- They do not appear on the My Notifications page until that date/time.
- They are not removed by archiving until after the Scheduled End Date/Time.
- Linked to the Notification Center — when disabled, are not delivered.
Announcement Notification History
From the History tab, you can access and view the detailed History of sent Announcement Notifications should a question/concern arise. For further details see Announcement Notifications History Tab.