This article details how to access the Announcement Notifications list and the available options to you.
Note: Depending on your organizational role and permissions granted to you, you may have the rights to View/Modify/Create/Delete Announcement Notifications. For further details on how to grant these rights, refer to Granting the right to Announcement Notifications.
Accessing the Announcement Notification List page
- From the Icon Bar click Setup
 .
. - From the Navigation Menu click Notifications to access the Notification List page.
Note: By default System Notifications is selected.
- From the Notification Type options, select Announcement Notifications.

Note: The Announcement Notification option is unavailable to users without any permission to Announcement Notifications. For further details on how to grant these rights, refer to Granting the right to Announcement Notifications.
- The list will refresh and show all available Announcement Notifications.
Available options from the Announcement Notification List page
By default, the page lists all Announcement Notifications in alphabetical order.
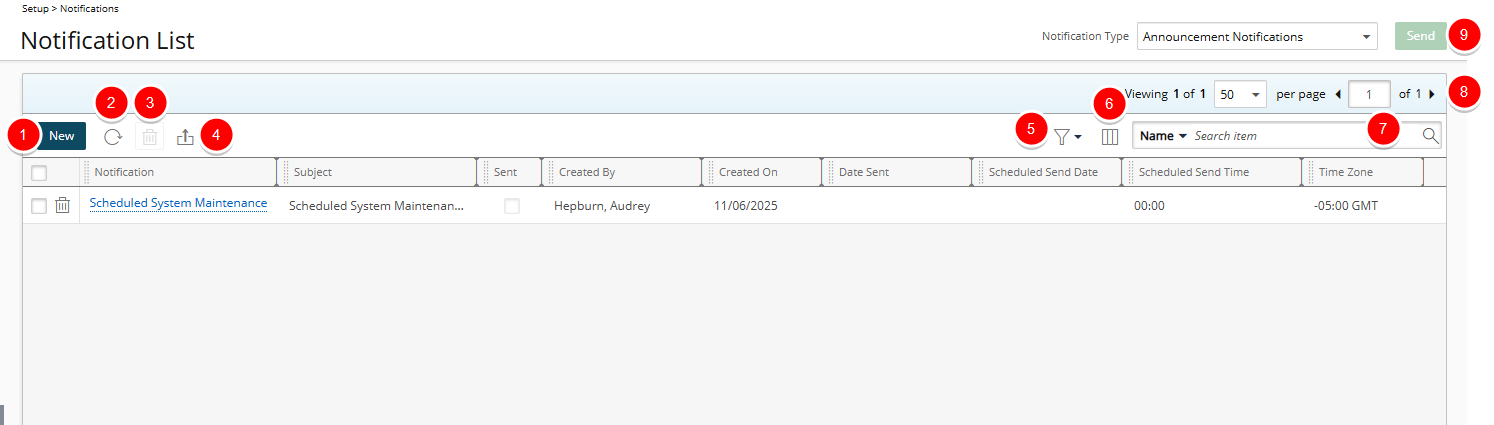
- Create New Notifications.
- Refresh
 the list.
 - Delete
 selected Announcements.
 - Filter
 the page based on Sent/Not Sent criteria.
 - Export
 the list to Excel.
 - The following columns are displayed by default: Notification, Subject, Sent, Created By, Created On, Date Sent, Scheduled Send Date, Scheduled Send Time and Time Zone. You can choose to add Delivery Method, Display only once, Scheduled End Date, Scheduled End Time and Valid Until columns from the Column Selection.
- Search for Notifications based on Name and Title.
- Pagination is available at the top right corner to facilitate easy navigation across pages.
- Send selected Announcement Notification(s).
Note: Upon clicking the Send button, if any issues are preventing the message from being sent, a detailed Error message is displayed, allowing you to make the necessary corrections.