A workflow role may be needed if the Leave Request Workflow process requires review/approval by a role, at some point in the workflow, that does not fall under any of the readily available, out-of-the-box manager roles (project, group, approval, functional), or that is designated to only specific users.
The manner in which to create a workflow role is basically the same with the main difference being the navigation to access the Workflow Role Edit page.
This article details how to access the Leave Request Roles page with a link to the article detailing how to create a workflow role and associate it to a state.
Access the Leave Request Roles list page
- From the Icon Bar click Setup
 .
. - From the Navigation Menu click Timesheet.
- From the available menu options select Leave Request Workflows.
- Click Workflow Roles button access the Leave Request Roles list page.
Available options from the Leave Request Roles list page
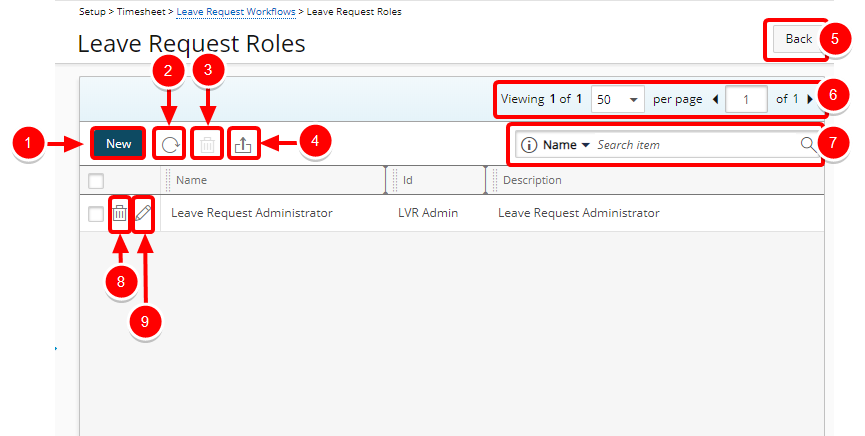
- Click New to enable inline editing to add a new Leave Request Role.
- Click Refresh
 to refresh the list.
 - The multi-Delete
 button is enabled when one or more Leave Request Role(s) are selected.
 - Click the Export to Excel
 button to download the Leave Request Role list as an Excel file.
 - Click the Back button to return to the Leave Request Workflows page.
- Pagination Included at the top to facilitate function.
- Search for available Leave Request Roles
- Click Delete to delete the selected Leave Request Role.
- Click Edit
 to enable inline editing to edit the Leave Request Role.
For more information refer to: