After setting up the notifications, the system automatically generates and sends notifications when the specified conditions are met. In addition, notifications can also be set up to notify users when a workflow changes states; for example, a creator of a workflow can receive a message confirming that the workflow has been resolved and closed.
Note: Decommissioned and Suspended Users will not receive any Workflow Notifications even if they are still included as recipients within the State/Transition Notifications settings.
- Select the workflow type: Creating/modifying workflows for all types of work is done in the same way, depending on which type of workflow you are creating. Select the workflow type that will be created by clicking the following:
- Click Setup >Expense > Workflows to access Expense Workflows
- Click Setup > Financial > Workflows to access the Invoice Workflows
- Click Setup >Timesheet > Timesheet Workflows to access Timesheet Workflows
- Click Setup > Timesheet > Leave Request Workflows to access the Leave request Workflows
- Click Setup > Workforce Planning > Resource Request Workflows to access the Resource Request Workflow
- Click Setup >Work > Projects> Project Workflows to access Project Workflows
- Click Setup >Work > Work Item Workflows to access Work Item Workflows
- Click an existing workflow Name from the list to access the Workflow Edit page.
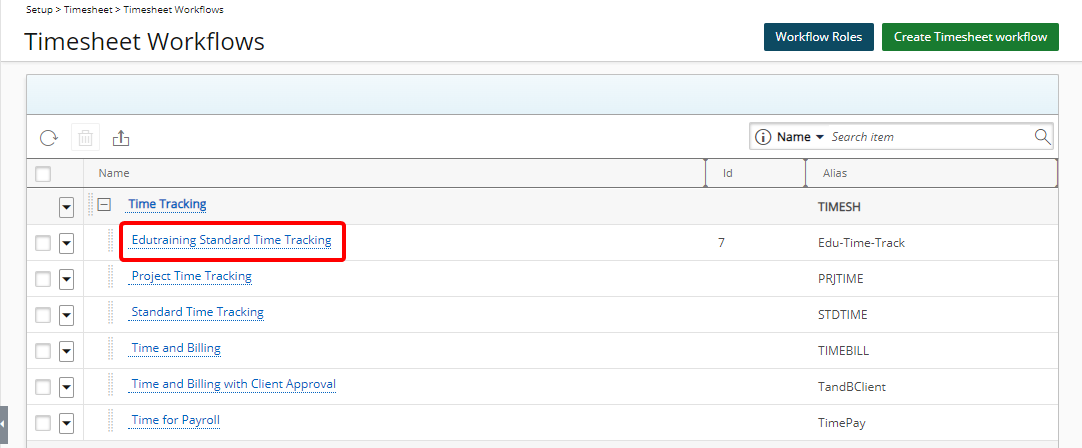
Note: For the purpose of this article we are going to modify a Timesheet Workflow (Setup >Timesheet > Workflows > New).
- Double-click a workflow State in the designer area to open the State Details sub-tab.
Note: You can also access a state's Details sub-tab by first navigating to the States tab and then clicking the state name from the list of available states on the left pane. The right pane will refresh and display the Details subtab.
- navigate to the Notifications sub-tab
- Then click New to open the New Notification dialog box.
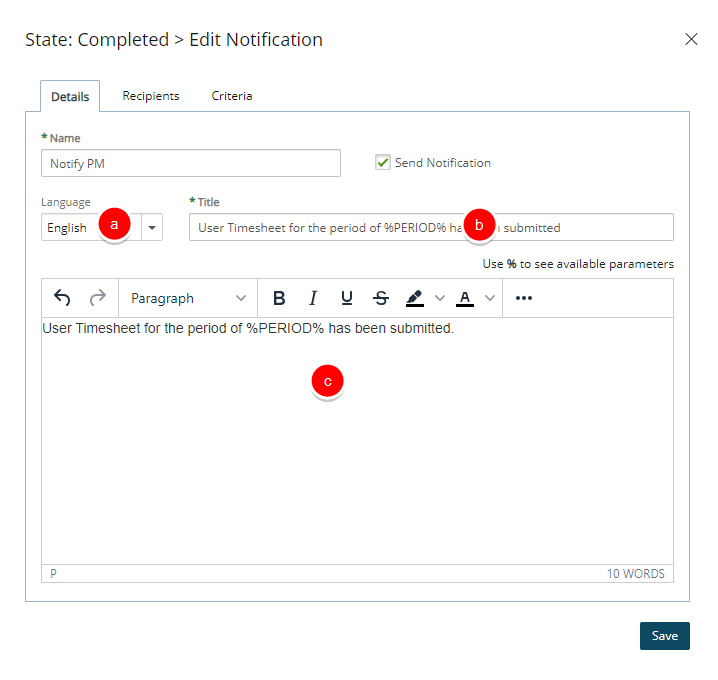
- Enter a Name.
- Define the notification message:
- Select the Language for the notification. Note: Currently French and English messages are supported; the users receive notifications in the language specified in their User Preferences.
- Enter a Title.
- Create the Message for the notification. Enter the required message within the Message box. You can customize the message body using the Rich Text Editor. For formatting options and features, see Rich Text Editor.
To insert parameters, simply type the percentage sign (%) which triggers a suggested list of available Parameter(s). As you type, the list is filtered to narrow down the options, allowing you to pick and insert the required Parameter into your Message body. For a complete list of available parameters refer to Available Parameters for Workflow Notifications.Note: When applying formatting to Parameters, the entire parameter name including percentage signs (%) must be formatted.
- Navigate to the Recipients tab to select the following parameters:
- Select a Message Type from theses available options:
- To: sends the email message directly to the user
- Cc (carbon copy): sends a copy of the email message to a recipient whose email address appears in the message to the user
- Bcc (blind carbon copy): sends a copy of the email message to a recipient whose email address does not appear in the message to the user
- Select the recipients who will be notified by email from the Notify list. Depending on the type of workflow notification created, the Notify list can vary; for more information, see Notify List Recipient Options.
- Click either:
- Save to save your changed and proceed to step d.
- Save & New to save your changes and immediately start adding another Recipient, without needing to close the dialog and click New again (proceed to step b).
- Click the Close
 button to return to the previous page.
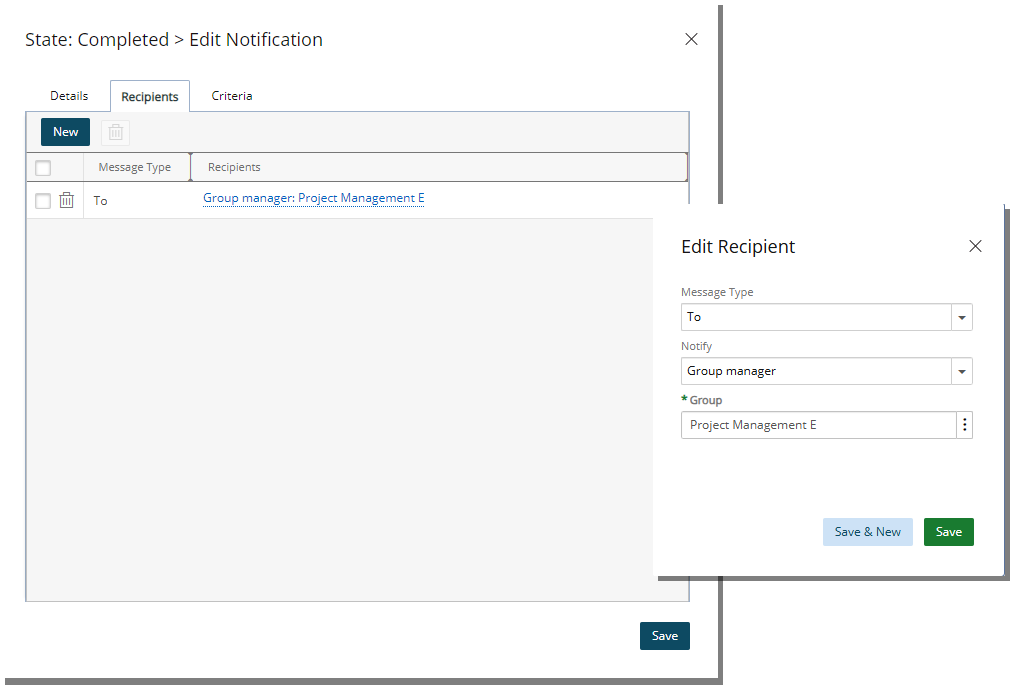
- Select a Message Type from theses available options:
- Navigate to the Criteria tab and define the conditions for sending the Notification.
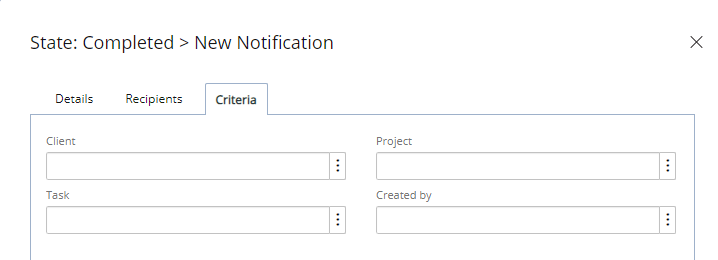
Note: Before a Notification can be sent to a user, the conditions specified must be met. Depending on the workflow selected, the criteria that is defined can vary.
- Define the criteria for the escalation (aging) notifications.
Note: The escalation (Aging) notifications are available only for the Project, Leave Request and Expense workflows. The notification conditions are set at the State level for all workflow based processes; therefore, a notification can be triggered based on an entry stuck at a State or inactive for a given amount of time; or alternately, for not reaching a State.
- When finished click Save.
- Click the Close button to exit the dialog box.
- From the Workflow Edit page click the Save button to save your Workflow modifications.