From the list of Notification Failures, you can view the details about individual Failed Notifications.
This article details:
Note: You must have the Failed Notifications security component in your user security profile. Only the Administrator Security Profile has this option checked by default.
Access the Failed Notifications list page
- From the Icon Bar click Tools
 .
. - Click Failed Notifications from the Navigation Menu.
Available Options
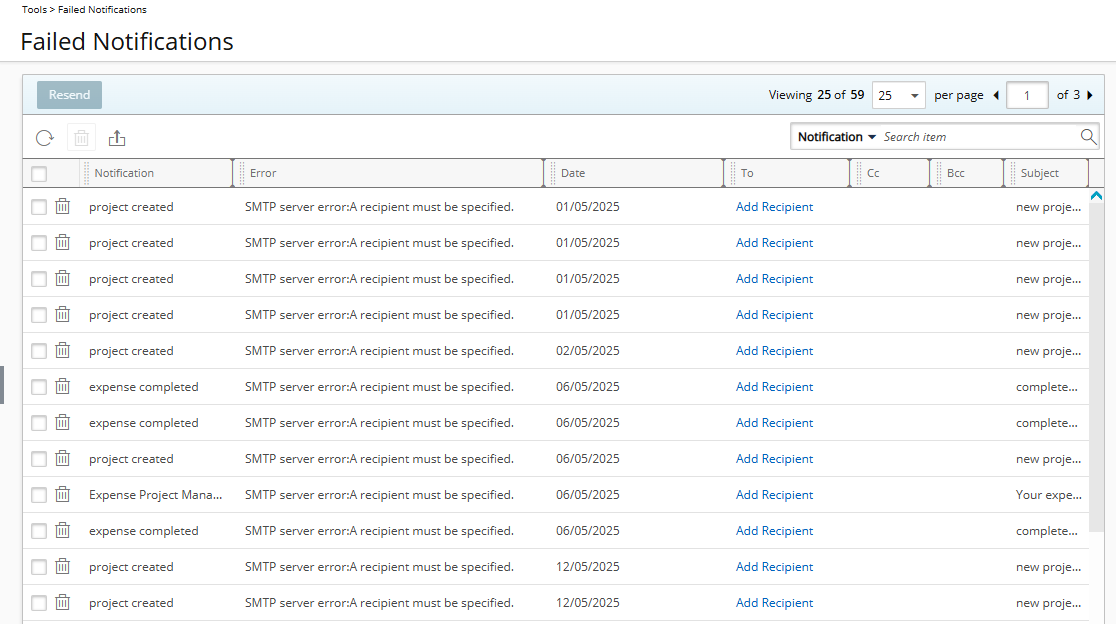
The page displays the list of notifications that failed to be sent.
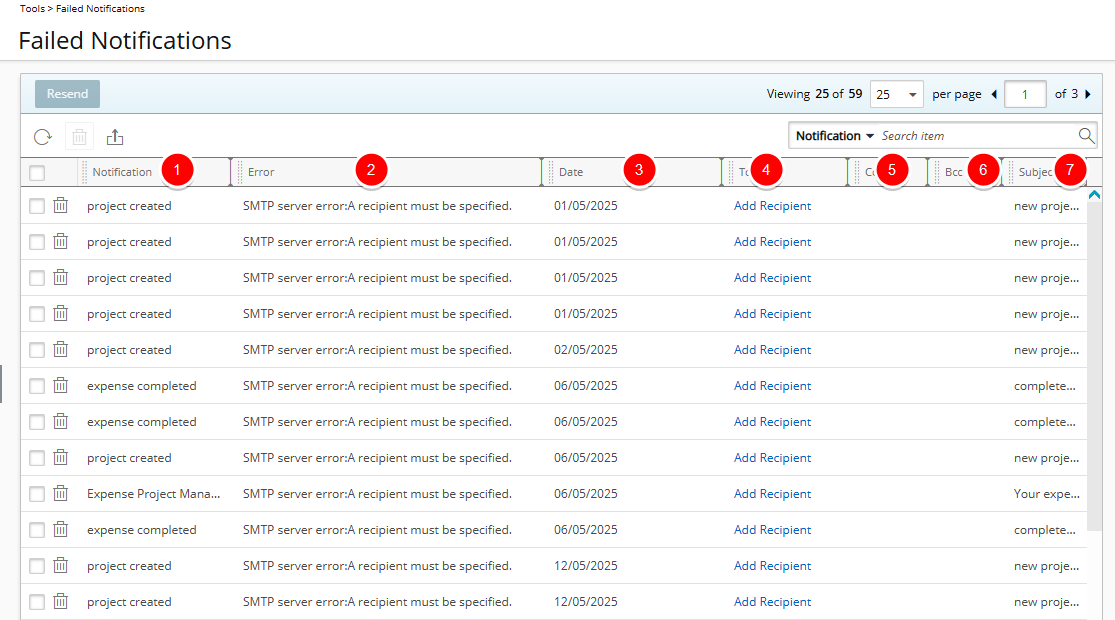
The following information is available:
- The Notification name.
- The Error.
- The Date the error occurred.
Note: The date format is defined on the Regional Settings.
- To: Displays the To recipient(s).
- CC: Displays the CC recipient(s).
- BCC: Displays the BCC recipient(s).
- The Subject line of the email notification.
Table Header Area

From the table header area you can:
- Select the notification(s), and then click Resend. This action resets the selected notification(s) in the database, allowing them to be reprocessed by the Automation Service.
- Click Refresh
 to reload the list of failed notifications.
 - Select notification(s) and click Delete
 . This flags the notification in the database so that it is no longer processed by the Automation Service.
 - Click Export to Excel
 to export the list to Excel.
 - To search for Failed Notifications, click the Search down arrow
 , select a criterion and then enter the corresponding value. Either press the [Enter] key or click the Search
  button to perform a search.
The available Search criteria are: Notification, Error, Date, To, State, Cc, Bcc and Subject. For further details refer to Searching for an item. - Pagination included at the top to facilitate easy navigation across pages. The list displays, by default, 50 timesheets at a time, and additional timesheets fall within subsequent pages. From the pagination, you can select the number of projects to display per page (25, 50, 75 or 100) and click the Previous
 and Next
  buttons to navigate though the available pages. For further details refer to Pagination.
 - From the table header:
- You can easily sort the columns by ascending or descending order simply by clicking a column header. Note that an arrow indicates the descending (
 ) or ascending (
 ) order applied to the column.
 - Click
 and move a column to the desired position.
 - You can dynamically resize column(s), to your preferred width. Simply move your cursor to the column boundary (
 ) you want to resize. When the cursor becomes a resize cursor, click and drag the column accordingly.
- You can easily sort the columns by ascending or descending order simply by clicking a column header. Note that an arrow indicates the descending (
Troubleshoot Failed Notifications
- Access the Failed Notifications Lis:
- From the Icon Bar click Tools .
- Click Failed Notifications from the Navigation Menu.
- From the Icon Bar click Tools
- Review Notification Details: Use the table to identify failed notifications and review the following columns:
- Notification Name – Identifies the notification.
- Error – Describes why the notification failed.
- Date – Shows when the error occurred (format follows Regional Settings).
- To, CC, BCC – Lists the intended recipients.
- Subject – Displays the subject line of the email.
- If needed, click Add Recipient to specify or correct the recipient email addresses.
- In the Add Recipient dialog box, you can enter addresses in the To, Cc, or Bcc fields.
Note: To is required.
- Click Save to apply your changes.
- Click the Close
 button to exit the dialog box.
 - After updating recipient details, select the Failed Notifications then click Resend to reprocess the notification through the Automation Service.