The Excel Import Template (.xlsx) provides predefined tabs that enable you to specify the properties of items or objects for import. This article covers the following steps:
Caution: You must download and use the new Excel Import Template (.xlsx) that includes the format change, renamed columns, and newly added fields. The legacy .xls template is no longer supported and cannot be used.
This article details the process of importing items and objects using the Excel Import Template (.xlsx), including how to access the Excel Import page, download the template, enter the required information, and complete the data import.
Note:
- Ensure to use the Excel Import Template in .xlsx format that you must download.
- To be able to successfully update any items/objects you have added/created after an initial import, ensure that you save the excel file that you used to make the initial import as the UniqueId that PSA assigns each item are populated in the file during the importing process. It is this UniqueId that facilitates an update import that you may have to perform, going forward, on the items that you had imported.
- The exported file is no longer downloaded in the Data Exchange Directory, and it will follow browser default settings leaving the original file untouched.
Access Excel Import page
- From the Icon Bar click Tools
 .
. - Click Import to expand the Import menu options.
- From the available menu options select Excel.
Download the Import Template and Enter the Required Information
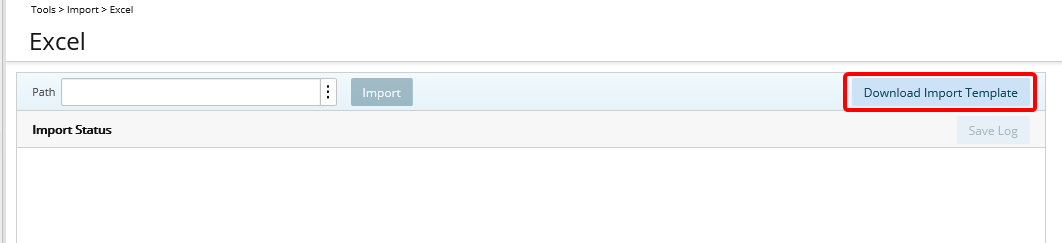
- From the Excel Import page, click Download Import Template.
- Follow your Browser Prompts to Open or Save/Open the PSA Microsoft Excel Import file, click any of the preferred option.
- If you initially opt to just Save. Access the file and open it.
- From the bottom of the PSA Microsoft Excel Import file that you've opened, select the required tab.
- The following articles are available to facilitate the smooth import of objects into PSA using the Excel Import Template (.xlsx). They outline the available fields, offering you concise descriptions to populate the Excel templates effectively:
- Business Units Property Import Fields
- Clients Property Import Fields
- Groups Property Import Fields
- Milestone Property Import Fields
- Phases Property Import Fields
- Portfolios Property Import Fields
- Programs Property Import Fields
- Project Property Import Fields
- Role Types Property Import Fields
- Roles Property Import Fields
- Roles Associations Property Import Fields
- Sites Property Import Fields
- Skills Property Import Fields
- Skill Associations Property Import Fields
- Tasks Property Import Fields
- Teams Property Import Fields
- Titles Property Import Fields
- Users Property Import Fields
- Work Types Property Import Fields
- Identify any notes, denoted by a red corner tab in the column header cell, and hover over them to read the note as they provide specific information as to whether or not a value must be entered, what type of value and how it must be entered.
- Enter the required data in the respective cells.
Note: The maximum allowed records per Excel sheet (per object) is 15,000. If you need to import 15,000 records for multiple objects (across different tabs), you must create separate files for each object and import them one by one. Exceeding 15,000 records in one tab will result in an error during the import process.
- Save your changes and close Excel.
- For the purpose of this article we are going to access the Skills tab and add the following languages under Spoken Languages placeholder: Arabic, Chinese, Dutch, English, French, German, Hindi, Indonesian, Italian, Mandarin, Portuguese, Russian and Spanish.

Import
- From PSA Import page, click the Path ellipsis to pull up the excel file you just saved.
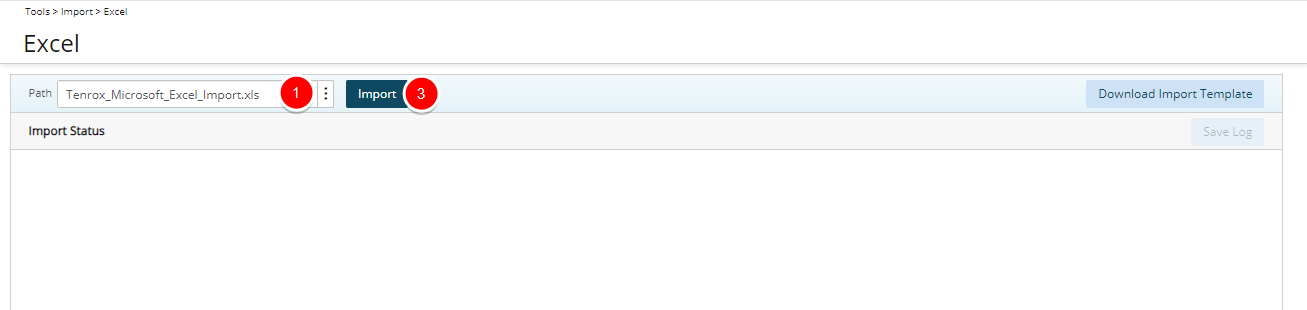
- Upon the Choose File to Upload dialog box displaying, follow the prompts to find and select the file.
- Click Import.
- Upon the notice to indicating that the loading process may take a few minutes, click Yes. Otherwise, click No to cancel the action.
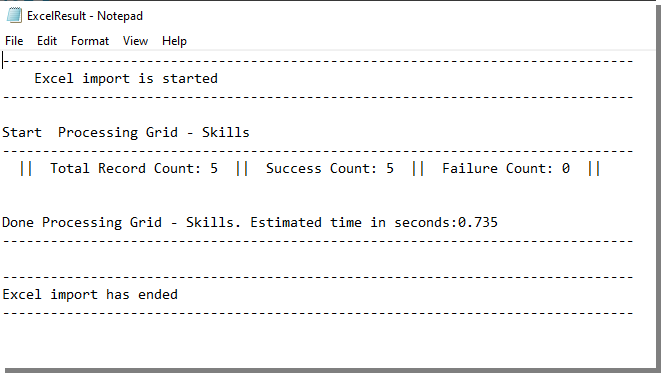
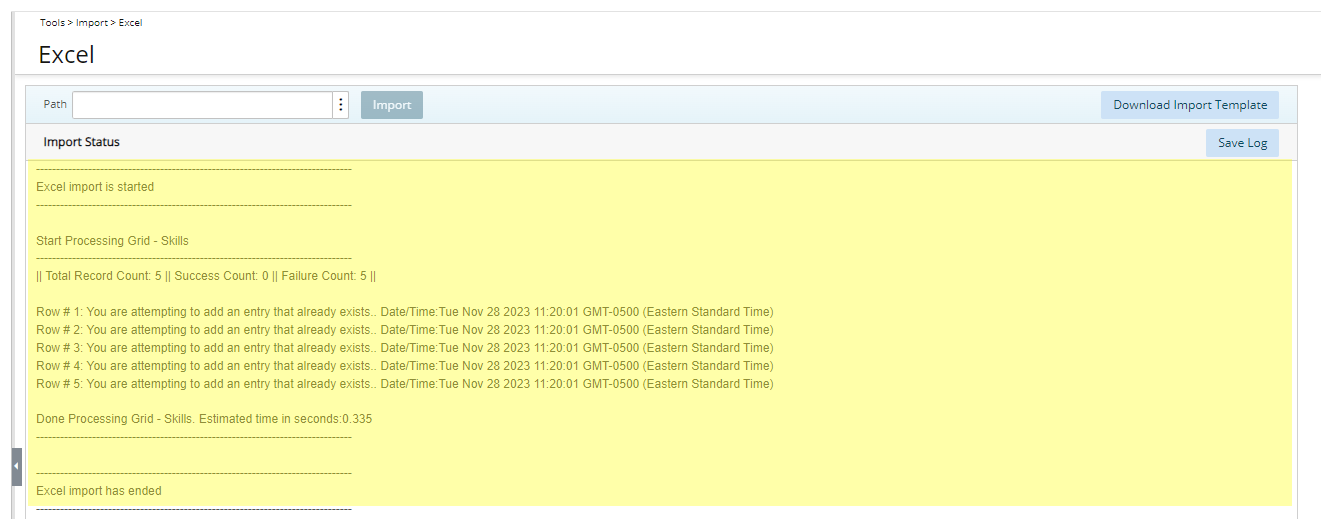
- View the Import Status, where the Estimated time it took to process the grid (worksheet) is displayed. Any errors that may have occurred during the processing, of each row, would also be detailed in this Import Status.
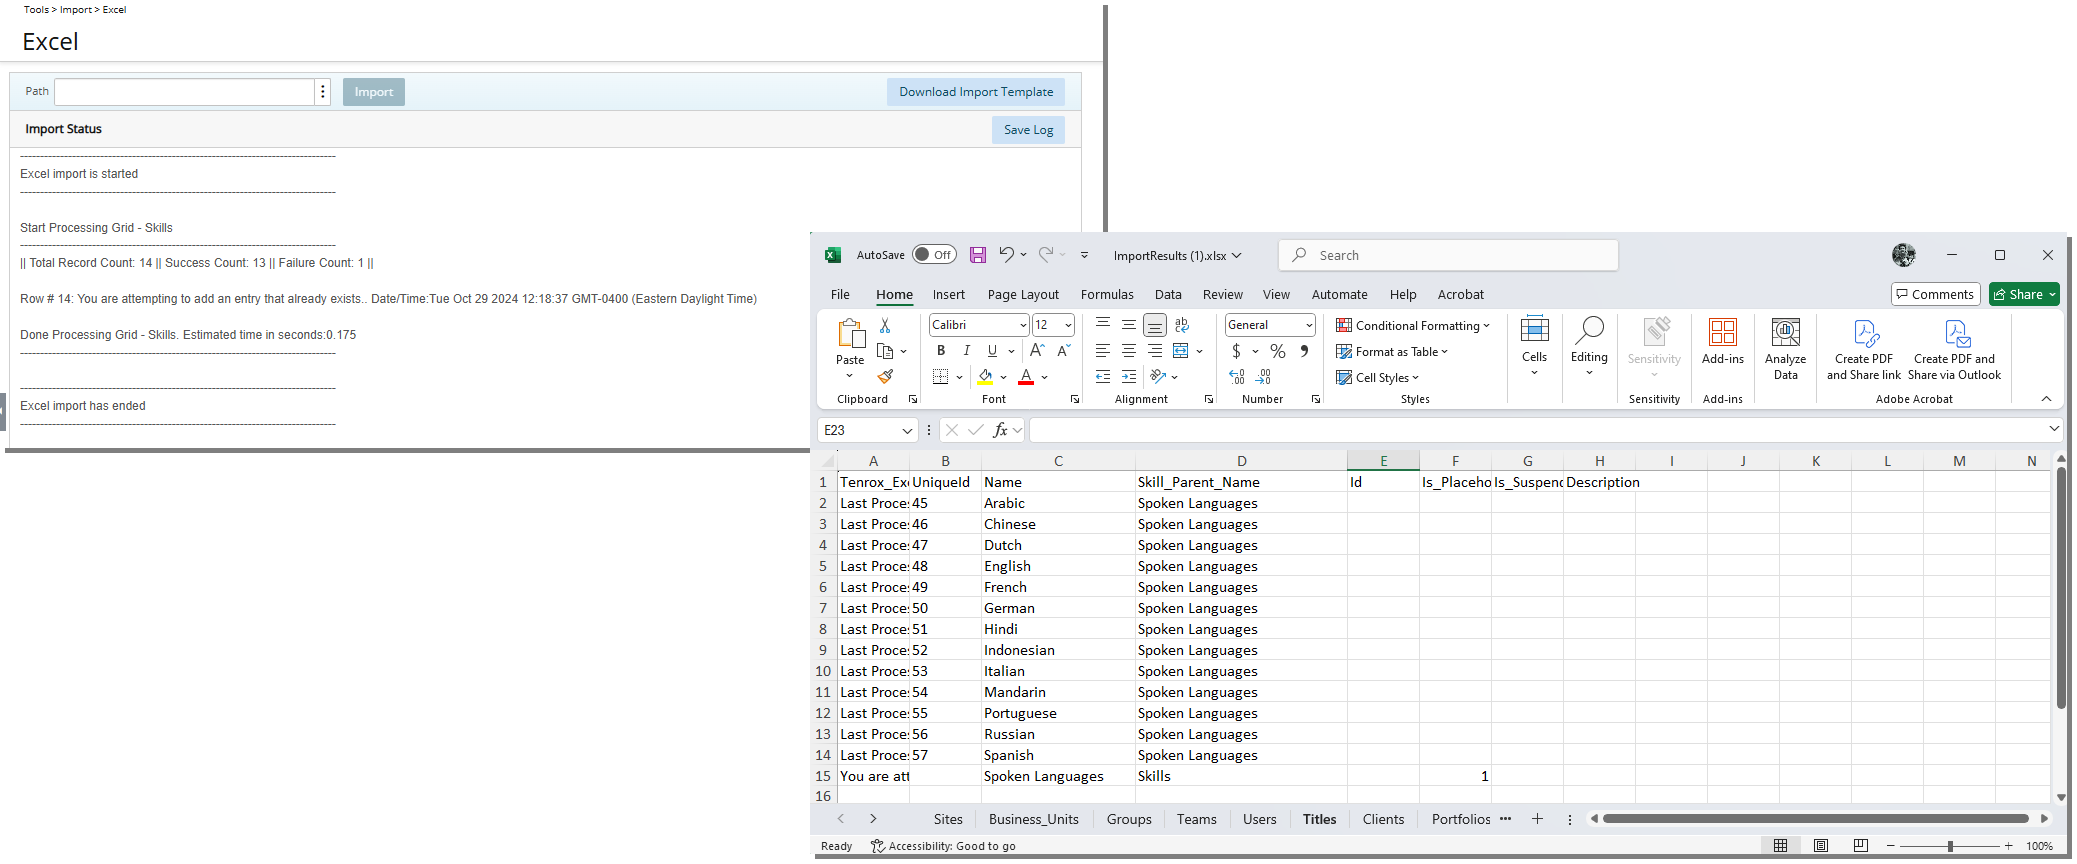
Note: The ImportResults.xlsx file is saved automatically on your computer. You can opt to save the Import Log.
- Navigate to the page to where items were imported. In this example, it is the list of Skills that were imported, and the values that were completed in the excel file correspond accordingly.

To view details of any errors
During the processing, if any errors have occurred, you can also read the details in the Import Status. In this example, in an attempt to update existing data already in PSA, the UniqueId values were tampered with, therefore the "Type mismatch" error message generated for the respective rows.
Caution: With any errors, you must open the Excel file again, make any necessary corrections, save the update, and select the file through the Path to repeat the process.
To save the Import Log
- Click Save Log.
- Upon the prompt displaying, which you may likely see at the very bottom of the page, giving you the option to Open or Save/Open the Excel log file, click any of the preferred option. If you initially opt to just Save, access the file and open it.
- View the details in the Notepad, which is exactly the same information seen in the Import Status.