Creating milestones for your Project plan can be simple. Once you have mapped out your overall Project Plan, you can easily identify Billing Milestones.
This article covers how to view Billing Milestone.
Tip: If the Milestones Column has been added to the Project List, you can access the Project Milestones page by clicking the Milestones counter. For further details on how to modify the Columns Selection refer to: Adding new Column(s) to the Project List page.
Accessing the Project Billing Milestone list
- From the Icon Bar click Project List
 .
. - From the Project List page, select the Project you wish to edit by following one of these steps:
- Click the Project context menu button
 to expand it. From the available options click Edit.
OR - Click the name of the Project you wish to access.
Tip: Use the search capability for an efficient way of finding the specific project. For further details refer to Searching for a Project within the Project List page.
- Click the Project context menu button
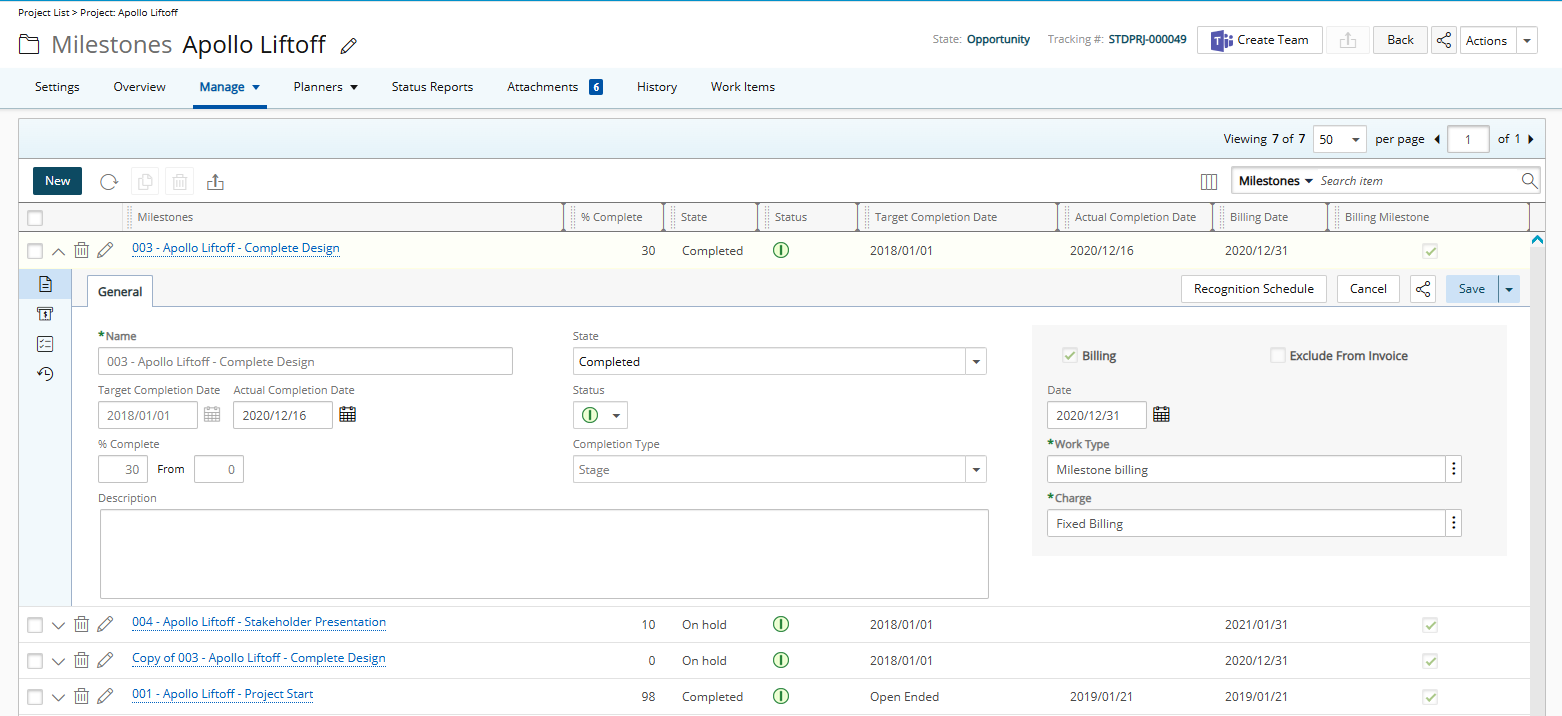
- From the Project Edit page, hover your mouse over the Manage tab and select Milestones from the available options.
- Select Billing by following one of the following steps:
- Click the Expand row button to view the Milestone expanded row, then click the Billing icon.
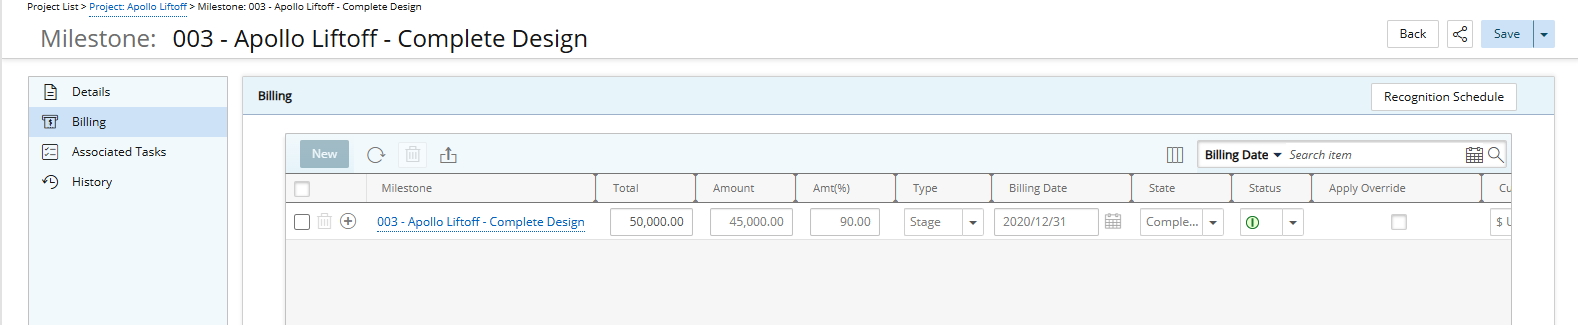
- View the Billing Milestone list.
- View the Billing Milestone list.
- Click the Milestone name to access the Milestone edit page, then select Billing.
- View the Billing Milestone list.
- View the Billing Milestone list.
- Click the Expand row button to view the Milestone expanded row, then click the Billing icon.
Available options to you
No matter how you access the Billing tab of a milestone, the available options remain the same:
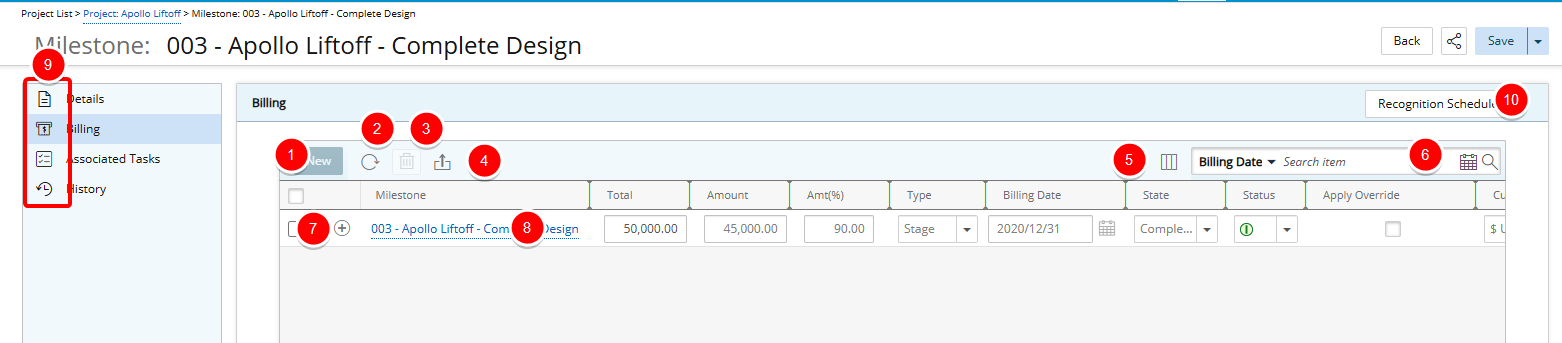
- Click New to create a new Billing Milestone.
- Click Refresh
 to refresh the page.
 - Delete
 selected Billing Milestones(s).
 - Click Export to Excel
 to export the list to Excel.
 - The following Columns are displayed by default: Milestones, Total, Amount, Amt (%) , Type, Billing Date, State, Status, Apply Override, Currency and Invoice No.
Click the Column Selection button to define which columns you wish to have displayed on the list page. In addition to any User Defined Fields associated to the Milestones, you can choose to add the Invoiced column.
 - Search functionality: By default you can opt to set the Search Filter criteria based on the: Billing Date.
- Click the Calendar icon to choose a period
or - Filter the list based on the following criteria: Today, This Week, Last Week, This Month, Last Month, This Quarter, Last Quarter, This Year, Last Year, Year To Date, This Fiscal Month, Last Fiscal Month, This Fiscal Quarter, Last Fiscal Quarter, Fiscal Year to Date or Custom.
You can choose to add the Apply Overtime as a Search criteria from the Column Selection dialog box.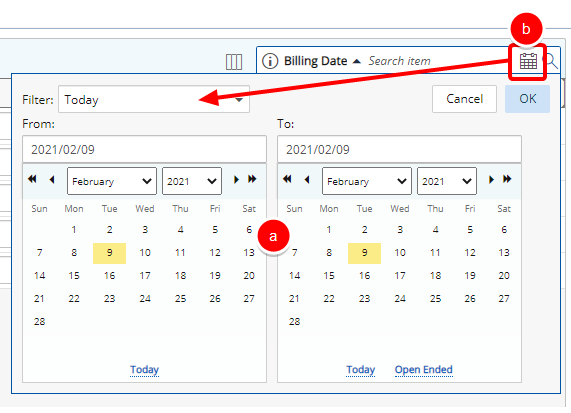
Note: By default Today is selected.
- Click the Calendar icon to choose a period
- Click the New
 button to
 - Access the Details of the Billing Milestone.
- From the tabs menu you can:
- Access the Details
- Add Billing information.

- Associate Task(s) .
- View the Milestone History.
- Setup the Recognition Schedule.