The process of creating a Work Item Entry is similar for all Work Items. Depending on the Work Item chosen, the available options and fields may differ.
This article details how to create an Action Item Entry.
- From the Icon Bar click Project List
 .
. - From the Project List page, select the Project you wish to edit by following one of these steps:
- Click the Project context menu button
 to expand it. From the available options click Edit.
OR - Click the name of the Project you wish to access.
Tip: Use the search capability for an efficient way of finding the specific project. For further details refer to Searching for a Project within the Project List page.
- Click the Project context menu button
- Click the Work Items tab to access the Project Work Items.
- The list of available Work Items Workflows can be found on the left navigation pane. Click Action Item.
- Click New.
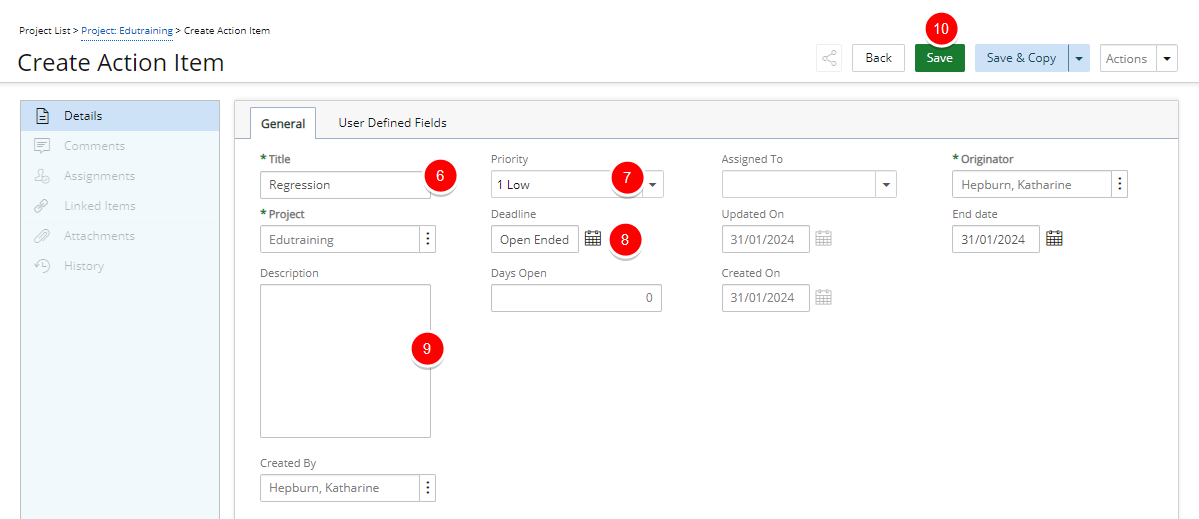
- Enter a title in the Title box.
- Choose the Priority of the Action Item from the available options: 1 Low, 2 Medium, 3 High, 4 Critical or 5 Blocking.
- Click the calendar button located against Deadline and choose the deadline date.
Note: By default Open Ended is selected.
- Enter a brief Description.
- Click Save. The page will refresh allowing you
to access and modify the Entry. Continue to Step 11 further details.
- Note that:
- The Comments, Assignments, Linked Items, Attachments and History tabs are now available to you.
- The State and Tracking# of the Entry are now visible in the header area.
- You can choose to Share it with colleagues. For further details refer to Sharing Pages.
- Click Back to return to the corresponding Work Item Entry list page.
Save & Copy
At any time you can click Save & Copy which will save your current Entry and create a copy of it. The copied Entry is saved immediately and will remain open for editing:
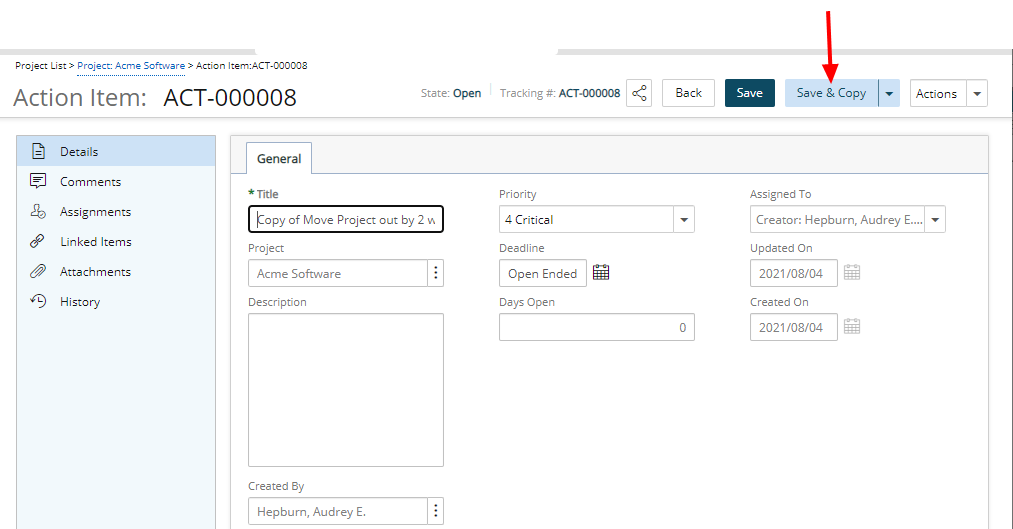
- The Title of the copied Entry will read Copy of [Copied Title]
- Priority , Project and Description are copied from the source Entry.
- The copied Entry is Assigned To the logged user.
- The Created By is set to the logged user.
- Days Open is set to 0.
- Updated On and Created On dates are set to current date.
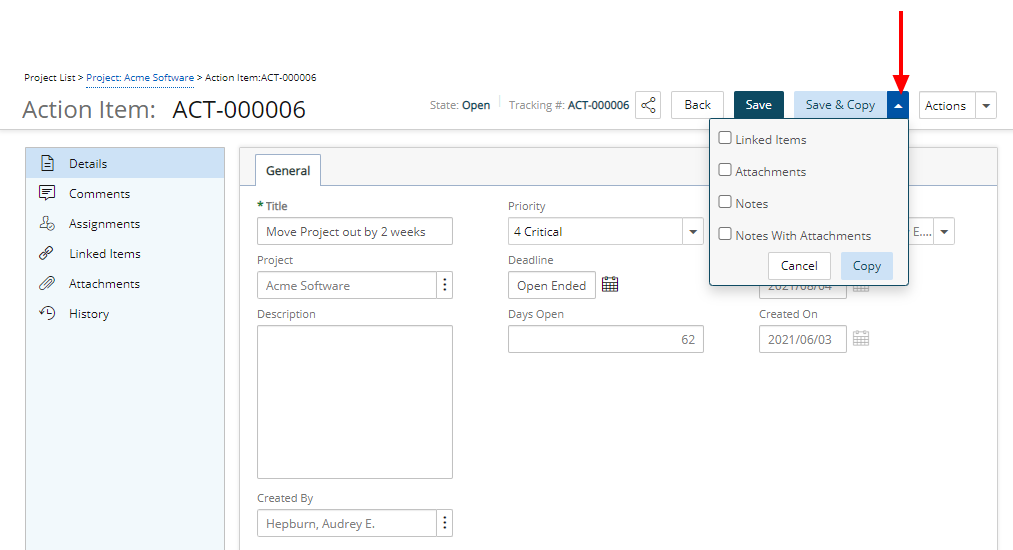
Or click the down arrow located against the Save & Copy button to copy all settings outlined above and:
- Linked Items: Choose this option to also copy all Linked Items from the source Work Item Entry.
- Attachments: Choose this option to also copy all Attachments from the source Work Item Entry.
- Notes: Choose this option to also copy all Notes from the source Work Item Entry.
- Notes With Attachments: Choose this option to also copy all Notes With Attachments from the source Work Item Entry.