Project owners can add participants to a project and assign those participants to roles. Once added to the project, owners can assign the participants to individual files, questions in an RFP file, or a review and approval assignment for all content in the project. Participants can be assigned to different roles in individual assignments. Participants must be licensed Upland Qvidian users. Upland Qvidian users who have the "Manage Projects Created by Other Users" application permission will have full rights to all projects, regardless of whether they are assigned to the project.
The project's participants are listed in the Participants tab in the navigation panel, along with the number of their assignments and a status bar that displays their progress in the assignments. You can hover over a participant's name or initials to view their location and contact information. Click the View Detail  icon to see more information about a participant's assignments. The project owner is indicated by the Owner
  icon.
icon.

Example of the Participants tab in the navigation panel.
Working with the participants tab
- Find specific participants by entering text into the Find participants.... bar and clicking the Search
 icon or Enter.
- Click the Add Participants
 icon on the Participants tab. The "Add Participants" dialog box displays.
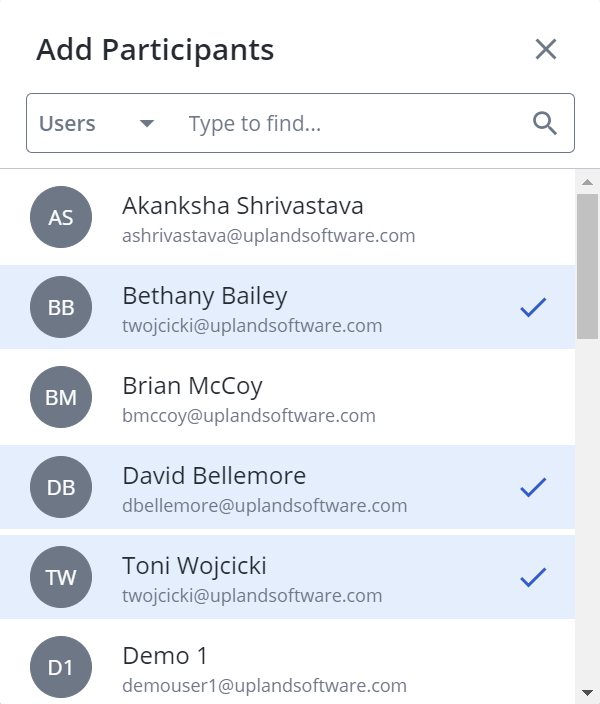
 - Locate the users to add to the project. You can narrow the results with the "Users" dropdown filter:
- Users: As the default in the Users dropdown menu, it allows project owners to search among all available users to add participants.
- Participants: Project owners can refine their view to only show existing project participants.
- Teams: Project owners can add entire teams of users as participants.
- Enter two or more letters into the search bar to locate a specific User, Participant, or Team. Results begin populating below the search bar once text is entered.
- Click the desired User, Participant, or Team to add them to the project. Once added, a blue checkmark appears.
- Click the X icon to exit out of the "Add Participants" dialog and save any changes.
Permissioned users can save groups of participants to Teams. This allows commonly grouped participants to be added to projects all at once, rather than adding each participant manually.
- Click the Save Team
 icon on the Participants tab. The "Save Participants as a Team" dialog displays.
 - Enter a Team Name.
- Enter a Team Description.
- Click Save.
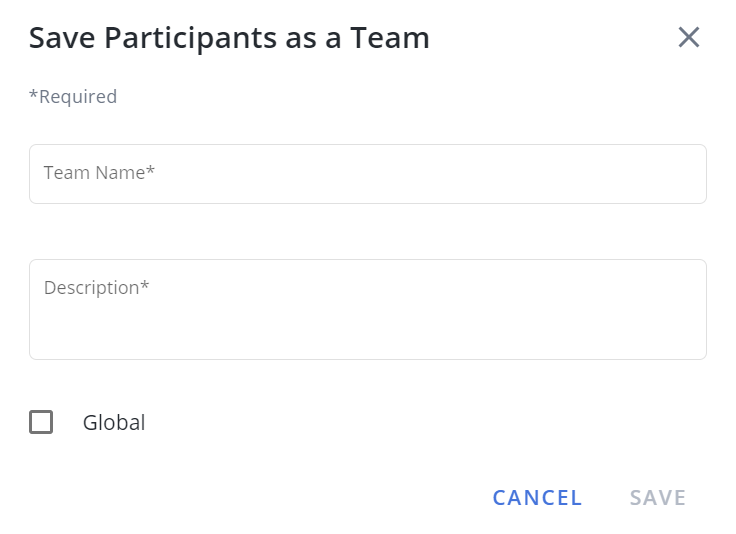
Note: If appropriately permissioned, select the Global checkbox to make the teams you create available to all other users in your organization.
- Click the Export Participant Summary
 icon. The "Export Participants Report" dialog will display.
 - Enter a File Name.
- Click Export.
Manage participants
Depending on your permissions, you can reassign remaining tasks, remove participants from a project, or grant/remove owner permissions.
You can select another participant to whom you will reassign all remaining tasks. For example, if a key participant leaves on vacation or becomes overburdened.
- Click the More Options
 menu on the desired participant.
 - Select Reassign Remaining Tasks. The "Reassign Remaining Tasks" panel appears.
- Click the Add Assignees button. The "Add Assignees" dialog appears.
- Narrow down the list by selecting: Users, Participants, or Teams from the dropdown menu.
- Enter two or more letters into the search bar to locate a specific user. Results begin populating below the search bar once text is entered.
- Click the desired user. Once selected, a blue checkmark appears.
- Click the X icon to exit out of the "Add Assignees" dialog and save any changes.
- Click Reassign.

Note: The Users option is only displayed if the "Allow users to assign tasks to users outside of the project" user permission has been enabled. Once a user outside the project is assigned, they are automatically added as a project Participant.
Note: After reassigning tasks, Qvidian automatically emails the new assignees and the project owner.
Project owners can remove a participant from the project and delete their assigned tasks. Any assignments with tasks assigned to the remaining participants will stay active.
Example: A project owner may use Remove if one out of three reviewers on an assignment becomes unavailable, and the assignment can be completed by any of the three reviewers. In this case, the project manager can remove the unavailable reviewer, and either of the remaining reviewers will still be able to complete the assignment.
- Click the More Options menu on the desired participant.
- Select Remove from Project. The "Remove Participant from Project" dialog appears.
- Click Yes, Continue.
Note: You can also remove participants when using the Add Participants method by clicking on a participant that has a blue checkmark.
The initial project owner can grant other
participants owner permissions (and remove them). Everyone with owner permission can manage the project together. Project owners (indicated by the Project Owner  icon) have full rights to the project. They will be able to assign sections, subsections, files, and RFP questions, modify the uploaded questionnaires, send notifications, manage all properties related to the project, and build the package.
- Click the More Options menu on the desired participant.
- To grant owner permissions, select Grant Owner Permission. The Project Owner icon will appear next to the participants initials.
- To remove owner permissions, Select Remove Owner Permission.
Note: Project owners may remove their owner permission if there is at least one remaining active owner.
Manage participant tasks
Depending on task status, you may complete your own tasks, re-open closed tasks, and view workflows. Project owners can complete and re-open tasks on behalf of other participants.
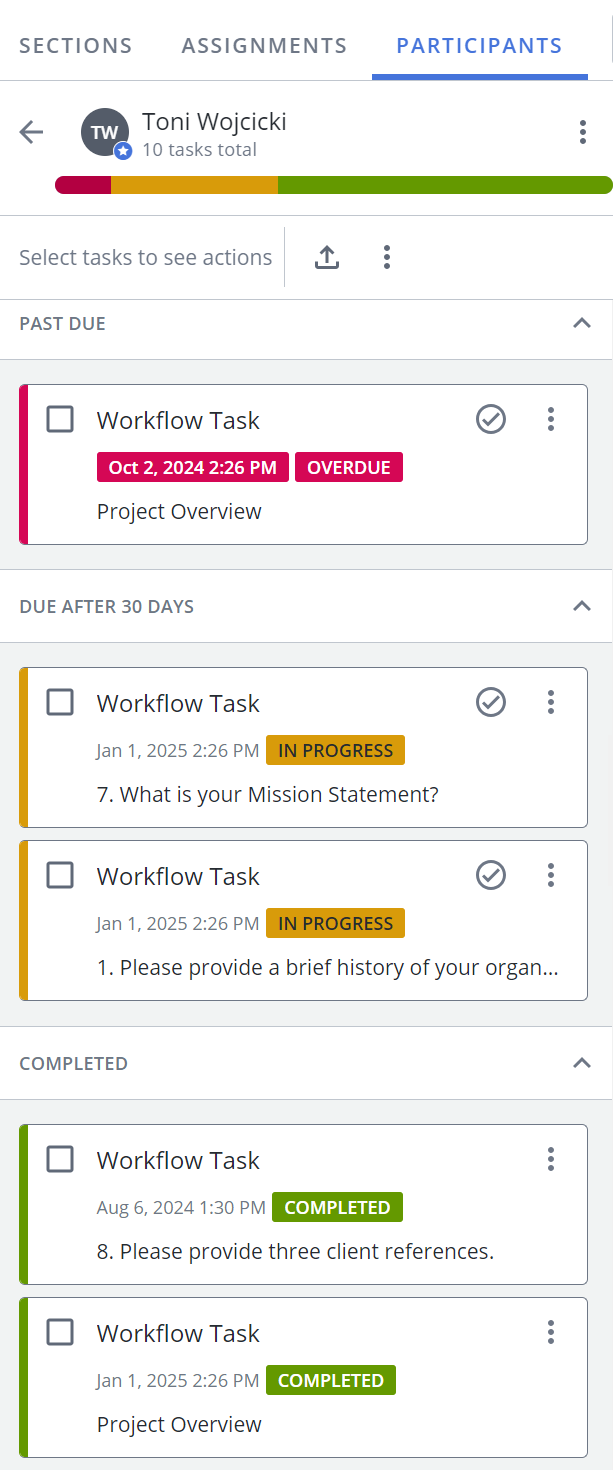
Example of an expanded Project Participant with the following task statuses: Past Due, Due After 30 Days, and Completed.
Participant status bar colors:
- Yellow: In progress
- Red: Past due
- Green: Complete

In the example above, the participant is also the project owner. Of the 4 total tasks, 1 is past due, 3 are in progress, and 6 are complete.
A list of a user’s assigned tasks, found below the status bar are grouped in order of due date (e.g., due next 30 days, due after 30 days, etc.).
- Click the Participants tab and locate the desired participant.
- Click the View Detail
 icon for a participant. The participant's task details will display in the panel.
 - Tasks are grouped into sections: Past Due, Due After 30 Days, Completed. View the participant's task status:
- Past Due: Tasks that are future and "Past Due" will be displayed in this section. Any tasks that are current and "Past Due" will have a red line on the left side and a red "Overdue" icon will appear on the task card.
- Due After 30 Days: Tasks that are future and "Due After 30 Days" will be displayed in this section. Any tasks that are current and "Due After 30 Days" will have a yellow line on the left side and a yellow "In progress" icon will appear on the task card.
- Completed: Tasks that are future and "Completed" will be displayed in this section. Any tasks that are current and "Completed" will have a green line on the left side and a green "Completed" icon will appear on the task card.
You can complete tasks using the Participants panel.
- Click the Participants tab and locate the desired participant.
- Click the View Detail icon for a participant. The participant's task details will display in the panel.
- Click the task card to view the task within the project.
- Click the Complete
 icon or select Complete Task from the More Options menu . For more information, see Complete your project assignments.
If you are the project owner or have permission to manage projects owned by other users, you can save time and clicks by marking more than one task complete at a time.
- Click the Participants tab and locate the desired participant.
- Click the View Detail icon for a participant. The participant's task details will display in the panel.
- Select all the tasks you would like to mark complete using one of the following methods:
- Select the checkboxes of the desired tasks.
- To select all tasks, click the Select All option from the More menu.
- Hold down the CTRL key on a PC or the CMD key on a Mac, click each task.
- While holding down the Shift key, click one task, and then click another task below it to select all tasks in between.
- Click the Bulk Complete
 icon.
icon.
You can re-open an individual task that has already been completed.
- Click the Participants tab and locate the desired participant.
- Click the View Detail icon for a participant. The participant's task details will display in the panel.
- Click the More Options menu and select Re-open Task. For more information, see Complete your project assignments.
You can view an individual task's workflow.
- Click the Participants tab and locate the desired participant.
- Click the View Detail icon for a participant. The participant's task details will display in the panel.
- Click the More Options menu and select View Workflow. For more information, see Create and edit project assignments .
Next tasks
You can do any of the following to continue working on your project:
- Upload files to your Instructional and Related Files section, File List subsection.
- Prepare and upload a questionnaire to your RFP Project subsection.
- Preview Static Content and make content selections in the project's sections and subsections.
- Create assignments.
- When all the sections are complete, you can build the package.