When creating a new Budget Notification within a Project, you can opt to use a pre-defined Template by clicking the “New from Templates” link, which displays the Budget Template List that lists the Budget Notifications created at the system level.
This article details how to create a Budget Notification Template at the system level that can later be used when creating a Project Budget Notification or a Task Budget Notification.
Creating a Budget Notification Template at the System Level
- From the Icon Bar click Setup
 .
. - From the Navigation Menu click Notifications to access the Notification List page.
- From the Notification Type options, select Budget Notifications.
- From the Budget Notifications List page click New.
- Enter a descriptive Name for your Budget Notification Template.
- Enter the Subject line of the Notification.
- Select the Language (English or French).
- Select Send Notification to send a notification when the criteria is met. Then select either Always to send a notification every time the criteria is met or Repeat and specify the number of times the notification should be sent.
- Choose Suspend <Project/Task> if the project or task should be suspended when the notification criteria are met.
- Message: Enter the required message within the Message box.
You can customize the message body using the Rich Text Editor. For formatting options and features, see Rich Text Editor.
To insert parameters, simply type the percentage sign (%) which triggers a suggested list of available Parameter(s). As you type, the list is filtered to narrow down the options, allowing you to pick and insert the required Parameter into your Message body. For a complete list of available parameters refer to Budget Notification Parameters.
Note: When applying formatting to Parameters, the entire parameter name including percentage signs (%) must be formatted.
- Click Save to apply your changes.
Note: Upon saving the notification, note that the Recipients and Criteria tabs are now available to you.
- Navigate to the Recipients tab where you can define which users receive the notification.
- Click New to start the process of creating a Recipient.
- Select a Message Type from the following available options: To, Cc and Bcc.
- Then click the Notify list and choose one of these options. Note that depending on your selection, additional fields may be displayed.
- Project Manager: When selected, the notification will be sent to the respective Project Manager.
- Group Manager: When selected, a new Select Group box is displayed. Clicking the Select Group browse button opens the Group List page where you can select the required Groups.
Note: Suspended Groups are hidden by default on the Groups List page, allowing you to focus on active groups. If needed, you can check the Show Suspended Groups box to display the suspended Groups. In this case, they will appear in red and will be non-selectable.
- Portfolio Manager: When selected, the notification will be sent to the respective Portfolio Manager.
- Program Manager: When selected, the notification will be sent to the respective Program Manager.
- User: When selected, the With box is displayed. The 'With' field has the following options:
- Name: When selected, you can click the browse button to open the User List page where you can make a selection from the available Users. Selected Users will receive the notification.
- Title: When selected, you can click the browse button to open the Title List page where you can make a selection from the available Titles. Users with the selected title receive the notification.
- Timesheet Role: When selected, you can click the browse button to open the Timesheet Roles page where you can make a selection from the available Timesheet Roles. Users with the selected Timesheet Roles receive the notification.
- Expense Role: When selected, you can click the browse button to open the Expense Roles page where you can make a selection from the available Expense Roles. Users with the selected Expense Roles receive the notification.
- Invoice Role: When selected, you can click the browse button to open the Invoice Roles page where you can make a selection from the available Invoice Roles. Users with the selected Invoice Roles receive the notification.
- Custom: Selecting Custom allows you to enter a recipient Email address and choose the required Language.
- Click Save to apply your changes.
Or
Click the Save & New button to save your changes and immortality open the New Recipient dialog box, ready for an entirely new entry, with the options and boxes reverting to default values.
- Navigate to the Criteria tab where you can define the notification trigger criteria.
- Budget: Available options are Baseline and Current.
- Budget Type: Budget Type on which the criteria is based. Available options are: Time, Cost, Billable and Non-Billable.
- Budget Sub-type: Budget Sub-type on which the criteria is based. The available options will differ based on the Budget Type selected above.
- For Time Budget Type the available Budget Sub-types are: Billable, Non-Billable and Total.
- For Cost, Billable and Non-Billable Budget Types the available Budget Sub-types are: Time, Expense, Charge, Product, and Total.
- Entry Status: Select the status of the entries to include: All, Completed or Approved.
- Threshold: Define the budget percentage to be reached to trigger the notification.
- To optionally apply Budget Notification Templates in bulk, go to the Associations tab. There, you can define filter conditions to target multiple projects and tasks. For further details refer to Automated Application of Budget Notifications to Projects and Tasks.
- Click Save to apply your changes.
- Click Back to return to the previous page.
Using the Budget Notification Template at the Project Level
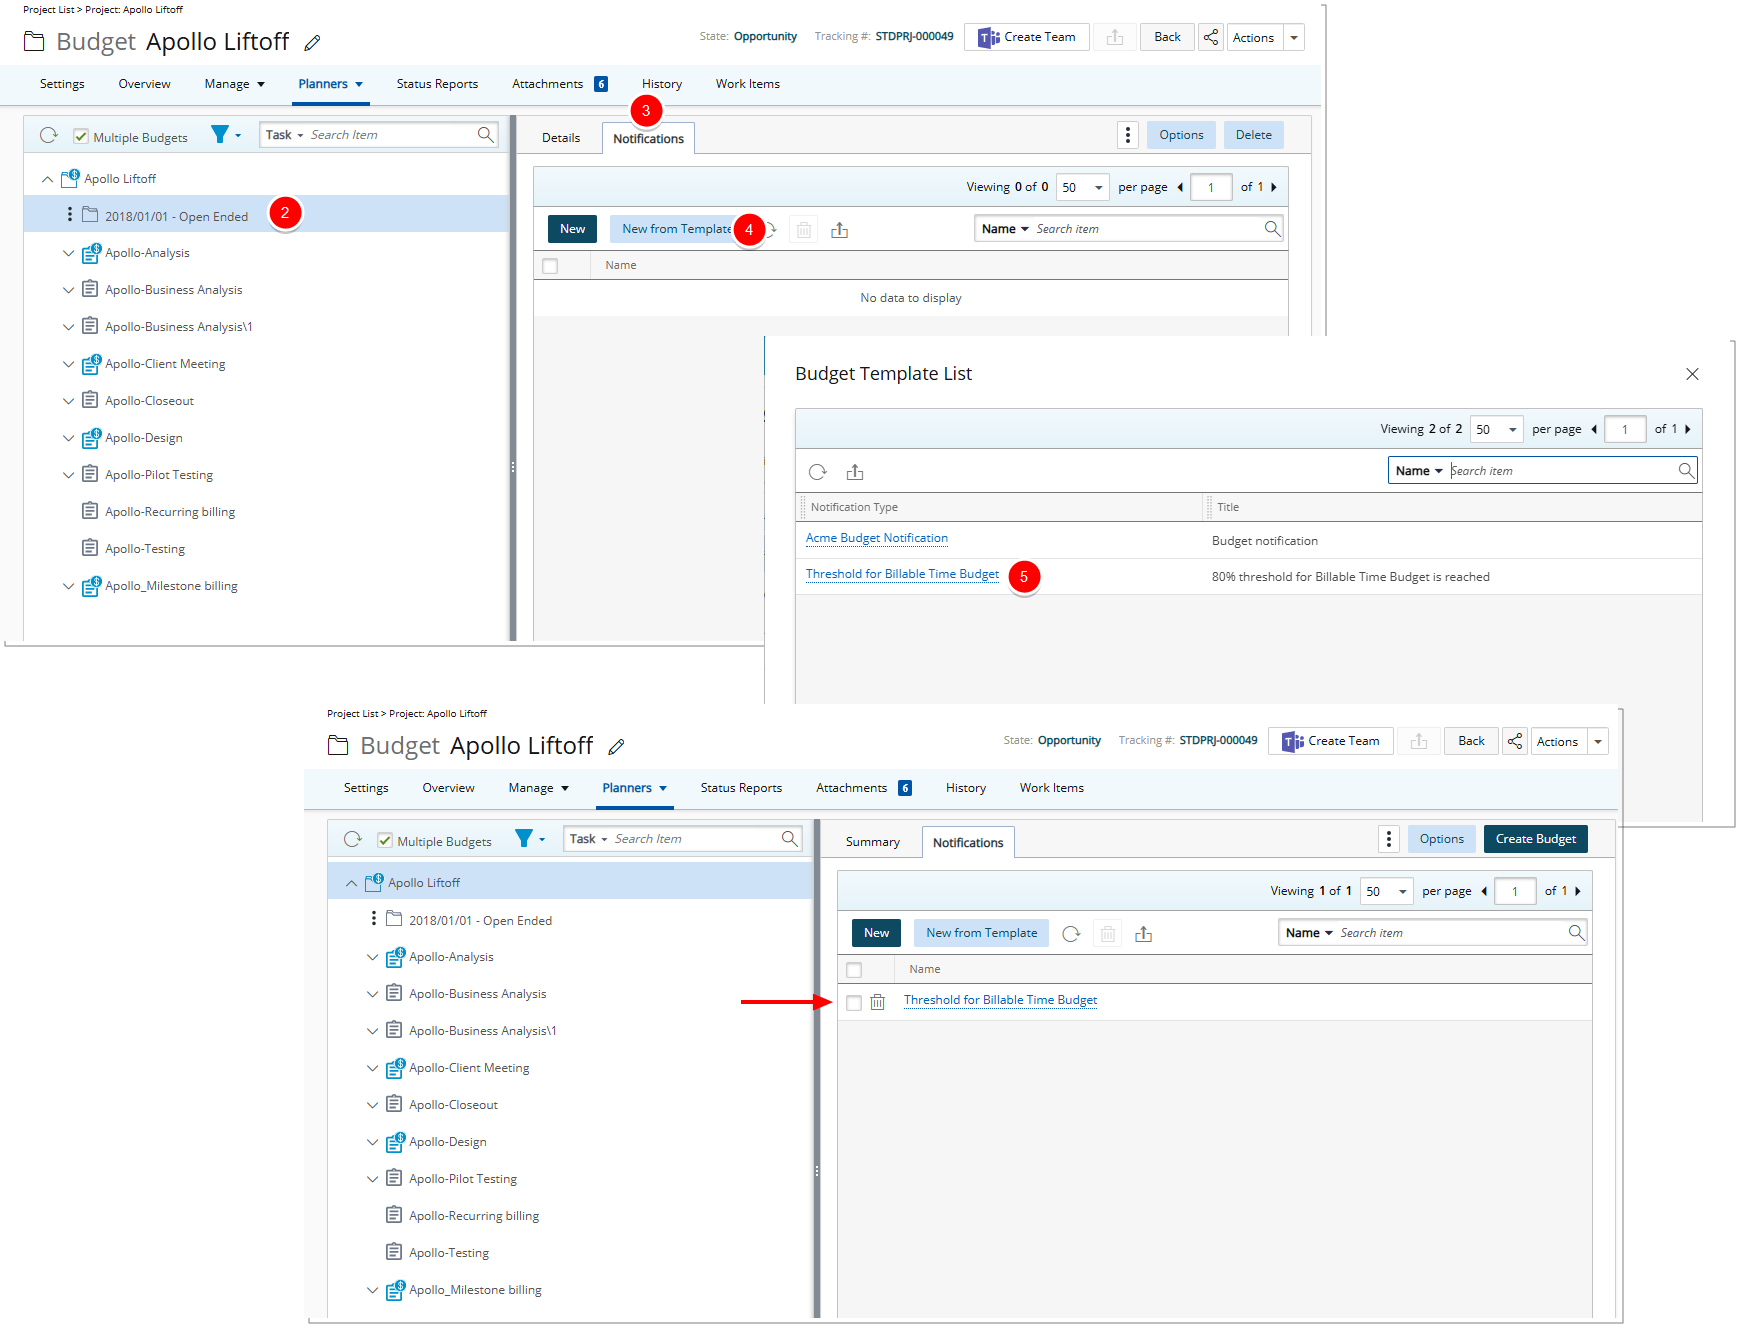
You can now navigate to a Project and use the newly created Budget notification:
From a Project Edit page.
- Hover over the Planners tab, then select Budget.
- In the left pane, select the Project Budget.
- In the right pane, go to the Notifications tab.
- Click New from Template.
- Select the desired Budget Template from the Budget Template dialog box. Note that it will appear in the Budget Notifications page. You are now using a copy of the template.
Note: You can modify the Budget Notification and customize it at the project level.