User-defined fields refer to fields not normally included in object descriptions, but may be included as needed. Although the application contains a default list of user-defined fields, you may also define new user-defined fields, as the organization requires.
This article details how to associate User Defined Fields.
Note: Creating user-defined fields for all PSA entities is the same, regardless of which module or page of PSA that you create UDFs for.
- From the Icon Bar click Setup
 .
. - From the Navigation Menu click Organization.
- From the menu click System.
- From the Organization System page, click the User Defined Fields link.
- On the User Defined Fields page click New.
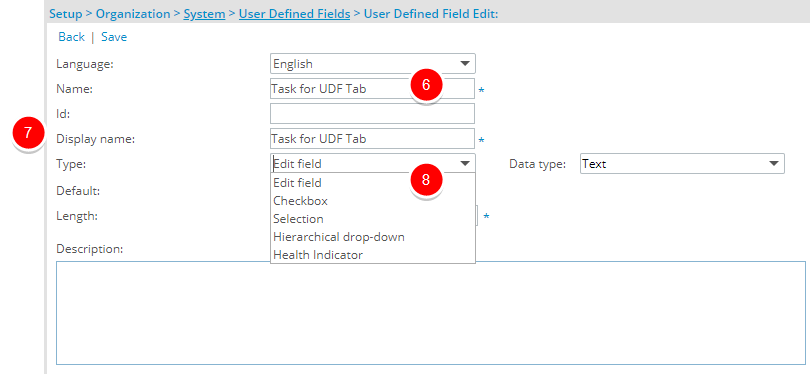
- Enter the Name*.
- Enter the Display name*.
- Click the Type list and select the UDF type you wish to create.

Note: You can enter or select additional information or properties on this page if you deem it necessary.
Tip: For more information on the Available Fields and Data Types when creating a UDF click here.
-
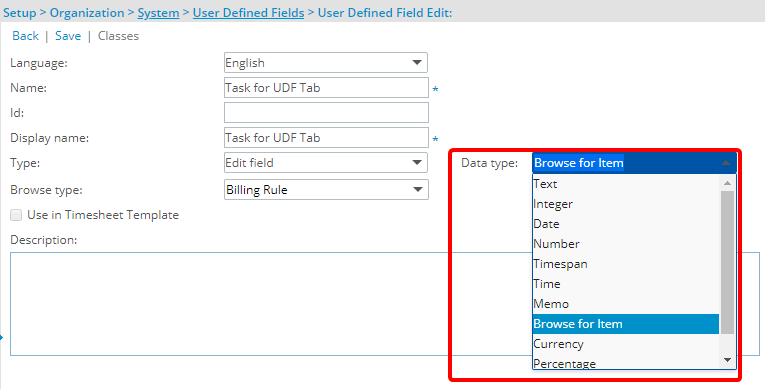
Click the Data type list and select Browse for Item.

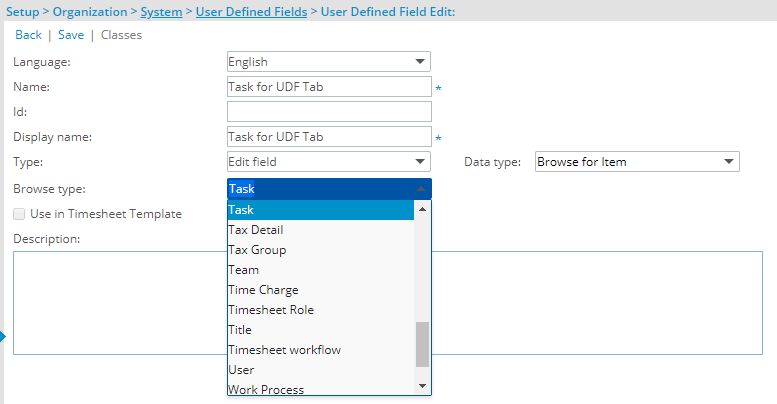
- Click the Browse type list and make a selection.

Note: Depending on your selection in Step 9 the available options in Step 10 will differ. For further details refer to Available UDF Types.
- Add or select other information you deem necessary, such as entering an Id.
- Enter any additional information in the Description. Use this field to provide additional context or guidance for the User Defined Field (UDF). When a description is entered, an info icon will appear next to the associated UDF throughout the application. Hovering over the icon displays the Description as a tool-tip and helps users better understand the purpose or usage of the field.
Note:
- The info icon will only appear if the description is not blank.
- Any leading or trailing spaces in the text are automatically removed when displayed.
- This feature applies to all UDF types except those used in Timesheets.
- Click Save to apply your changes.
- Click Back to return to the previous page.
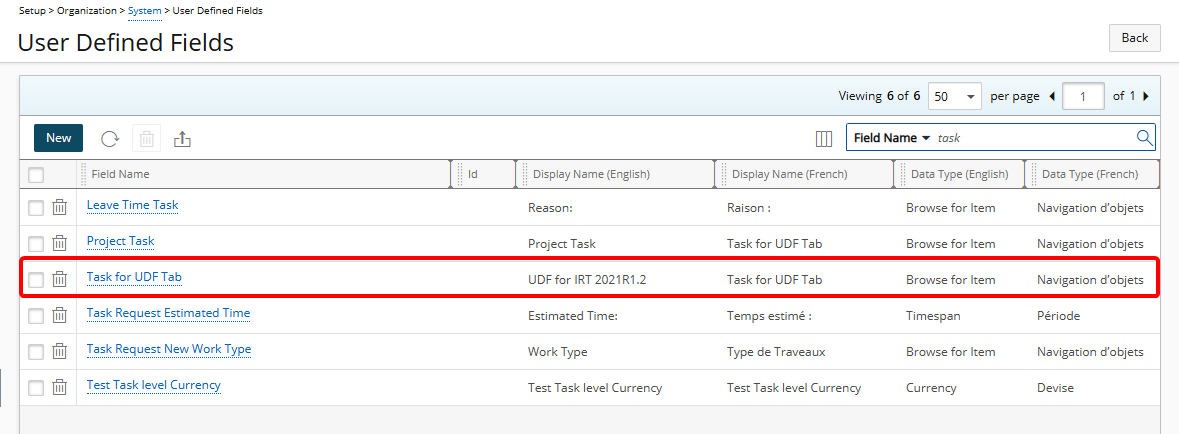
- Upon returning to the User Defined Fields list page, view the UDF you just created.
