This article details the Sort Order feature for Timesheet State Transitions, allowing administrators to assign a custom order to each Transition within the Actions selection list on the New Timesheet and Timesheet Manager pages.
Administrators with the Modify permission to Timesheet Workflows can use the Transition Ordering feature to set a specific sequence for each Transition, enhancing the organization and ease of selecting actions when using the New Timesheet and Timesheet Manager pages.
Note: This feature applies only to the New Timesheet and does not affect the API or PSA Mobile.
- From the Icon Bar click Setup
 .
. - From the Navigation Menu click Timesheet.
- From the available menu options select Timesheet Workflows.
- From the Timesheet Workflows list that displays, click the Name of the Timesheet Workflow you wish to access.
- Upon the Timesheet Workflow Edit page displaying, click the Transition ordering button.
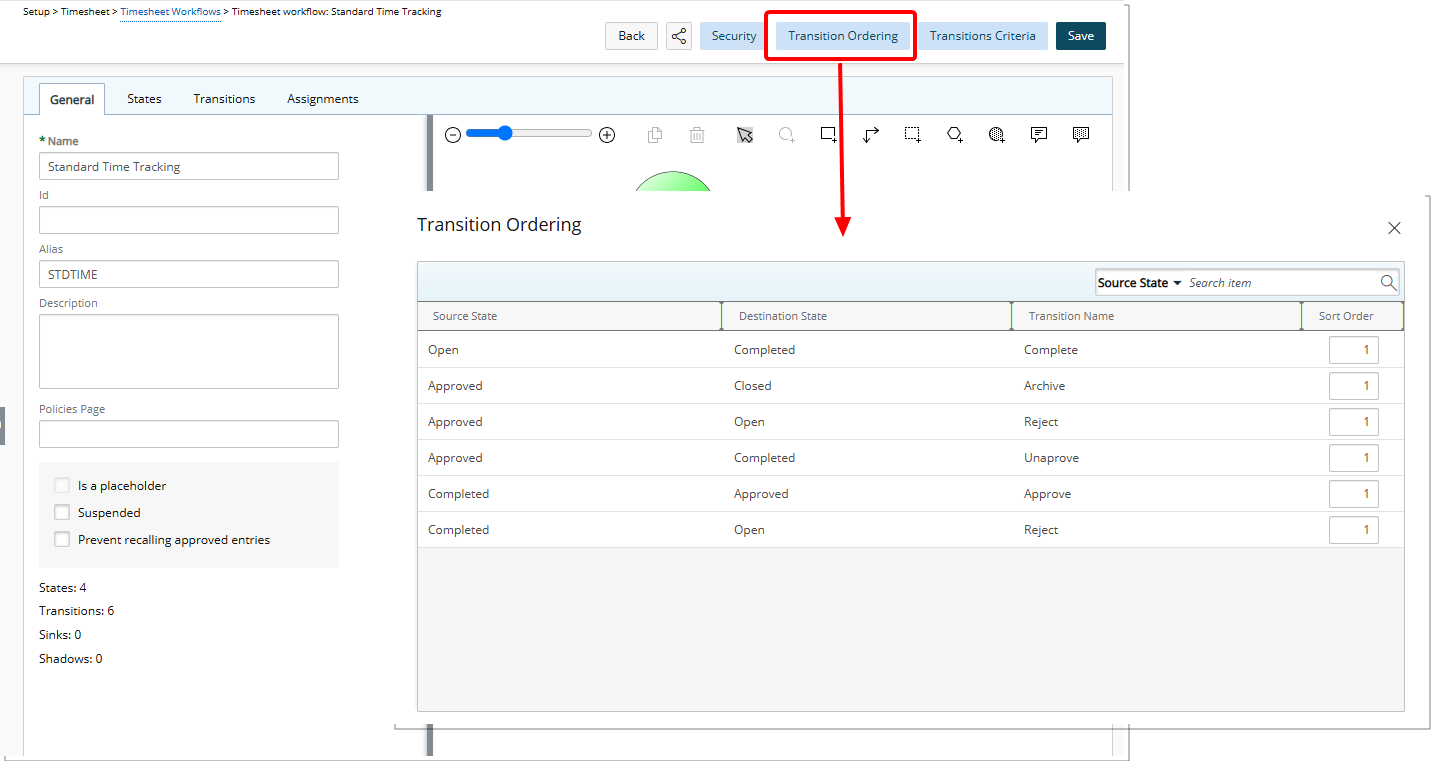
- which opens a dialog box displaying read-only columns for Source State, Destination State, and Transition Name.
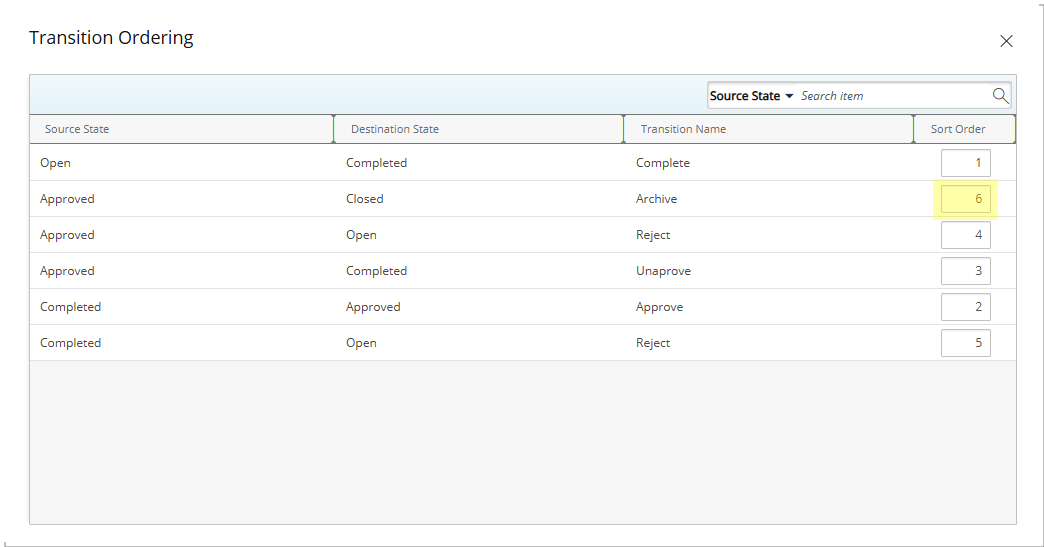
- Assign a numerical order (1 to 50) to each Transition to control its position within the Actions selection lists.
Note: If two or more transitions share the same Source State and Sort Order, they will be sorted alphabetically.
- In our example above we chose to display the Archive Transition as last item on the list.
Note: Changes to the Sort Order are saved automatically, so there is no need to Save the Workflow separately. Furthermore, modifying only the Sort Order of existing Transitions does not create a new Workflow version. However, adding a new State or Transition does.
View the impact of your changes
In our example above we chose to display the Archive Transition as last item on the list.
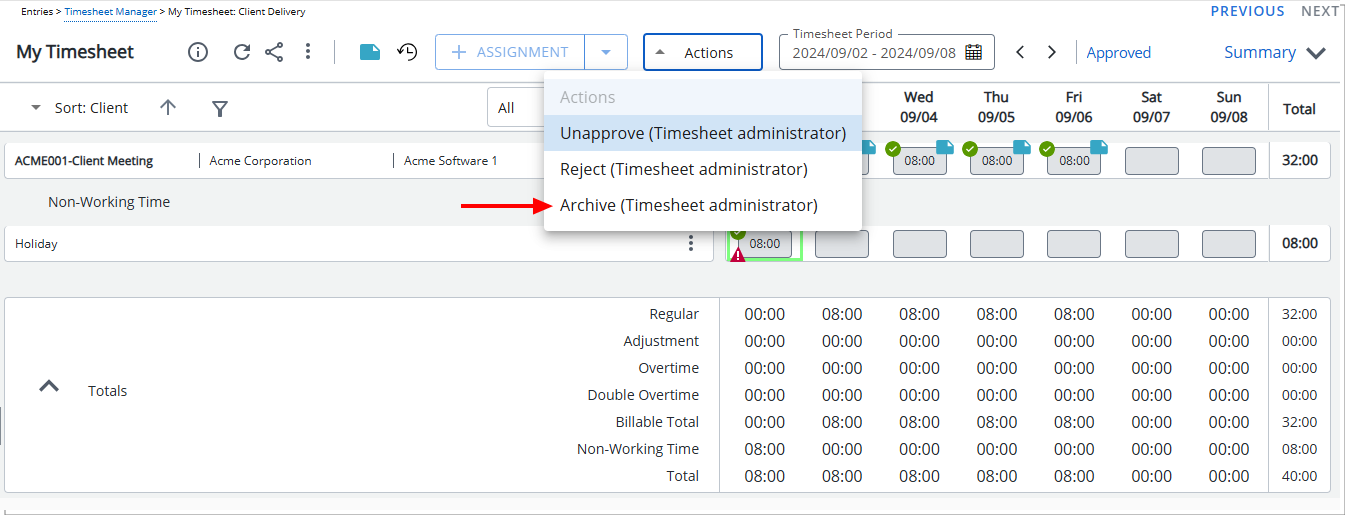
New Timesheet
The Archive Transition as last item:
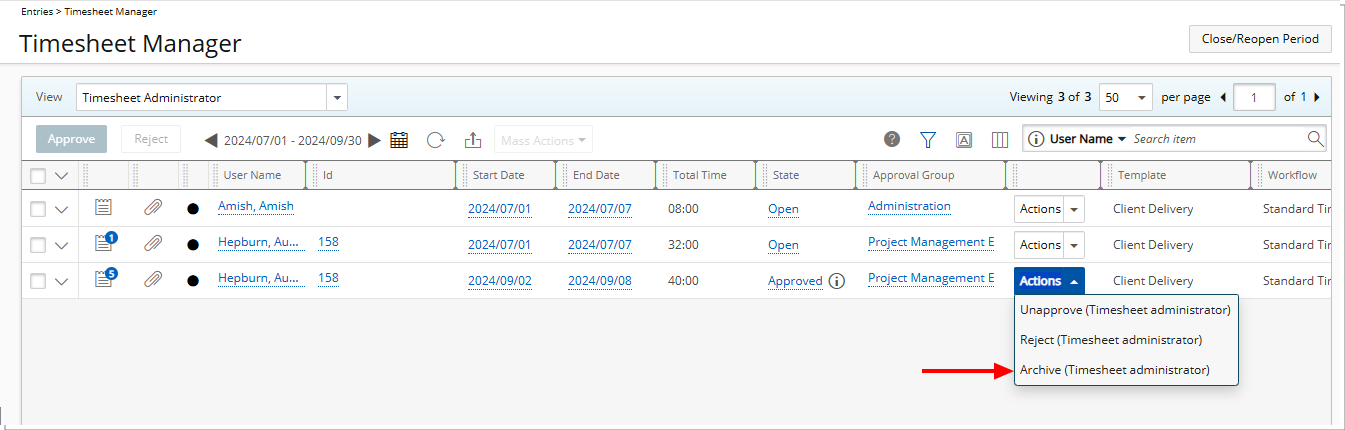
Timesheet Manager
The Archive Transition as last item: