Edit Field User Defined Fields of Type Integer, Number, Timespan, Currency and Percentage support calculations.
You can use the following User Defined Field Types in calculations:
- Edit Field User Defined Fields with Data Type Integer, Number, Timespan, Currency and Percentage which are not marked as Calculated
- Selection User Defined Fields which are not marked as Multi-value. Note that the Value entered for the Id of such User Defined Fields should be dot separated and will be used in calculations.
- Out of the Box Work Items Severity, Probability and Priority User Defined Fields.
Calculated User Defined Fields can be associated to:
- Charges
- Client Contacts
- Groups
- Leave Request
- Milestones
- Roles
- Portfolios
- Products
- Programs
- Projects
- Tasks
- Work Types
- Work Item Workflows
You must:
- Create the User Defined Fields that will be used for calculation.
- Associate them to any of the items listed above.
- Set up the calculations.
Note: Users must be granted the Can manage calculated fields permission to be able to select the, Is Calculated selection box. For further details refer to Granting the right to Manage Calculated User Defined Fields.
This article details how to create Calculated User Defined Fields.
Caution: Calculated User Defined Field changes are not audited in Project Detailed Auditing.
As an example let's create the following User Defined Fields:
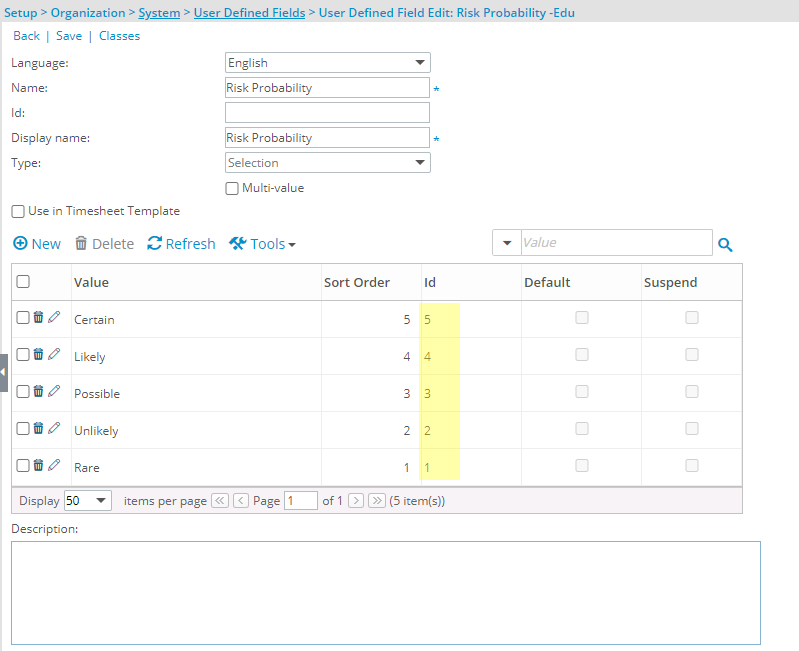
- Risk Probability: A Selection Field with the following values: Rare (1), Unlikely (2), Possible (3), Likely (4) and Certain (5)
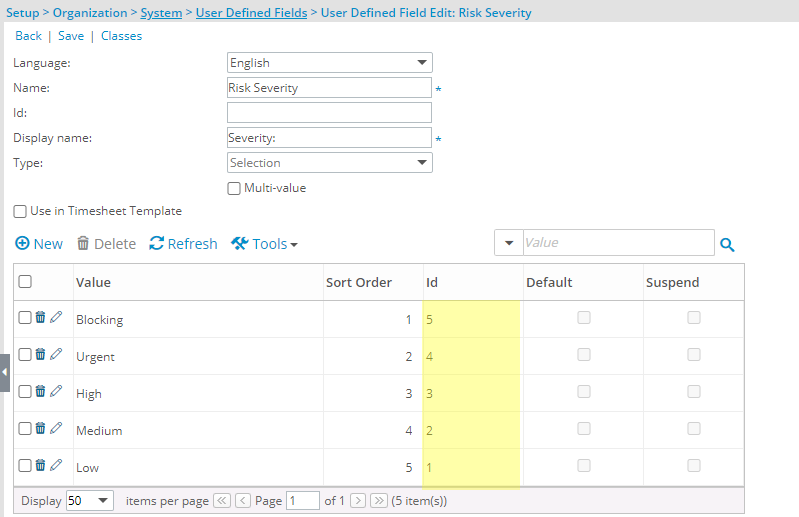
- Risk Severity: A Selection Field with the following values: Low (1), Medium (2), High (3), Urgent (4), Blocking (5)
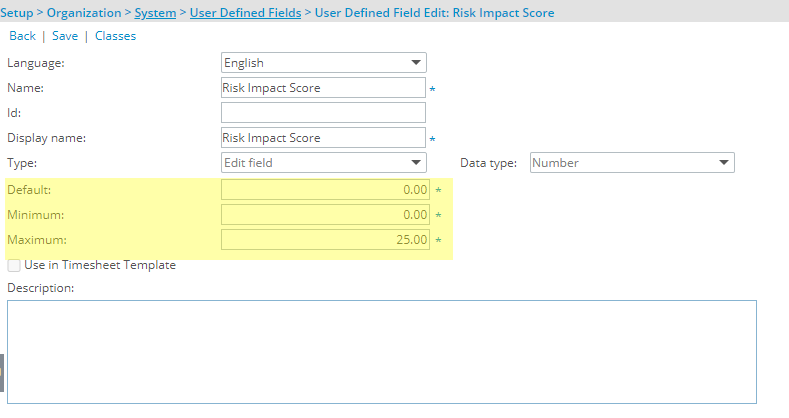
- Risk Impact Score: An Edit Field of Type Number
Then we will use the Risk Probability and Risk Severity to calculate the Risk Impact Score:
- Risk Impact Score = Risk Probability x Risk Severity
Caution: It is recommended to use the same type of UDFs for a set of calculations. As an example if you require your calculated field to be a percentage then the Fields used for the calculation must also be of type Percentage.
Create the User Defined Fields that will be used in the calculation
Note: For step by step instructions on how to create a User Defined Field, refer to Setting Up User-Defined Fields at the System Level and Available UDF Types.
Create a User Defined Field of Type Selection with the following Values and Ids:
| Value | Id |
|---|---|
| Certain | 5 |
| Likely | 4 |
| Possible | 3 |
| Unlikely | 2 |
| Rare | 1 |
Note: For the Type Selection User Defined Fields, the numeric value of the ID is used for the calculations.
Create a User Defined Field of Type Selection with the following Values and Ids:
| Value | Id |
|---|---|
| Blocking | 5 |
| Urgent | 4 |
| High | 3 |
| Medium | 2 |
| Low | 1 |
Note: For the Type Selection User Defined Fields, the numeric value of the ID is used for the calculations.
Create a User Defined Field of Type Number with the following settings:
- Default: 0.00
- Minimum: 0.00
- Maximum: 25.00
Associate the User Defined Fields to the Work Item Workflow
User Defined Field(s) must first be associated to the Work Item in order for them to be available when creating a formula.
- From the Icon Bar click Setup
 .
. - From the Navigation Menu click Work to expand the corresponding menu.
- From the Work menu items, click Work Item Workflows.
- From the Work Item Workflows list that displays, click the Name of the workflow you wish to access.
- From the Workflow Edit page, click Setup.
- Upon the Work Item Setup dialog box displaying, choose the Layout tab.
- Search for the Risk Probability User Defined Field and drag it to the Layout area. Upon the Field Properties dialog box displaying choose the Standard Type and click Save
- Search for the Risk Severity: User Defined Field and drag it to the Layout area. Upon the Field Properties dialog box displaying choose the Standard Type and click Save.
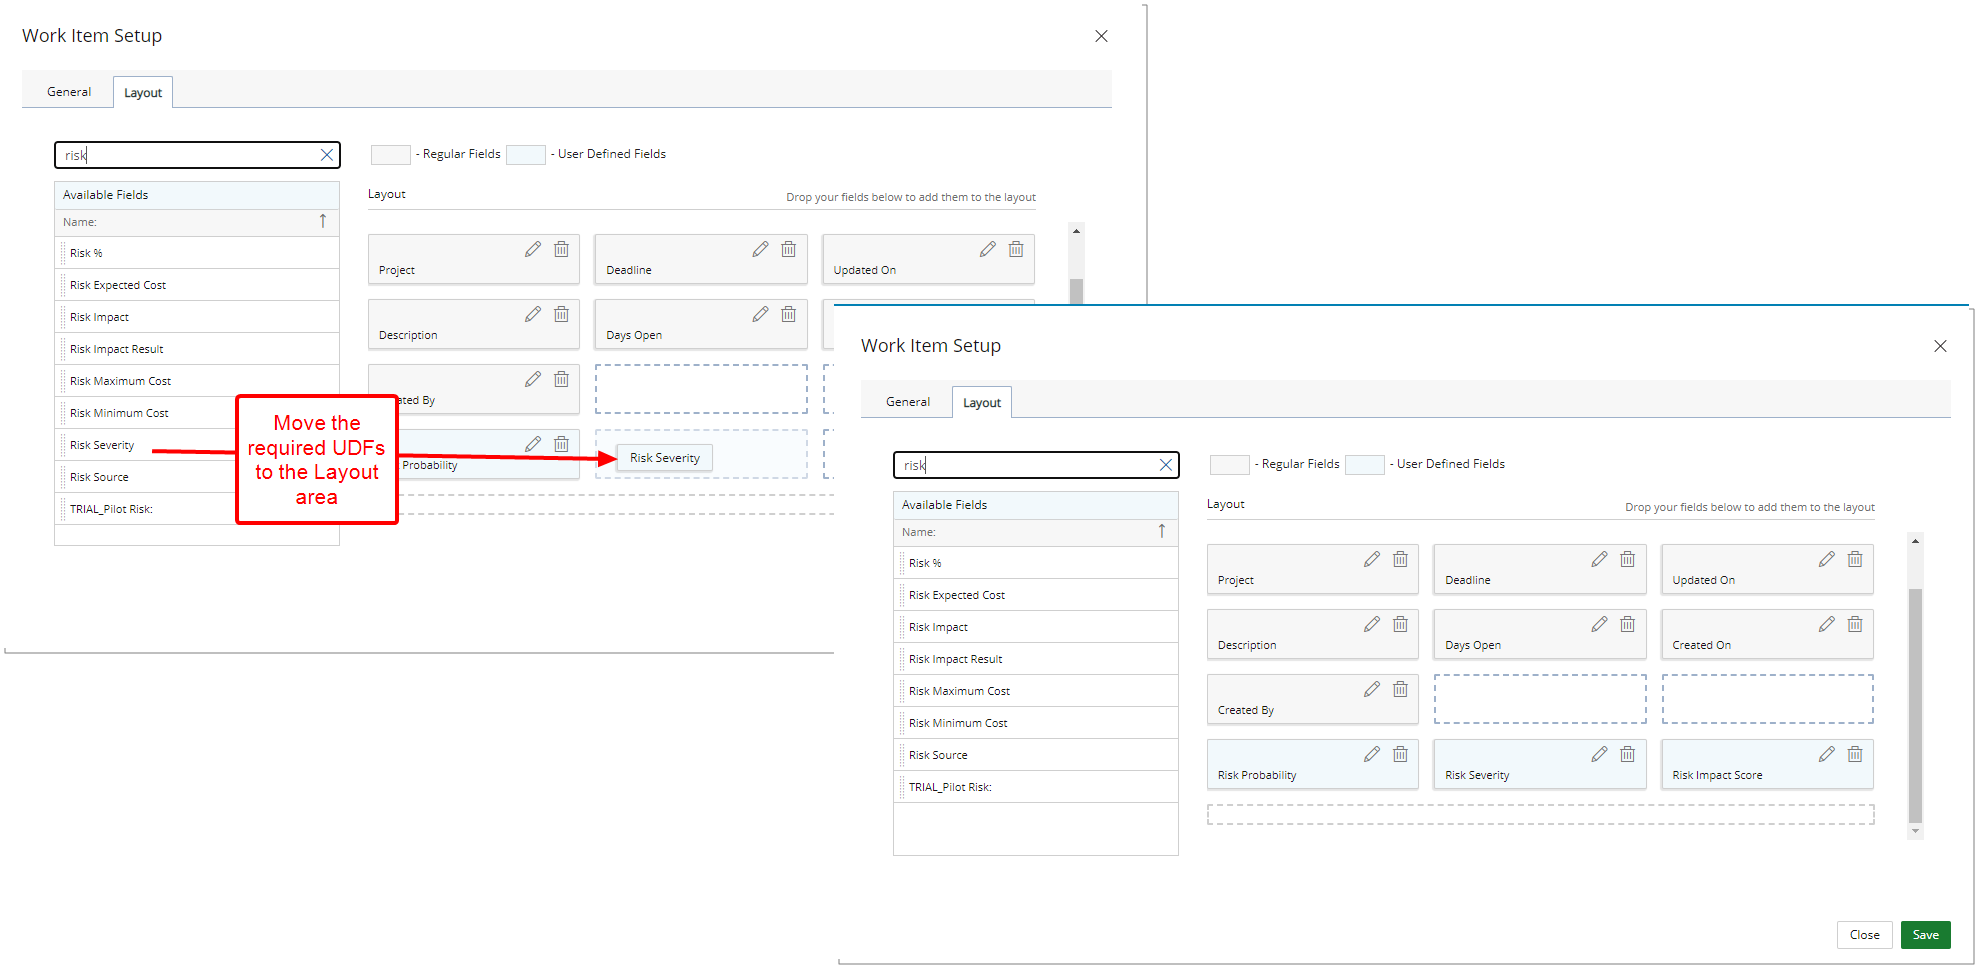
- Search for the Risk Impact Score User Defined Field and drag it to the Layout area.
Upon the Field Properties dialog box displaying choose the Calculated Type.
Note: Users must be granted the Can manage calculated fields permission to be able to select the, Is Calculated selection box. For further details refer to Granting the right to Manage Calculated User Defined Fields.
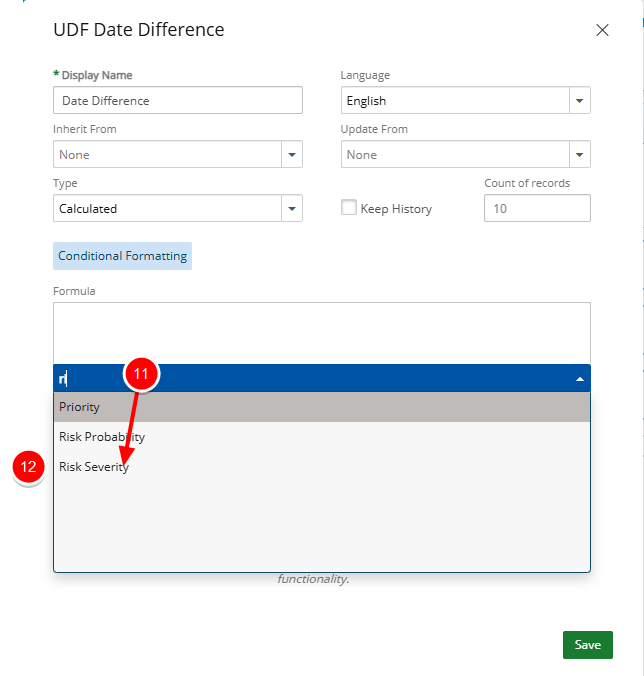
- Click the Select a field to use in the formula.
- Choose the required User Defined Field (Risk Severity) from the available options.
Note: User Defined Field(s) must first be associated to the Work Item in order for them to be available when creating a formula.
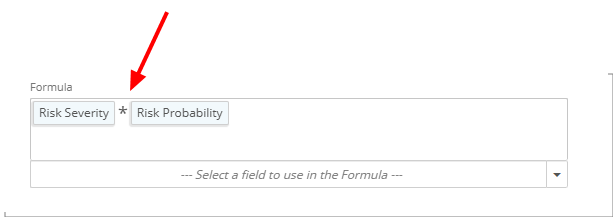
- Enter the required operator:
- * for Multiplication
- + for sum
- - for subtraction
- / for division
- () for grouping
- Repeat step 4-5 to add any other required field(s) to your formula. In our example we are going to add the Risk Probability User Defined Field.
- Select Apply Color if you would like to use color indicators for this calculated field then choose the following options:
- Include min: When selected, the min value(s) within the ranges will have a color indicator.
- Include max: When selected, the max value(s) within the ranges will have a color indicator.
- Midpoints Included in Left Range: When selected, the midpoints will have the color of the lower range otherwise the higher range is used.

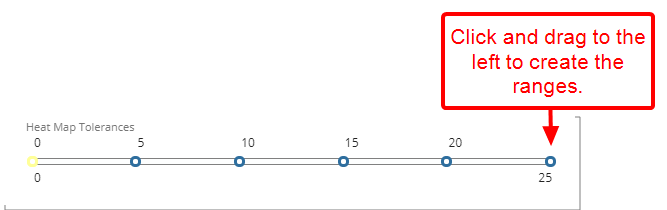
- Drag the slider located at the far right to create as many ranges as necessary. In our example we created 5 ranges:
- To configure the background color for each range, click the color bar to access and select a color form the color picker.
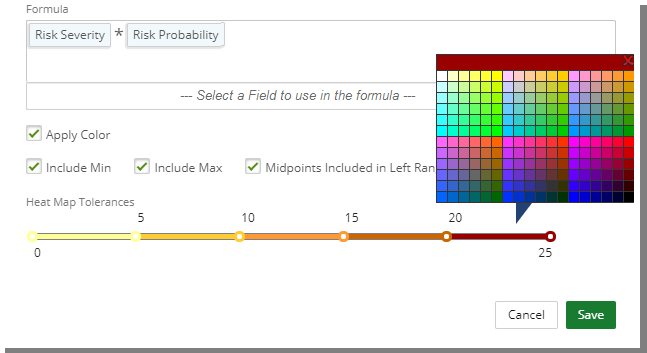
- Click Save.
- From the Work Item Setup dialog box click Close to return to the Workflow edit page.
View the impact of you changes
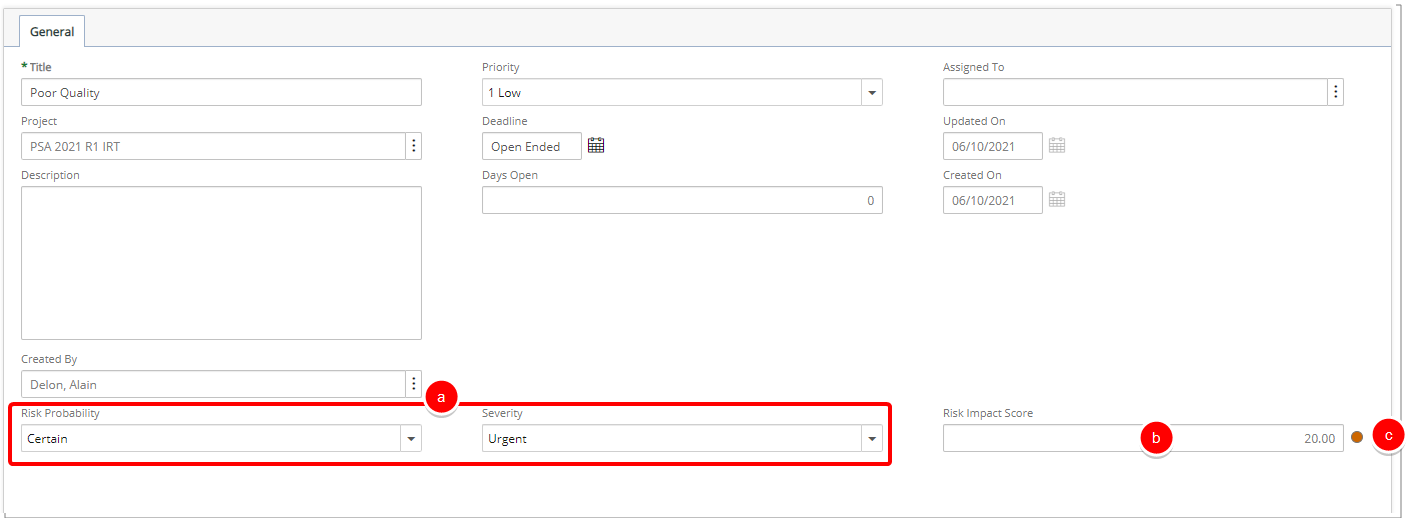
Work Item Entry editpage:
- You can choose the values for Risk Probability and Risk Severity when creating/managing the Work Item Entry.
- The Risk Impact Score is calculated automatically.
- The corresponding color indicator is displayed.
Work Item Entry list page:
From the Work Item list page you can choose to display the Risk Impact Score from the column selection and note that the corresponding value and color indicator is displayed with the table.

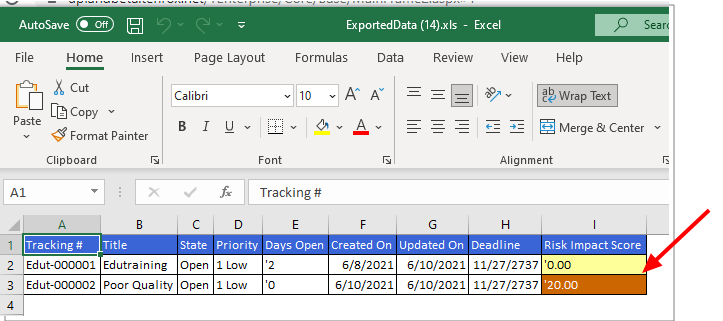
When Exporting to Excel:
When exporting the list to Excel the cell background of the calculated field reflects the chosen colors for each range.