The Entry Mass Updatebutton is used to perform updates on the Attributes of Time, Expense, Money Charge and Product Entries for selected Tasks and Users within a defined date range. If any Attributes are changed and Entries exist for the Task, you will be prompted to update the Attributes for the existing Entries when saving the Task.
Note: The Entry Mass Update button is enabled only if the logged user is assigned rights to the Entry Mass Update component in their security profiles. To access the Entry Mass Update component, click Setup > Organization > System and then click the Security button. Select a security role from the list to open the Security Profile page. From the left navigation select he Setup to expand the sum items and then choose theWork option.
- From the Icon Bar click Setup
 .
. - From the Navigation Menu click Work to expand the corresponding menu.
- From the Work menu items, click Tasks.
- Click Entry Mass Update button located to the left of the Create Task button.
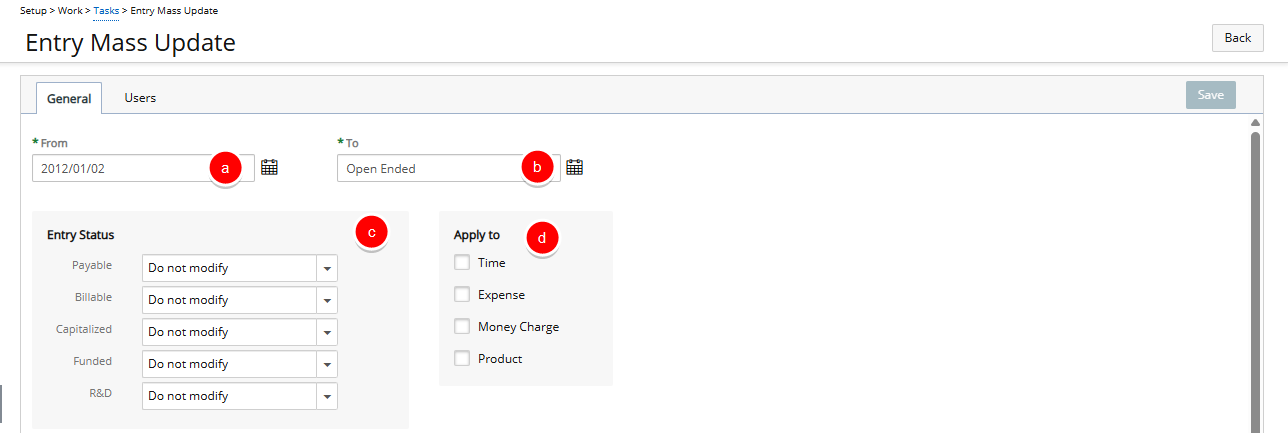
- From the General tab, specify the following information
- From: start date (inclusive) of Entries being updated; by default, the database Start Date is displayed.
- To: end date (inclusive) of Entries being updated; by default, to Open Ended is displayed.
- Entry Status: defines the status of the Billable, Payable, Capitalized, Funded and R&D Attributes; by default, Do not modify is displayed. Note: The options include Do not modify, Billable/Payable/Capitalized/Funded/R&D, Not Billable/Not Payable/Not Capitalized/Not Funded/Not R&D.
- When the Payable Attribute is set for Time Entries, updates are only performed on uncompleted and unapproved Entries that are part of an open Timesheet Period.
- When the Payable Attribute is set for Expense or Charge Entries, updates are only performed on Entries that are not included in a Payable or Payroll Batch regardless of their status (completed/approved)
- When the Billable Attribute is set for Expense, Charge or Product Entries, updates are only performed on non-invoiced Entries
- When any Attribute is set for Time Entries, updates are only performed on non-invoiced Entries
- When any Attribute is set for Expense Entries, updates are not performed on Entries created against an item of type Cash Advance
- When any Attribute is set for Time Entries, updates are not performed on Entries within a Timesheet Period that is not in a final State and has Overtime Entries
- When the billable Attribute is set for Charge Entries, updates are only performed on Charge Entries that are not generated from a milestone billing rule, a recurring billing rule or a Charge marked as Use for Unearned Revenue
- When the billable Attribute is set for Time Entries, updates are not performed for Entries exceeding the enforced Billable or Non-billable Assignment Budget Time
- When any Attribute is set for Expense Entries, updates are not performed for Entries exceeding the enforced Expense Limits
- When any Attribute is set for Expense, Charge or Product Entries, updates are not performed for uncompleted and unapproved Entries that are created using an item that is not allowed by the Task budget restrictions
- Apply to: defines the type of Entries that are updated, options include:
- Time: defines whether or not Time Entries are updated
- Expense: defines whether or not the Expense Entries are updated
- Money Charge: defines whether or not Charge Entries are updated
- Product: defines whether or not Product Entries are updated. Note: If no Time, Expense, Money Charge and Product licenses exist, then the Time, Expense, Money Charge and Product boxes are not displayed.
- Search for Tasks by Task Name, ID or Project Name.
- The left grid displays all the Tasks in the system within the logged user’s scope. Select the Tasks from the list of available Task.
- Click the arrow to add them to the selected Tasks list.
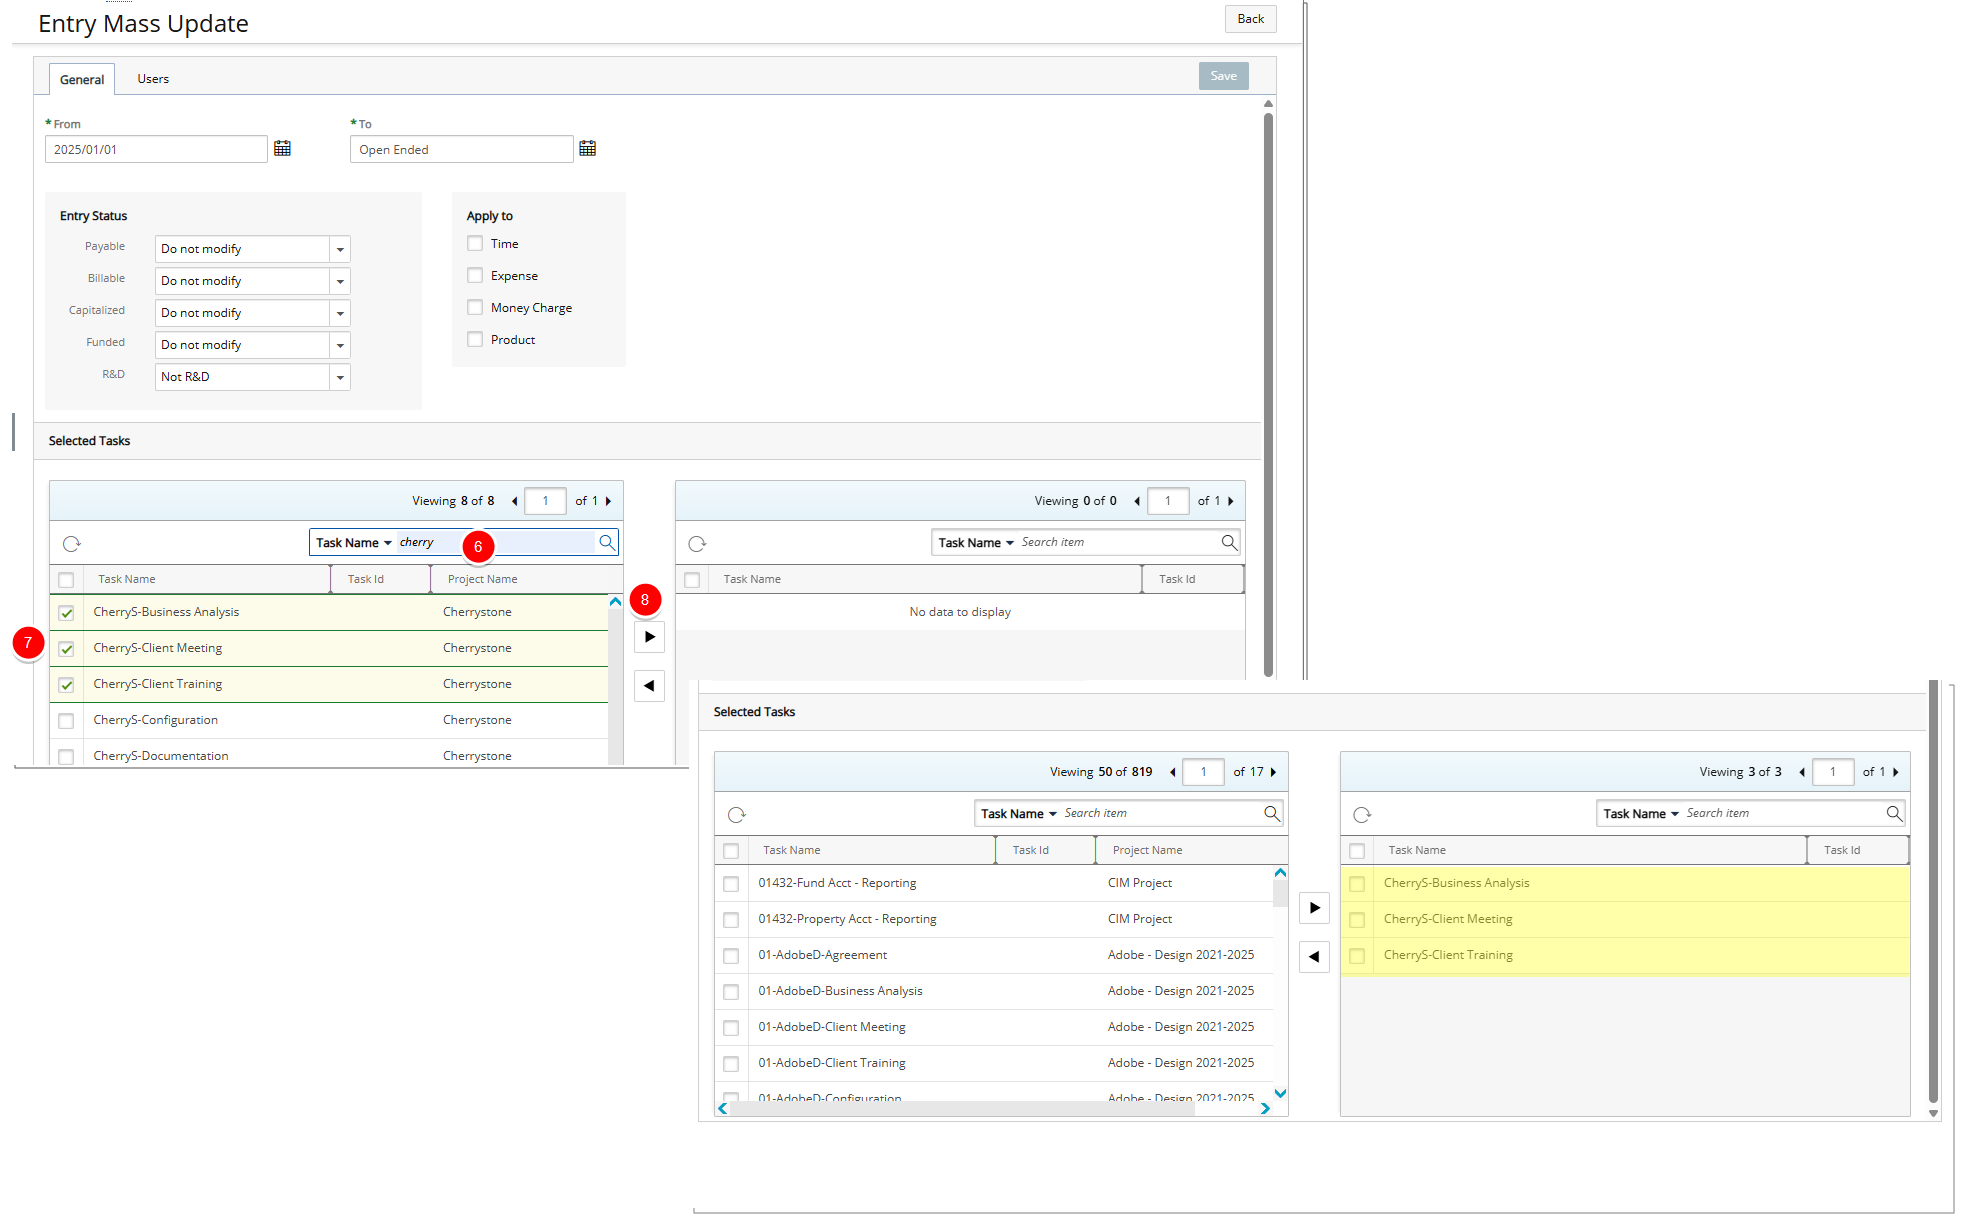
- Click the Save link to apply the new Attributes to the selected Entries.
Note: The Save link is disabled if no Tasks or Entry types are selected, or all Attributes are set to Do not modify.
- Select Users (Optional):
- Search for User(s) by User Name or ID.
- The left grid displays all the Users in the system within the logged user’s scope. Select the Tasks from the list of available Task.
- Click the arrow to add them to the selected Users list.
- Click Save to apply the new Attributes to the selected Entries.
- If no Users are selected, the update applies for all Entries against the selected Tasks (for all users).
- If users are selected, the update applies only for the Entries against the selected Tasks that are originated by the selected users.
Note: The Apply link is disabled if no Tasks or Entry types are selected, or all Attributes are set to Do not modify.
- If Time is selected, you will be prompted to click Yes to continue with the update or No to end the update action; by updating the Time Entries, a loss of Time Entry data may occur
- If all Entries are updated successfully, a message is displayed that confirms the successful update.
- If any errors occur during the update, the system continues to update the remaining Entries.
- If any Entries are not updated, a list of all the Entries that were not updated is displayed with the reasons for the errors; the errors can be copied by clicking Copy to clipboard.