By default the following Columns are displayed within the Task list page: Name, Id, Planned Start Date, Planned End Date and Project.
You can manage these through Column Selection ![]() and define which columns you wish to have displayed on the list page. In addition to any User Defined Fields associated to Tasks, you can choose to add: Client, Description, Milestone, Priority, State, Synchronize with Project Planner and Work Type.
and define which columns you wish to have displayed on the list page. In addition to any User Defined Fields associated to Tasks, you can choose to add: Client, Description, Milestone, Priority, State, Synchronize with Project Planner and Work Type.
This article details how to:
- Add Columns to the Tasks list page
- Remove Columns from the Tasks list page
- Rearrange/resize columns
- Sort Columns in Ascending or Descending order
Note: The pages and/or format in which the page(s) is/are shown in this article may differ from yours as your organization may have required a different set up altogether.
Add Columns
- From the Icon Bar click Setup
 .
. - From the Navigation Menu click Work to expand the corresponding menu.
- From the Work menu items, click Tasks.
- Upon the Tasks list page displaying, click Column Selection
 button.
Tip: For a detailed list of all available Column selection options refer to the Column Selection Options | Tasks list article.
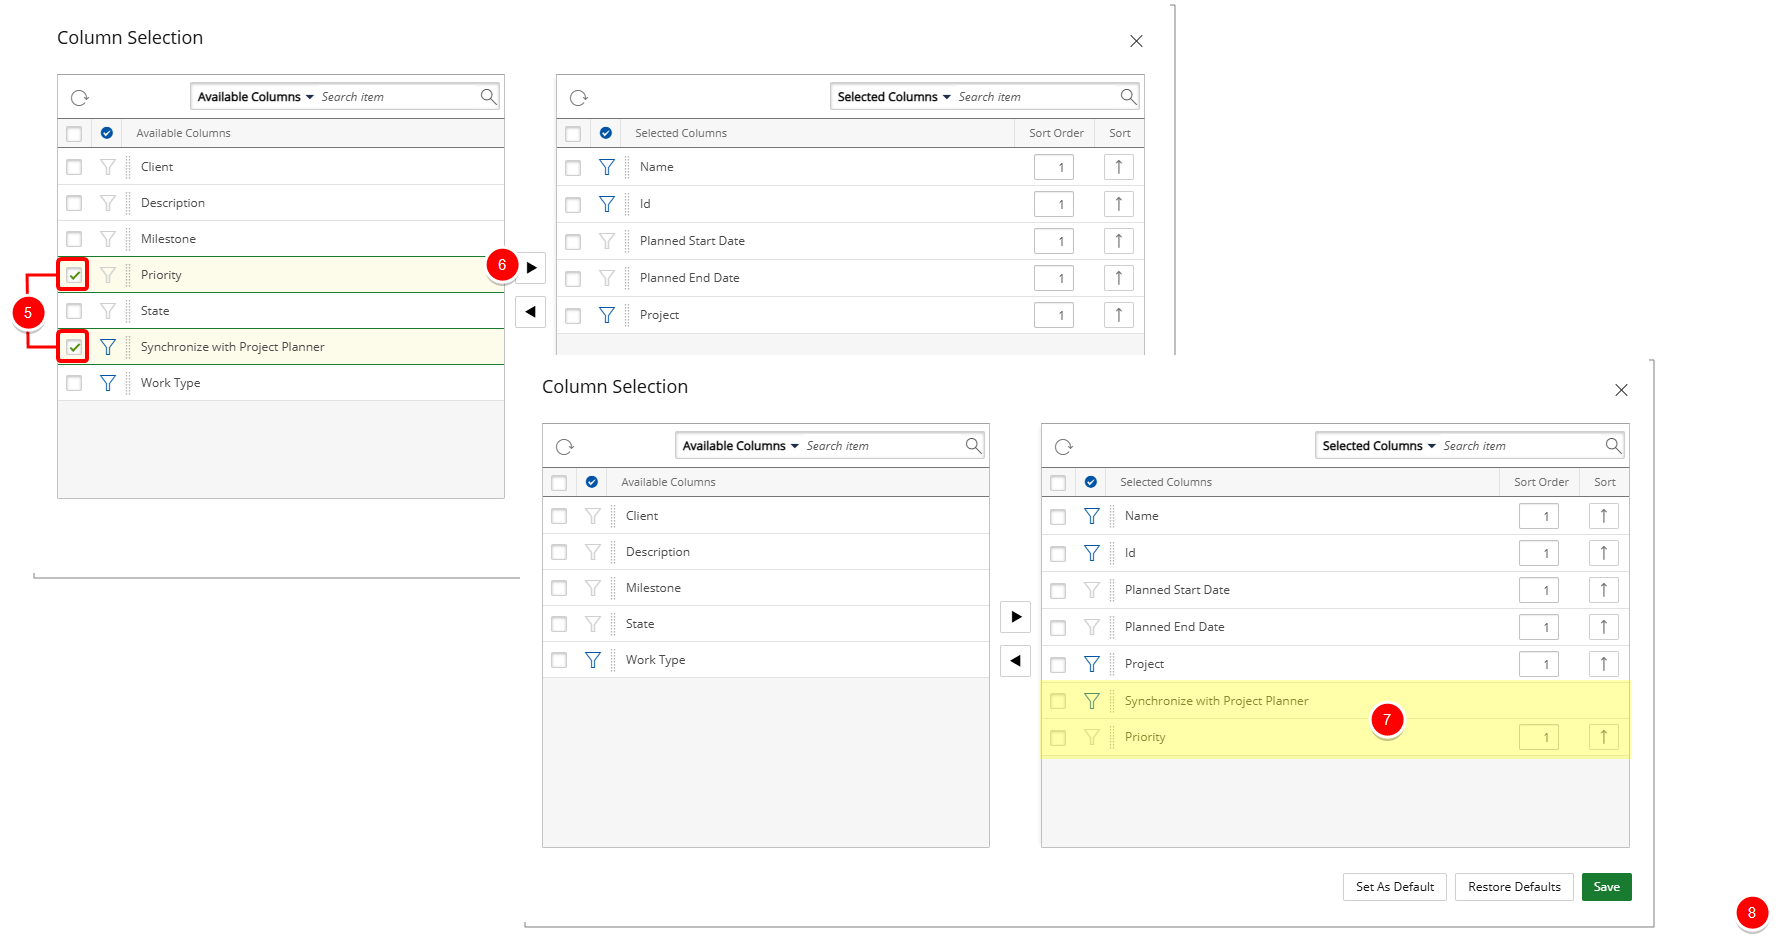
- Select the item(s) from the Available Columns list.
- Click the right arrow
 button to move the item(s) to the Selected Columns list.
 - View the added item(s) in the Selected Columns list.
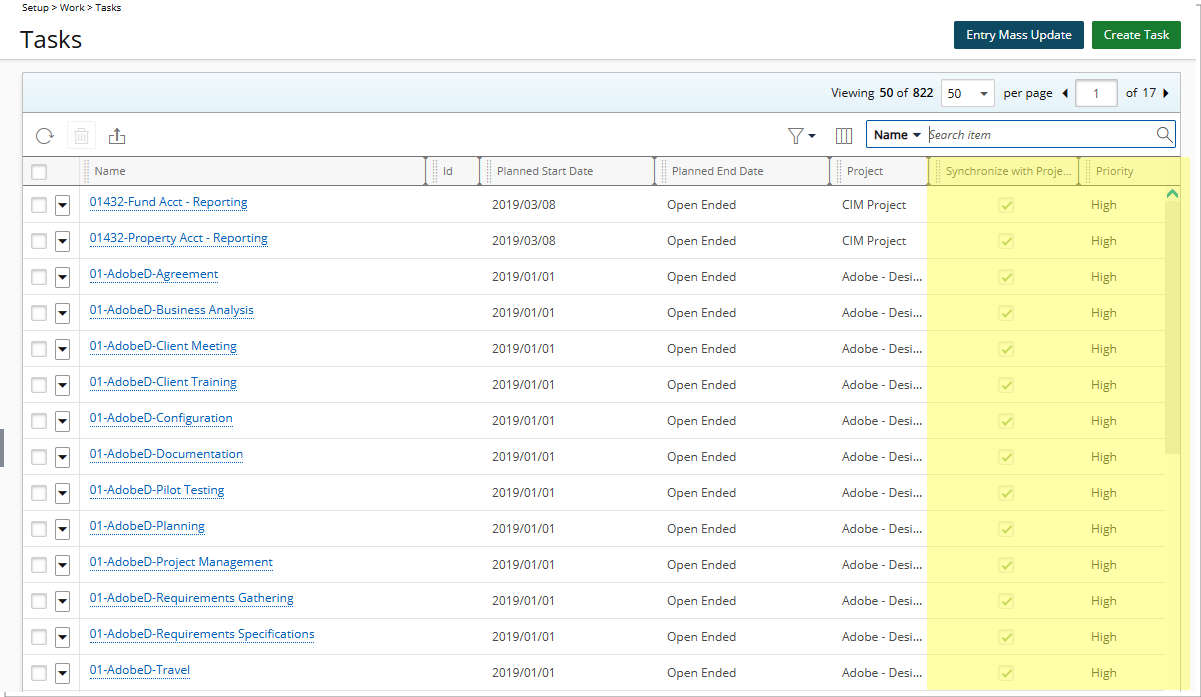
- Click Save to save your modifications and to return to the Tasks list page.
- View your saved modifications on the Tasks list page where the added columns are now displayed.
Remove Columns
- From the Icon Bar click Setup .
- From the Navigation Menu click Work to expand the corresponding menu.
- From the Work menu items, click Tasks.
- Upon the Tasks list page displaying, click Column Selection button.
Tip: For a detailed list of all available Column selection options refer to the Column Selection Options | Tasks list article.
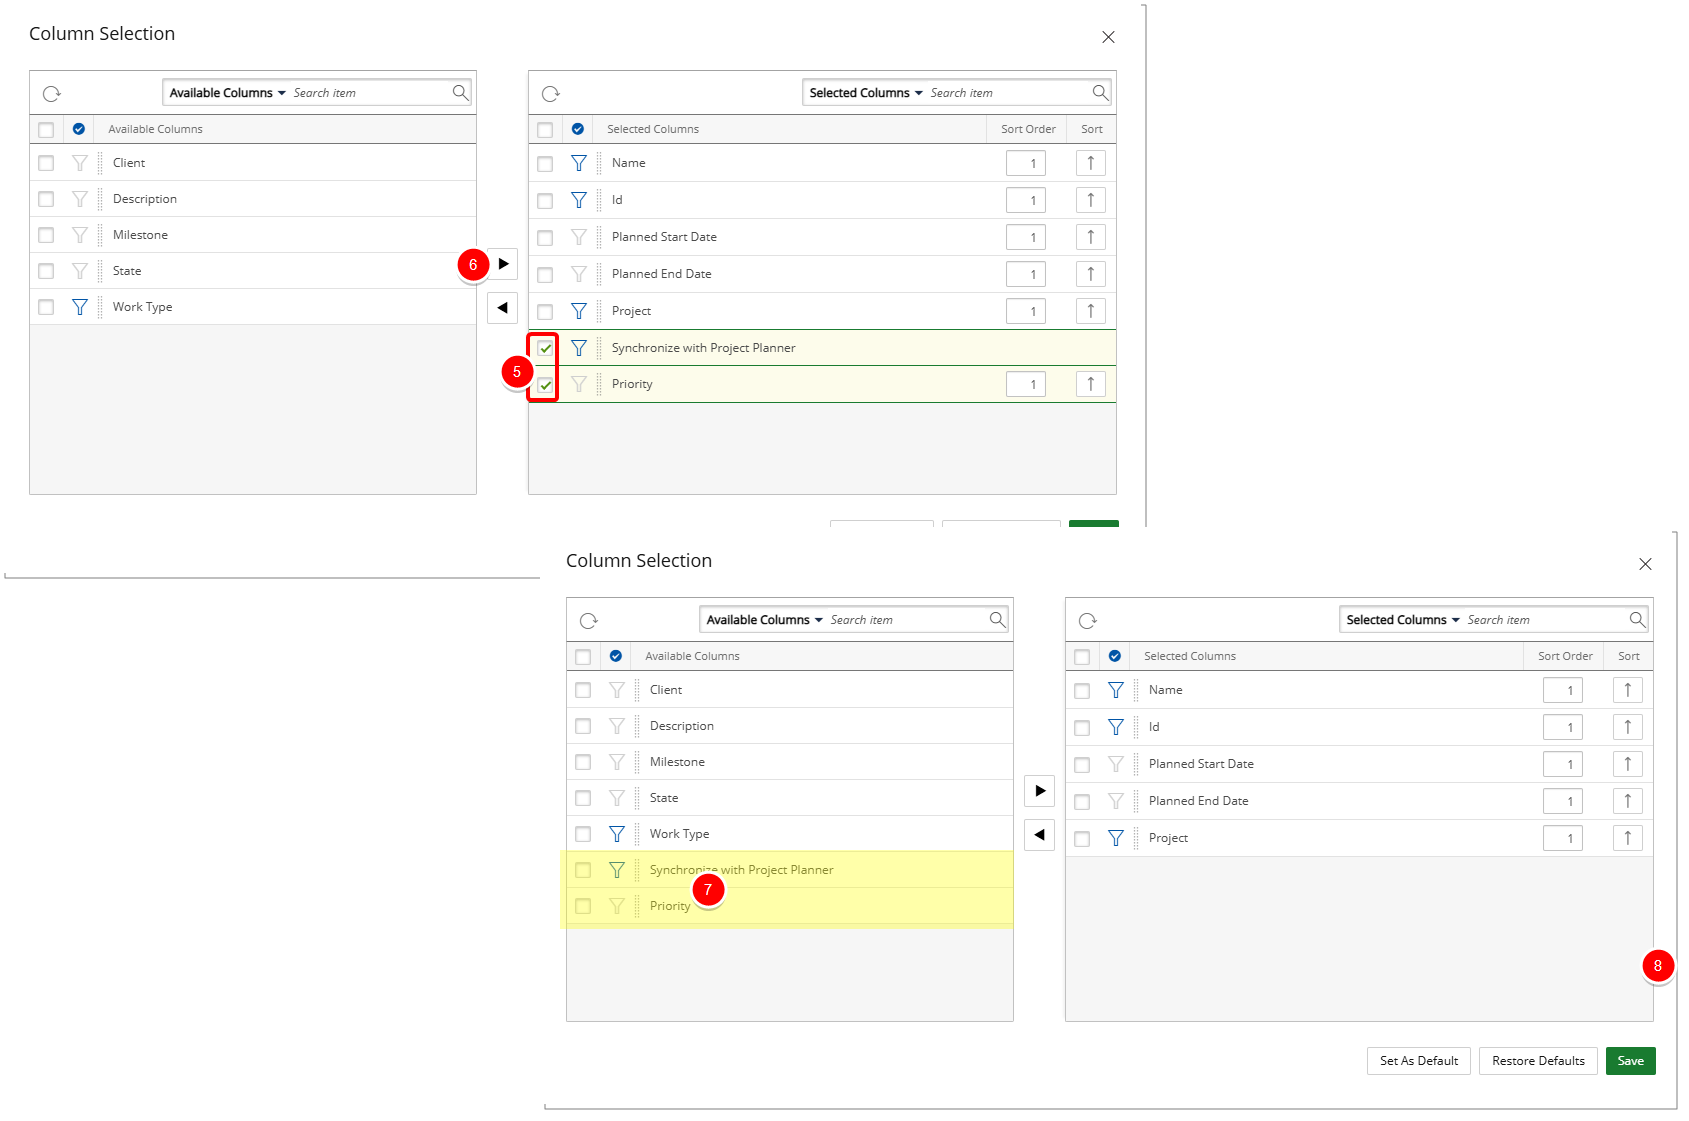
- Select the item(s) from the Selected Columns list.
- Click the left arrow
 button to move the item(s) to the Available Columns list.
 - View the removed item(s) in the Available Columns list.
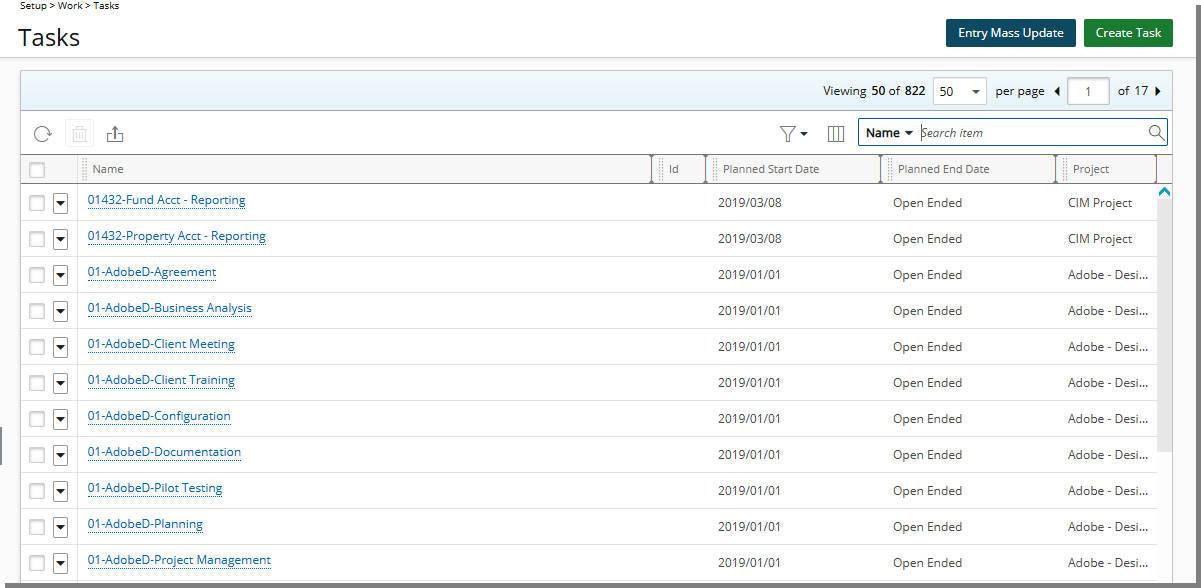
- Click Save to save your modifications and to return to the Tasks list page.
- View your saved modifications on the Tasks list page where the added columns are now displayed.
Rearrange or Resize Columns
Rearrange Columns
There are two ways to change the position of the columns and each are explained in detail below:
- From the Icon Bar click Setup .
- From the Navigation Menu click Work to expand the corresponding menu.
- From the Work menu items, click Tasks.
- Click the heading of the Column you wish to move.
- Drag the heading to the new position. You will see a thicker black line indicating where the Column will reside.
- View the new Column position.
- From the Icon Bar click Setup .
- From the Navigation Menu click Work to expand the corresponding menu.
- From the Work menu items, click Tasks.
- Upon the Tasks list page displaying, click Column Selection button.
- Click the row you wish to move.
- Drag the row to the new position.
- Click Save, which will close the dialog box, refreshing the Tasks list with your changes.
Resize Columns
To resize a column:
- Move the cursor to the right side of the column boundary
 you want to resize.
 - When the cursor becomes a resize cursor (
 ), click and drag the column to the desired width.
Sort Columns in Ascending or Descending Order
A column can be sorted in ascending or descending order.
- Click the name of the column you want to sort by.
- An up arrow
 will display next to the column name when it is sorted in ascending order.
 - A down arrow
 represents descending order.