Users with the Create right to the Role Skill Association permission (Setup > Workforce Planning), defined for the Security Profile under which the User falls (Setup > Organization > System > Security), can associate Skills to Roles from the Roles Edit page. For further details refer to Granting the rights to the Role Skill Association.
When creating a Role based Booking, you can choose to automatically filter the User list based on mutual Skills association.
This article details how to associate Skills to Roles.
- From the Icon Bar click Setup
 .
. - From the Navigation Menu click Organization.
- From the available options select Roles.
- Upon the Roles list page displaying, click the name of the Role you wish to edit, to access the Role Edit page.
- From the General tab of Role Edit page, navigate to the Skills tabto access the Associated Skills page.
- Select the Skill(s) from the available skills table on the left.
- Click the right arrow to add them to the selected Skill table on the right.
- For each selected Skill, click the Proficiency box and choose the level of Proficiency from the available options.
- Click Close to return to the Role Edit page.
View the Impact of your changes
- From the Icon Bar click Project List
 .
. - From the Project List page, select the Project you wish to edit by following one of these steps:
- Click the Project context menu button
 to expand it. From the available options click Edit.
OR - Click the name of the Project you wish to access.
Tip: Use the search capability for an efficient way of finding the specific project. For further details refer to Searching for a Project within the Project List page.
- Click the Project context menu button
- From the Project Edit page, hover your mouse over the Planners tab and select Work Plan from the available options.
- Click the New Button, then choose Booking.
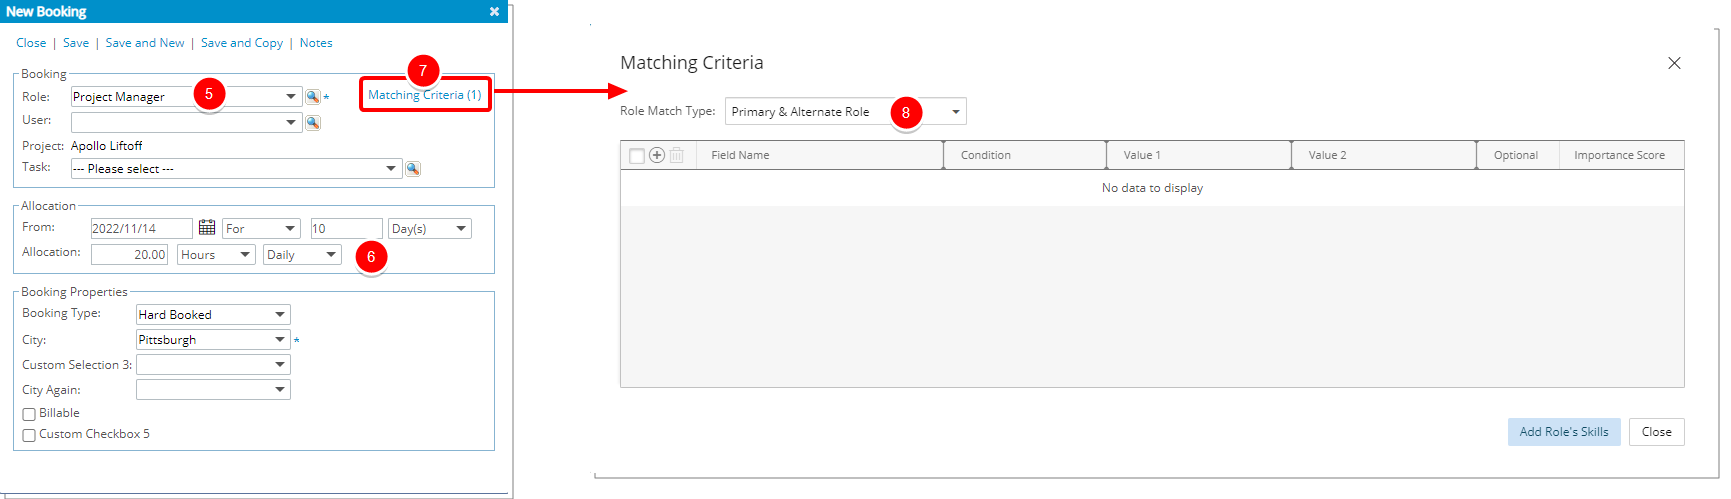
- From the New Booking Dialog box select the required Role.
In our example we are going to select the Project Manager Role. Which has the PMP Skill with Expert Proficiency. - From the Allocation section, choose the required settings.
- Click the Matching Criteria link.
- Upon the Matching Criteria dialog box displaying, choose the Role Match Type which defaults to the selection made within the Workforce Planning System Setup page. The available options are:
- Primary Role
- Primary & Alternate Role
- Ignore Role.
- Click the Add Role's Skills button.
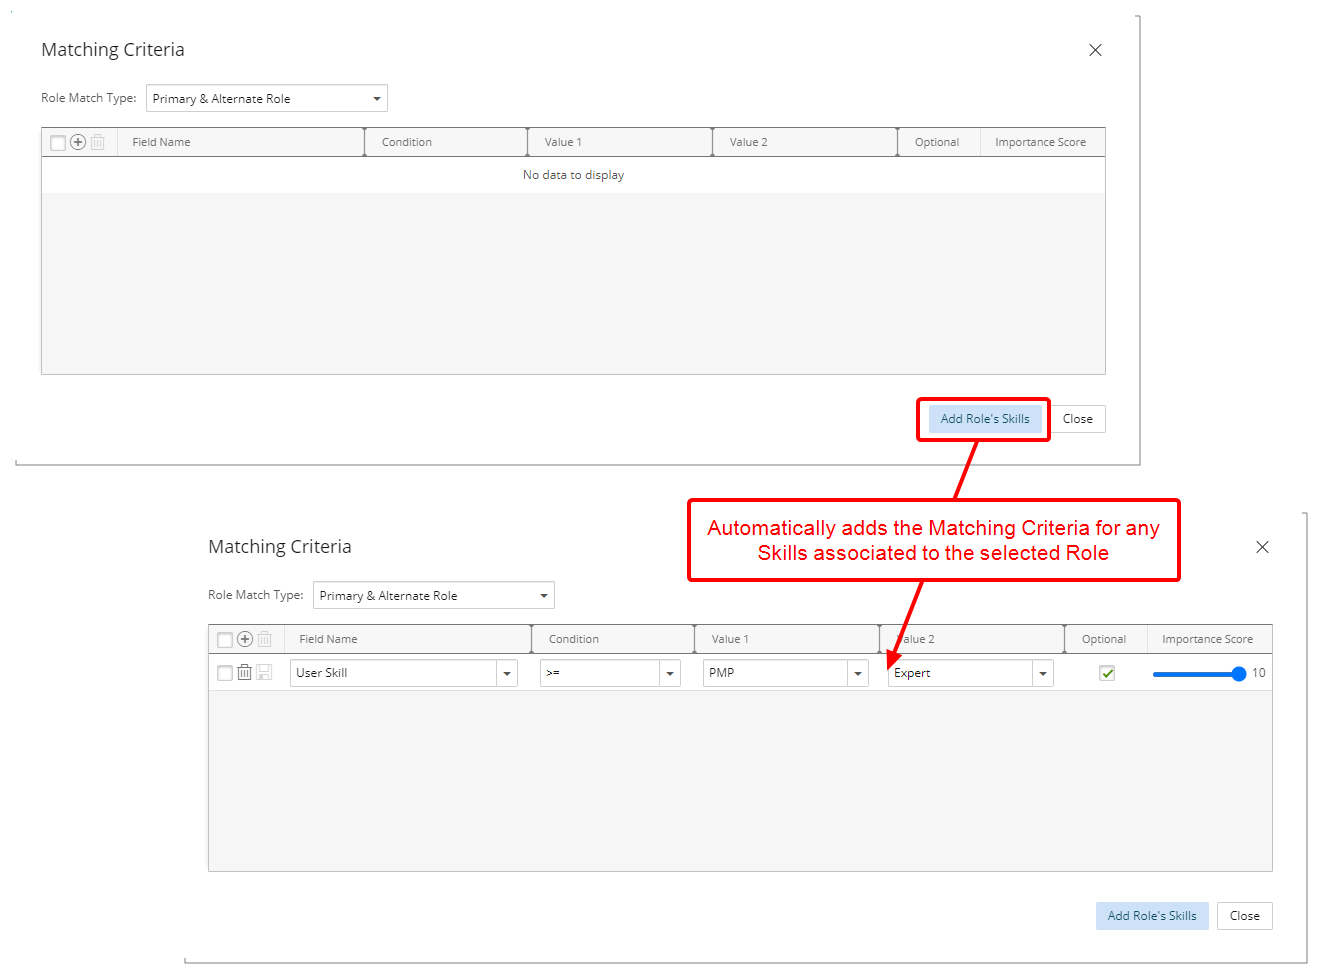
- Note that the page automatically lists the required Filter based on the Skills associated to the selected Role. Which in our case is: User Skill >=PMP with Expert Proficiency
- Click Close
- From the New Booking dialog box, click Save and then Close to return to the Work Plan.
- Access the booking context menu located against the newly created Role booking
- From the available options click Find Matches.
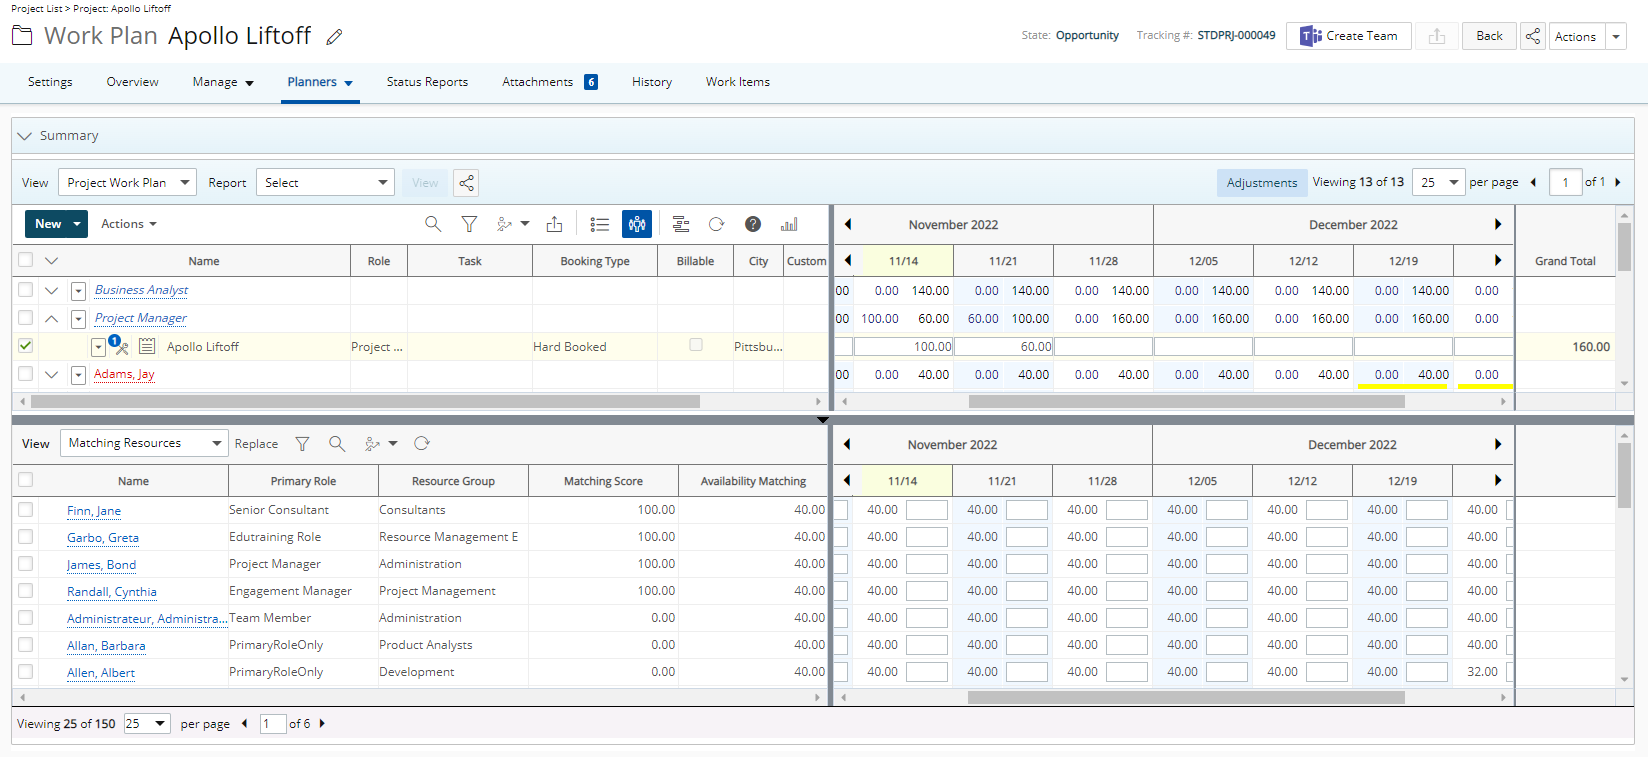
- The bottom section of the Work Plan will refresh to display the Users that match your booking criteria.
- In our example we have 4 Users with the following Roles and Skill associations:
Primary Role Secondary Role PMP Skill Proficiency Delon, Alain Project Manager --- Informed Hutton, Lauren Project Manager --- Basic James, Bond Project Manager --- Expert Barkley, Bill Senior Consultant Project Manager Intermediate - If in step 9Primary Role was chosen; the system will match the users having the Project Manager Primary Role. In our use case 3 users are returned:
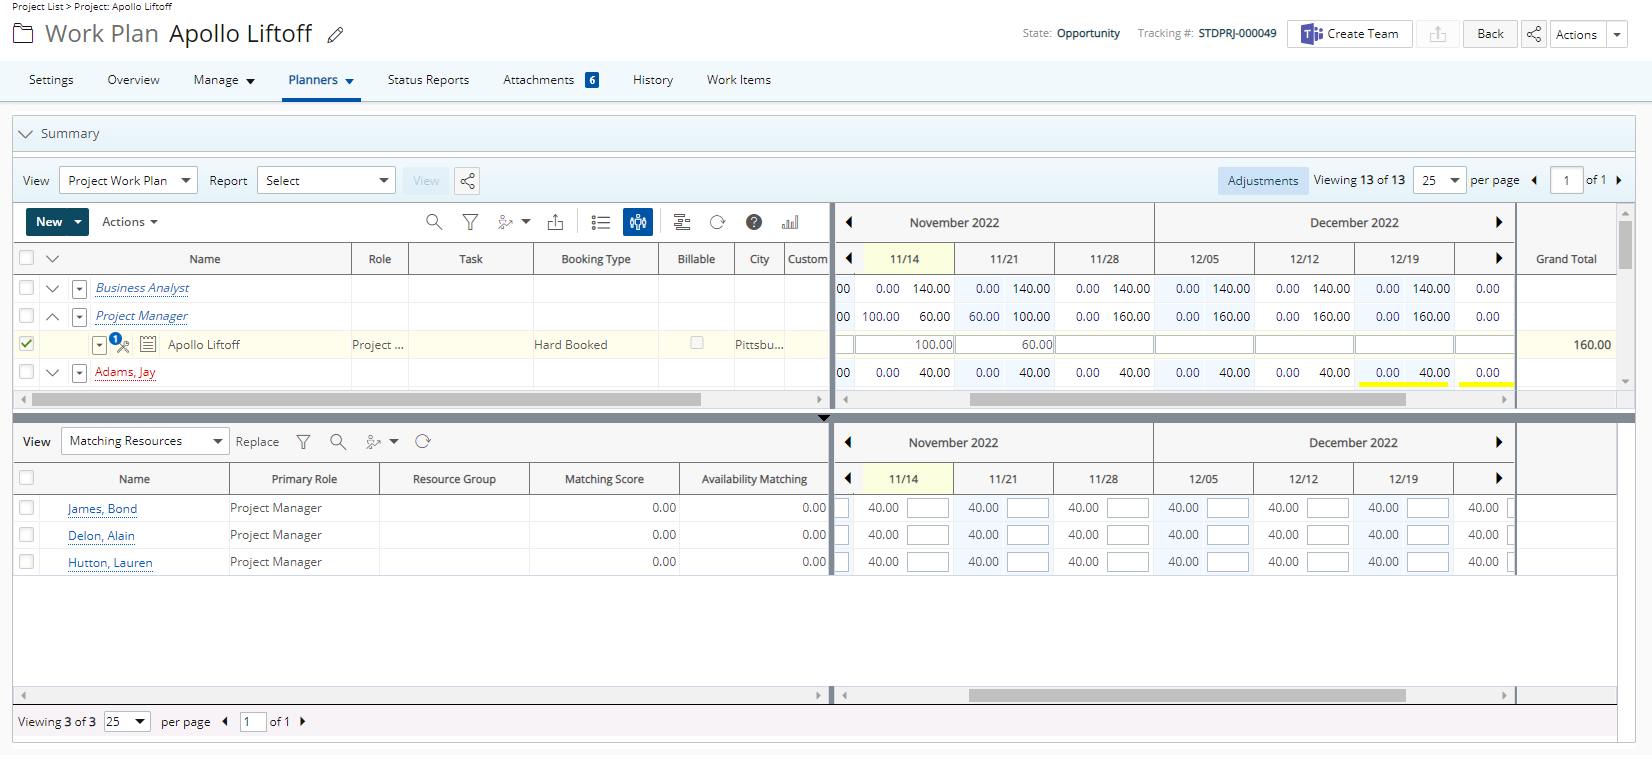
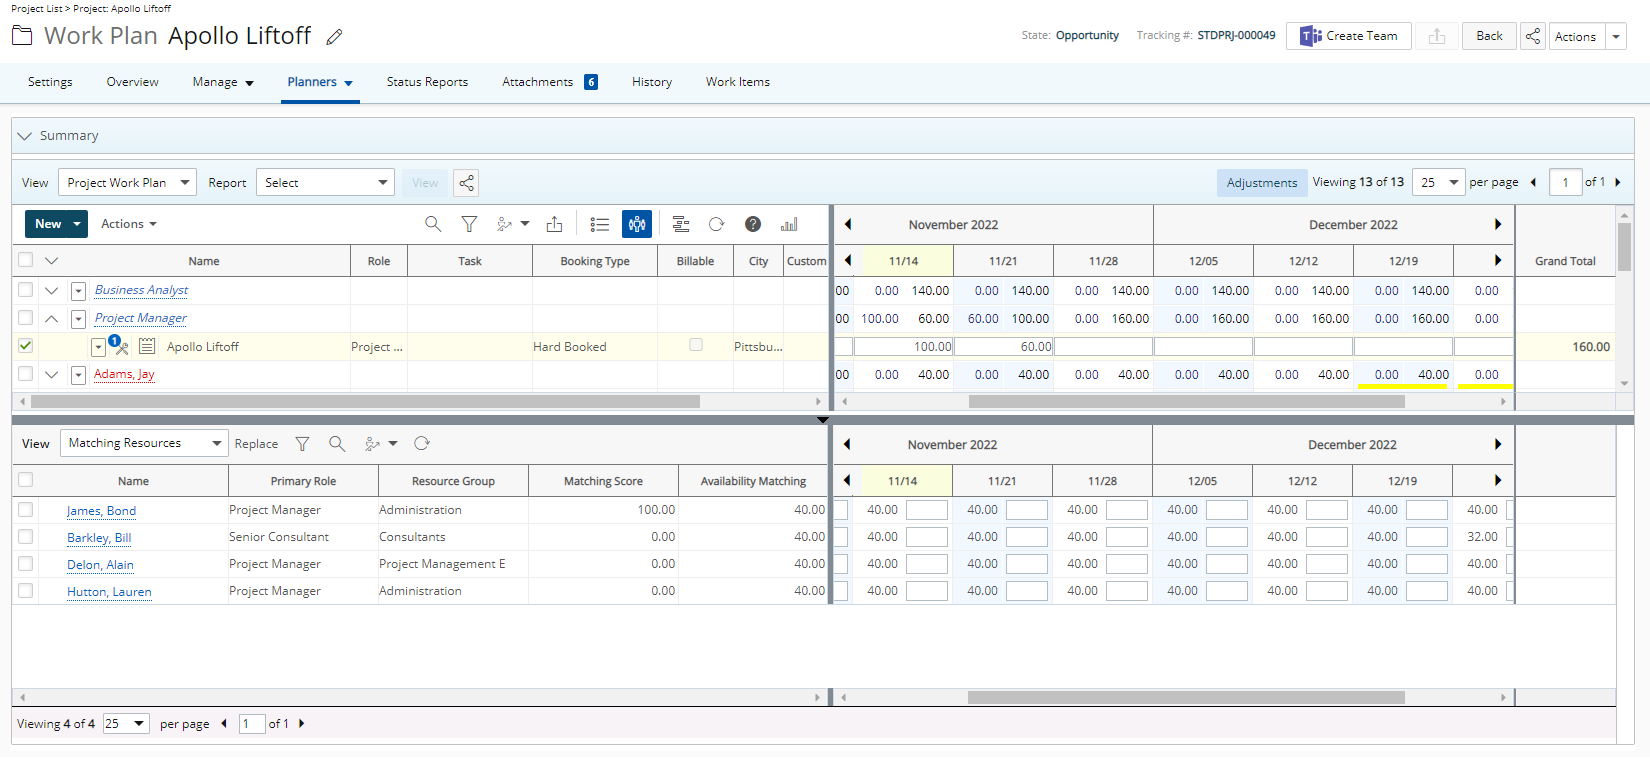
- If in step 9Primary & Alternate Role was chosen; the system will match the users having the Project Manager Primary Role and Secondary Role. In our use case 4 users are returned:
- If in step 9Ignore Role was chosen; the system will ignore the Role and return all users.
- If in step 9Primary Role was chosen; the system will match the users having the Project Manager Primary Role. In our use case 3 users are returned: