Scoping is a functionality that allows an administrator to define and limit what objects users have access to view through the association to a specific Site(s).
This article details how to modify a Team's Scope.
Note: Upon creation, the new Team, by default, has no sites associated to it, therefore it is visible and accessible to all Users.
- From the Icon Bar click Setup
 .
. - From the Navigation Menu click Organization.
- From the available options select Teams.
- Click the name of the Team in the list to access the Team Edit page.
- From the General tab of the Team edit page, click the Scope button.
- Modify Team's Scope
 Adding a site to the Selected Sites list:
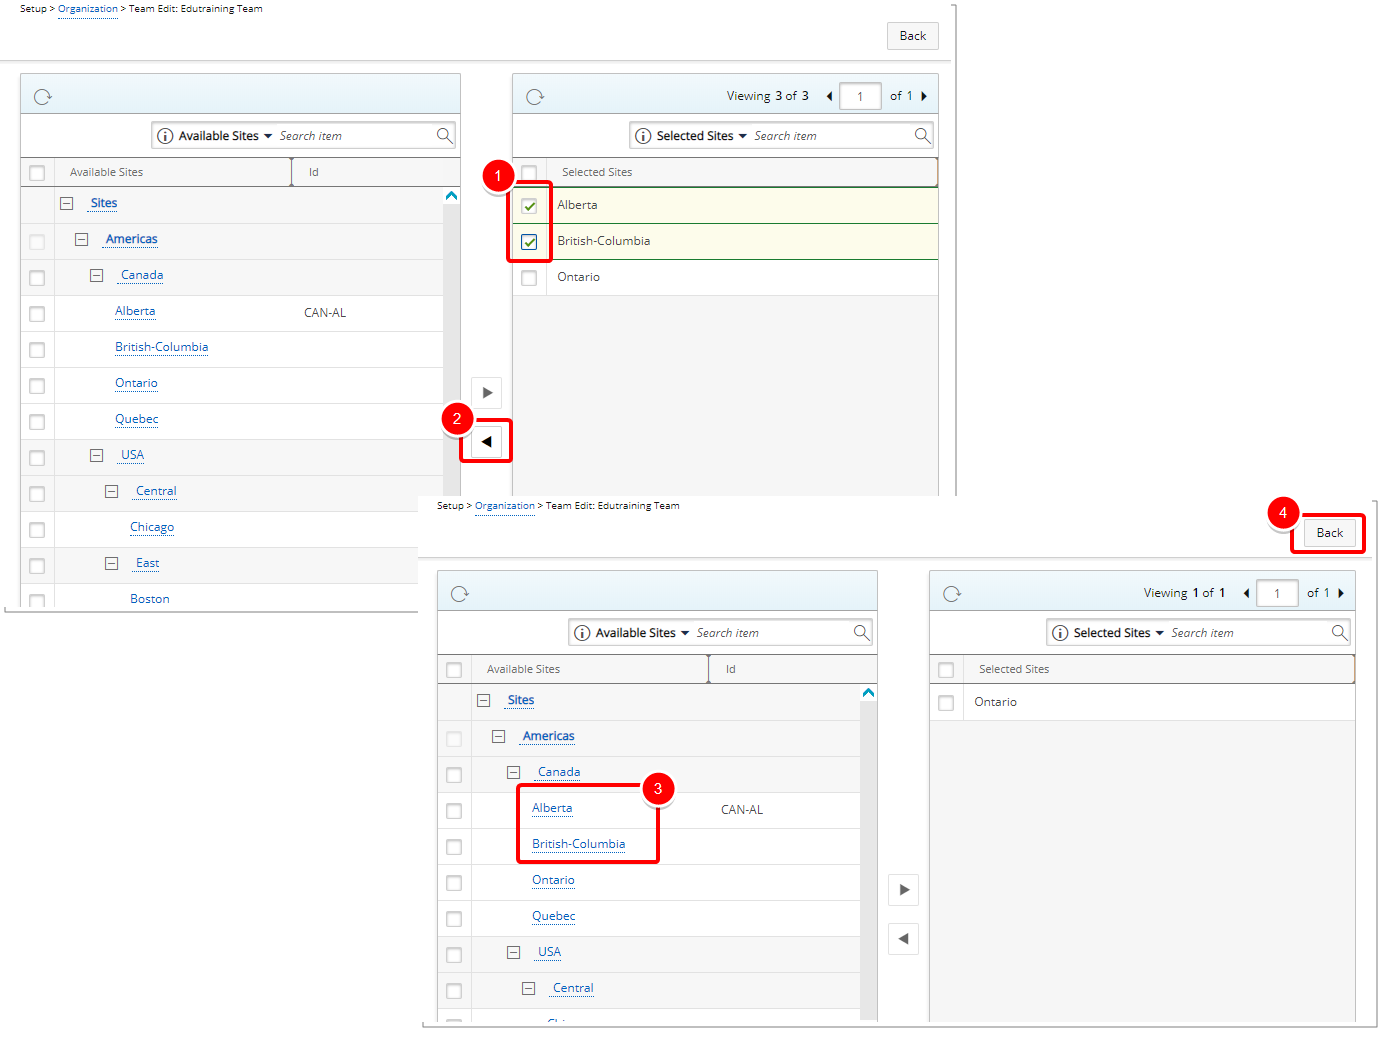
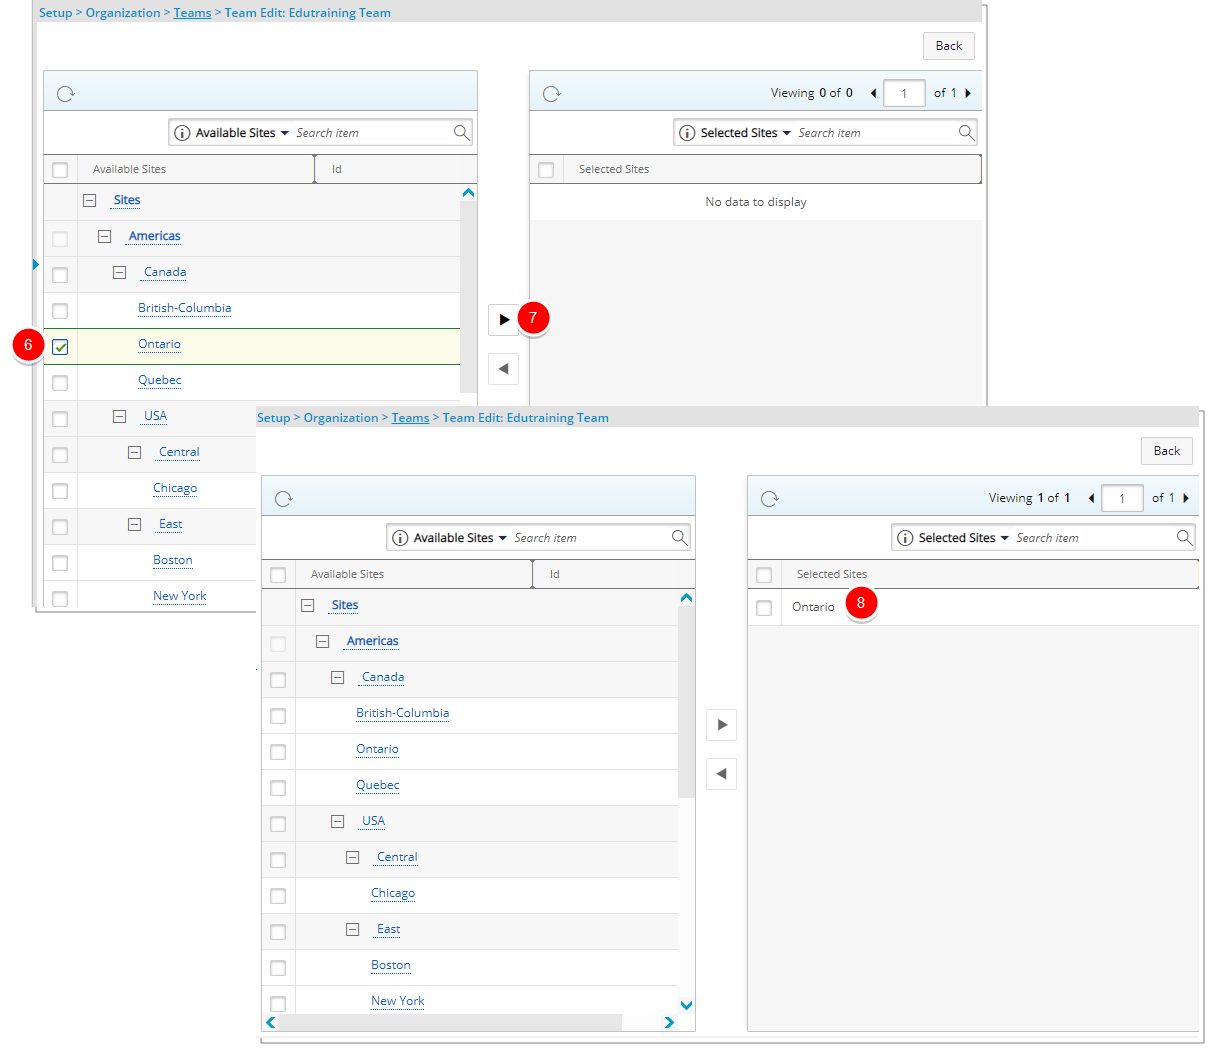
In order to add a site to the Selected Sites section:
- Select the required site from the Available Sites.
- Click the Add button (>).
- The selected site(s) appears in the Selected Sites section.
- Click Back to return to the User Edit page.
- Removing a Site from the Selected Sites list:
In order to remove a site from the Selected Sites section:
- Select the required site(s) in the Selected Sites section.
- Click the Remove button (<).
- The selected site appears in the Available Sites section.
- Click Back to return to the User Edit page.
Tip: When there are no sites associated to the User, it is visible and accessible to all other Users. For more information on the different scenarios see Scoping.
- Upon returning to the Teams Edit page click Save and then Back to save your changes and return to the Teams list.