Scoping is a functionality that allows an administrator to define and limit what objects users have access to view through the association to a specific Site(s).
A Site, which is an object within the Organizational Breakdown Structure (OBS), can be a physical or virtual office or location, a department/division, or even a project. It is through this object that Scoping functions. Therefore, when required, through the creation of a site(s), users, groups, teams, clients, portfolios and projects that a particular user is permitted to view and access are clearly defined. As a result, Scoping enhances security, organizational efficiency/effectiveness, and can facilitate operations for a large or geographically dispersed organization.
This article covers how to setup scoping for a Team.
Note: Upon creation, the new Team, by default, has no sites associated to it, therefore it is visible and accessible to all Users.
- From the Icon Bar click Setup
 .
. - From the Navigation Menu click Organization.
- From the available options select Teams.
- Click the name of the Team in the list to access the Team Edit page.
- From the General tab of the Team edit page, click the Scope button.
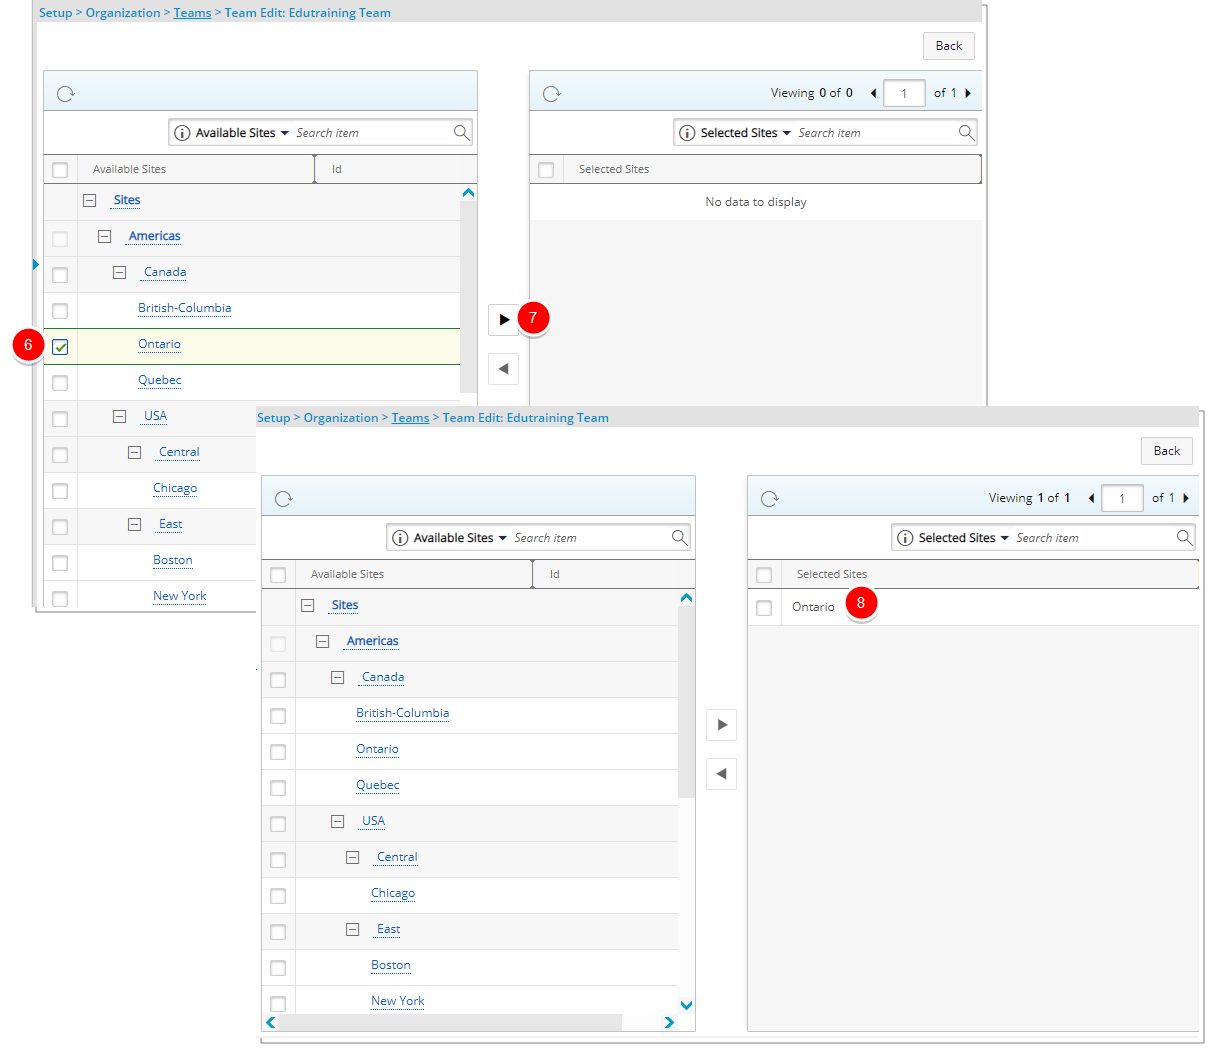
- From the Available Sites section, click the box(es) to the left of the Site(s) to associate to the Team.
- Click the Add button (>).
- View the associated Site(s) in the Selected Site section.
- Click the Back button.