Add Notes and Attach Documents and Links to a User
This article details how to create a Note and then attach document(s) and link(s) to a User.
Adding Note(s) to a User:
- From the Icon Bar click Setup
 .
. - From the Navigation Menu click Organization.
- From the available options select Users.
- Upon the Users list page displaying, click the name of the User you wish to edit, to access the User Edit page.
Tip: You may wish to narrow your Users list so that you retrieve just the right amount of information you need. To do so you can perform a search. Select a search criterion from the list of available search criteria and then enter a corresponding value in the Search box. Click the Search icon to narrow down the Users list. For more information on the contains-in logic search click here.
- Upon the User Edit page displaying, click the Attachments link located under the Others navigation menu.
- From the Notes sub-tab click New.
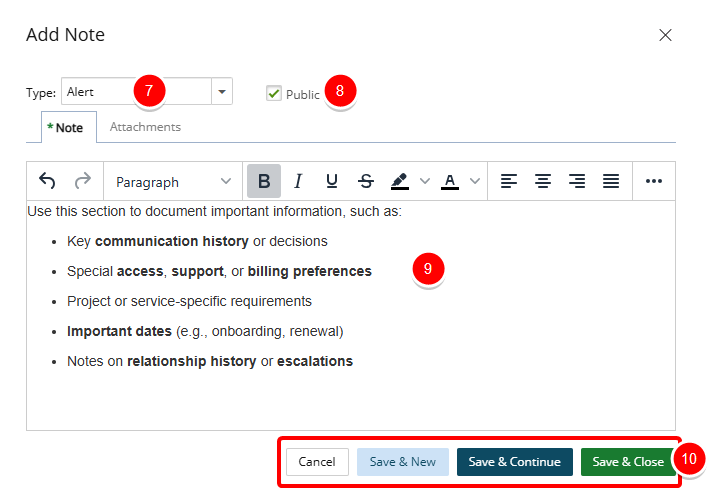
- From the Add Note dialog box select a note Type from the following available options:
- Alert
- Hourly
- Invoice
- Notice
- R&D
- Rejection
- Specifications
- Status
- Decide whether the note should be public or not, and select the Public box accordingly.
- Enter your note in the Note box.
Note: You can customize the message body using the Rich Text Editor. For formatting options and features, see Rich Text Editor.
- Select one of the following:
- Cancel: To cancel your changes and to return to the previous page.
- Save & New: To save the Note and create a new one.
- Save & Continue: To save the Note and continue editing it.
- Save & Close: To save the Note and close the dialogue box.
Note: When creating a new Note, You must save the Note to be able to access the Note Attachments tab. Refer to Add Attachments to a Note and Add Links to a Note for further details.
Add Attachments to a Note
- From the Add Note dialog box, navigate to the Attachments tab.
- To attach a document either:
- Click the Add Document
 button.
- Click Browse to upload an individual file. You may also attach multiple files by holding down either the CTRL or Shift key, and selecting more than one file.
- Click Open.
- You will see your files appear in the Attachments tab.
- Drag files from your computer to attach them to your Note by following these steps:
- Open File Explorer.
- Navigate to the folder with the documents that you want to upload.
- Drag the files to the space where you see: You can drag and drop any document into this area.
- You will see your files appear in the Attachments tab.
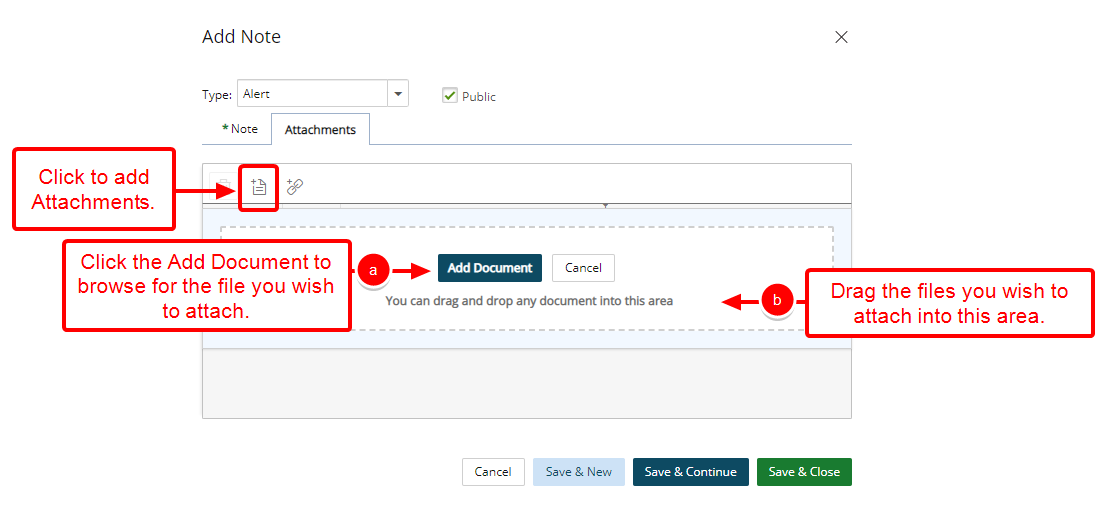
Tip: You can click Cancel to cancel the document attachment process and to return to the previous state of the dialog box where you can choose to include a Link instead, for example, without the need to close it.
- Click the Add Document
Add Links to a Note
- Click the Attachments tab.
- Click the Add Link
 button.
 - Enter the following information:
- Name: Enter the Name of your Link.
- URL: Enter the URL.
- Description: Enter a brief description in the Description box.
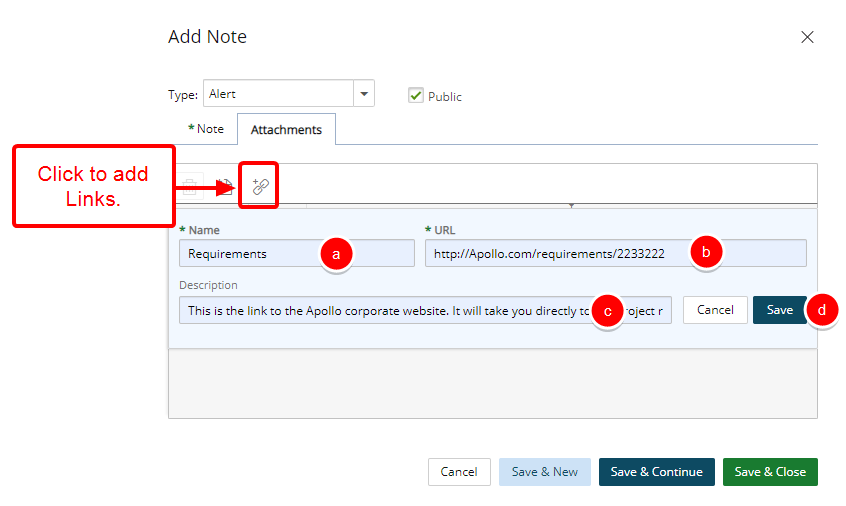
- Click Save or Cancel.
Viewing and Managing Notes
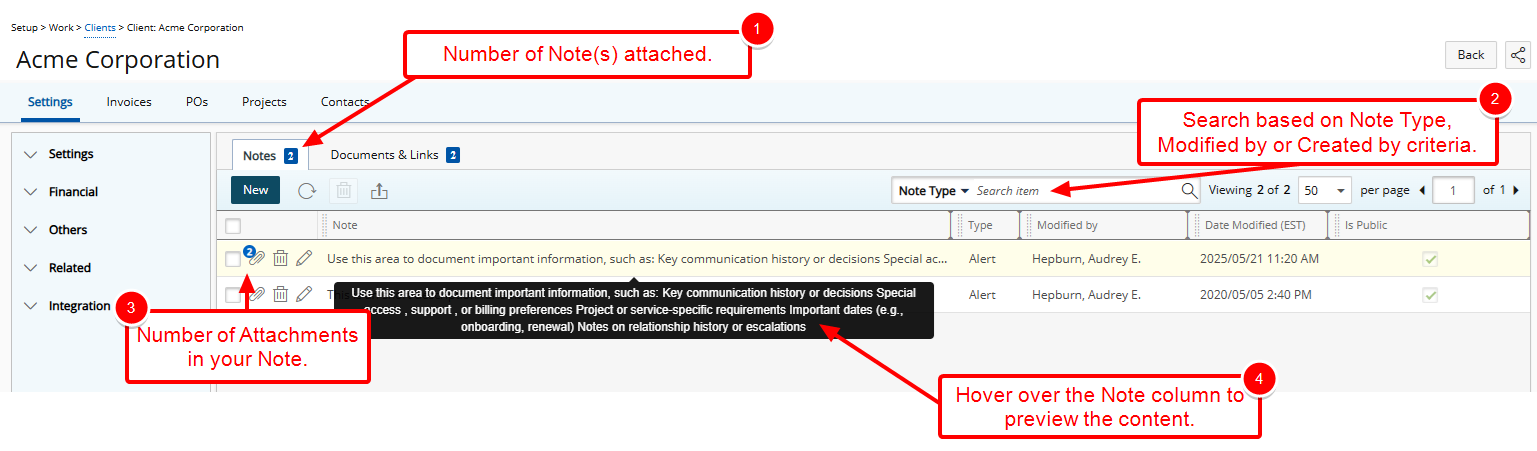
- Note that a counter is present on the Note tab, indicating the total number of Notes present for your User.
- Searches can be performed based on Note Type, Modified by or Created by criteria.
- Upon returning to the Notes tab you will notice a counter on the attachment icon against your Note, indicating the number of attachments.
- Hover over the Note column to preview the content.
Note: Formatting is not displayed in this preview.