Associate Role to a User
This article covers associating a Role to a User.
- From the Icon Bar click Setup
 .
. - From the Navigation Menu click Organization.
- From the available options select Users.
- Upon the Users list page displaying, click the name of the User you wish to edit, to access the User Edit page.
Tip: You may wish to narrow your Users list so that you retrieve just the right amount of information you need. To do so you can perform a search. Select a search criterion from the list of available search criteria and then enter a corresponding value in the Search box. Click the Search icon to narrow down the Users list. For more information on the contains-in logic search click here.
- Upon the User Edit page displaying, expand the Employment menu item.
- From the available options, click Roles.
- Choose a Primary Role for the user.
- Then select any number of Alternate Roles.
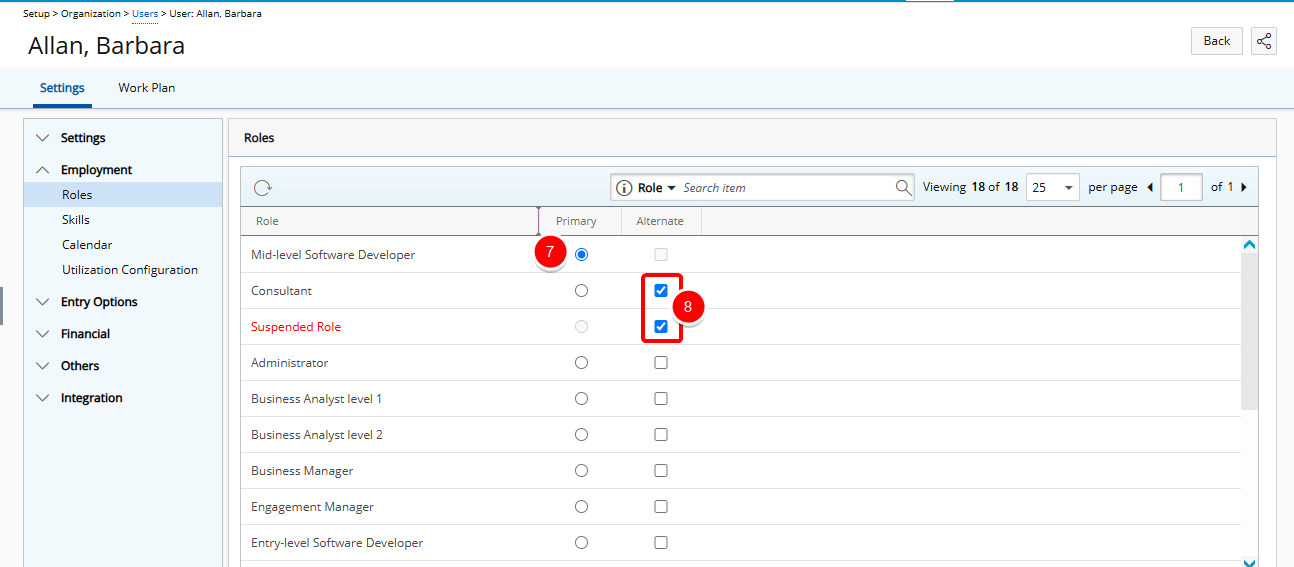
Note:
- Suspended Alternate Roles are visible and display in red as long as they are still associated with a User, allowing administrators to easily identify and manage them. However, suspended Roles that have no associations, are hidden from view.
- The User can have none or as many Alternate Roles as required.