Access and View a User's Leave Time History
Once the Leave Time Processing is complete the changes can be reviewed through the Leave Time History page.
This article details how to access and view a User's Leave Time History.
- From the Icon Bar click Setup
 .
. - From the Navigation Menu click Organization.
- From the available options select Users.
- Upon the Users list page displaying, click the name of the User you wish to edit, to access the User Edit page.
Tip: You may wish to narrow your Users list so that you retrieve just the right amount of information you need. To do so you can perform a search. Select a search criterion from the list of available search criteria and then enter a corresponding value in the Search box. Click the Search icon to narrow down the Users list. For more information on the contains-in logic search click here.
- Upon the User Edit page displaying, expand the Entry Options menu item.
- From the available options, click Leave Time.
- Upon the Leave Time page displaying, click the History
 button located against the required Leave Time.
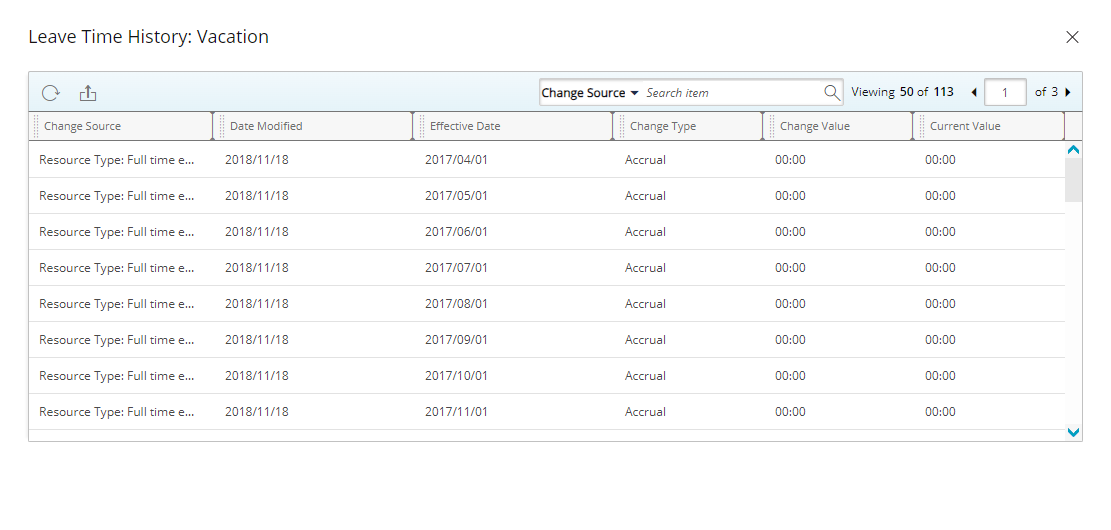
- View Leave Time History: The Leave Time History dialog box lists the following changes that were made to a user's Leave Time
- Change Source: Displays the source of the change.
- Date Modified: Displays the date on which the leave time bank value was modified according to the Time zone of the Active Site associated with the logged User.
- Effective Date: Displays the date from which the change value is valid.
- Change Type: Displays the type of the change. Possible values are Accrual, Reset, Manual and Time Entry
- Change Value: Displays the value by which the bank was updated.
- Current Value: Displays the current leave time bank value.
- Click the Close
 button to exit the dialog box.