Projects is a document automation feature that uses document types to produce RFP responses, proposals, other documents. Projects can be created from the Home or My Work > Documents & Projects pages. If your instance of Upland Qvidian is integrated with Salesforce, you can also create a document or project from Salesforce. You must be granted Create New Project permission to create a new project.
Note: Document types that include an RFP Compliance Matrix component must use created documents feature for automation. For more information on how projects and created documents differ, and help deciding which to use, see Automating RFPs, proposals, and presentations.
- Do one of the following:
From the Home page > Create a Project widget, click the Create a Project button.
Note: If you don't have the Create a Project widget on your Home page, you can add it in the settings by going to Profile menu > Customize Home Page.
- From the My Work > Documents & Projects page, click the + Create Project button.
- On the Create a Project or Document page, select the Create a Project radio button.
- Enter a Project Title.
-
Set a Deadline for the project.
 Set the due date & time
- Click the calendar icon to open the calendar.
- Browse to the required month and year and click on a date to set the date. Use the left and right arrows on the top right to move to the previous or next month. Use the drop-down to select the year.
- Set the time using one of the methods below:
- Click the clock icon to open the clock.
- Click in the hours and minutes fields and enter a new time.
- Click the up or down arrows on the hours, minutes.
- Use the drop-down to select AM or PM.
- Select your Document Type.
- Click the Edit
 icon to open the Select Document Type dialog. A list of doc types will appear to choose from. The system will remember the last document type you used and keep that selected until you change it.
 - Find the doc type by entering text into the search bar and clicking the Search
 icon or Enter.
 - Click the Preview
 icon to preview the doc type. You can view all pages, zoom in/out, and download the doc type from here.
 - Click the desired doc type row. A blue checkmark will be displayed next to the selected document type.
- Click Done.
- Click the Edit
-
Select the Style Template from the dropdown menu.
Note: The style template you choose will be remembered and used as the default template the next time you create a document or project using the same document type. You have the option to select a new style template when you build the package.
- (Optional) In the Value field, enter a monetary value.
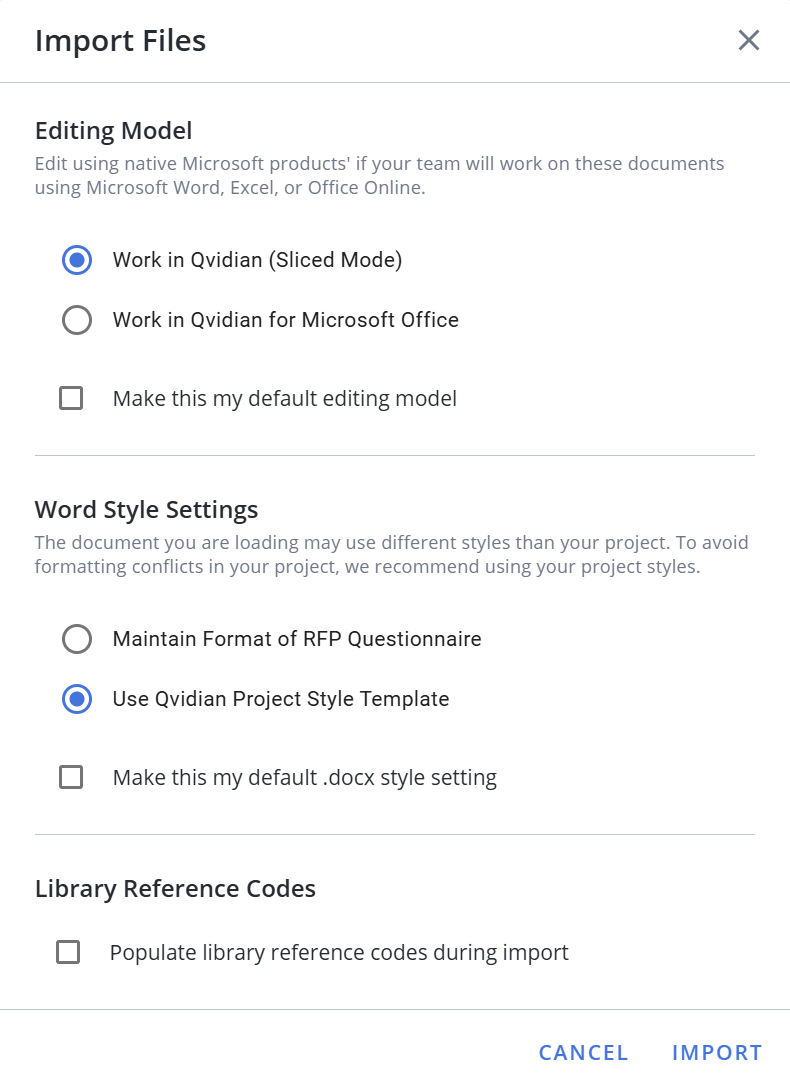
- Upload your file(s), up to 300MB, by using either the Click to Browse button or dragging and dropping your file directly into the Upload RFP Files area. The "Import Files" dialog will appear.
- Choose your Editing Model:
- Work in Qvidian: Choose this editing model if your team will work on these documents directly in Qvidian.
- Work in Qvidian for Office: Choose this editing model if your team will work on these documents using Microsoft Word, Excel, PowerPoint, or Office for the Web.
Note: You can select the Make this my default editing model checkbox to make your current selection the default.
- Choose your Word Style Settings:
- Maintain Format of RFP Questionnaire: This option preserves the current styles found in your document.
- Use Qvidian Project Style Template: This option applies project styles to your document to avoid any conflicts in your project.
Note: This dialog box will only appear if the file you have uploaded is using different styles than your document or project. You can select the Make this my default setting checkbox to make your current selection the default.
- Click Import.

Note: PDFs will be automatically converted to unsliced Word files when they are imported to the RFP section of a project (e.g. questionnaires). The Qvidian Project Style Template will be applied upon import. After import, the unsliced Word file can be edited before being sliced (click the More Options
 menu and select Slice). The Slice option is only available to project owners, users with the Role permission to "Manage Projects Owned by Other Users"/ "Manage Projects Owned by Partner/Role/Doc Type Permissions", and users assigned to the current "Write" step of the project workflow. The original PDF can be downloaded at any time by clicking the More Options menu and selecting Download Original.
 - Choose your Editing Model:
- (Optional) Click Optional Information to display additional fields.
- Enter the percent of probability that the opportunity will be closed in the Close Probability field. You do not need to enter the percentage symbol; it will be added when you tab to another field.
- Set the Close Date and Time
- Click the calendar icon to open the calendar.
- Browse to the required month and year and click on a date to set the date. Use the left and right arrows on the top right to move to the previous or next month. Use the drop-down to select the year.
- Set the time using one of the methods below:
- Click the clock icon to open the clock.
- Click in the hours and minutes fields and enter a new time.
- Click the up or down arrows on the hours, minutes.
- Use the drop-down to select AM or PM.
- Select the Status of the client for whom this document or project is being created.
- Select the Team Name that you want to assign this document or project to.
- Enter any Comments to further identify the document or project.
- Click Create to finish creating the project.
Next tasks
After you've set up your project, you can do any of the following to continue working on it:
- Upload files to your Instructions and Related Files section and File List subsections.
- Prepare and upload a questionnaire to your RFP Project subsection.
- Preview Static Content and make content selections in the project's sections and subsections.
- Add project participants. Participants must have Upland Qvidian licenses. Upland Qvidian users who have the Manage Projects Created by Other Users application permission will have the same rights as owners, regardless of whether they are assigned to the project.
- Create assignments. You must add participants prior to creating assignments.
-
When all the sections are complete, you can build the package.