The option to prevent Functional Group Managers from approving their own Expense Reports is available from the Expense Workflows. When selected, the Functional Group Manager’s Expense Report will be assigned to their Group’s Approval Manager. In cases where their Group’s Approval Manager is set as Out Of Office in PSA, their Group’s Approval Alternate Manager will be assigned to the State.
Example: Adam, the system administrator is tasked to configure the Expense approval process that is to bar Functional Group Managers from approving their own Expense Reports. He can now easily select Prevent Self-Approval for a State assigned to Originator’s functional manager.
This article details the restricting of a Functional Group Manager from approving their own Expense Reports.
- Select Setup from the Icon Bar
 .
. - Select Expense from the Navigation Menu.
- Select Workflows.
- Select an Expense Workflow to edit.
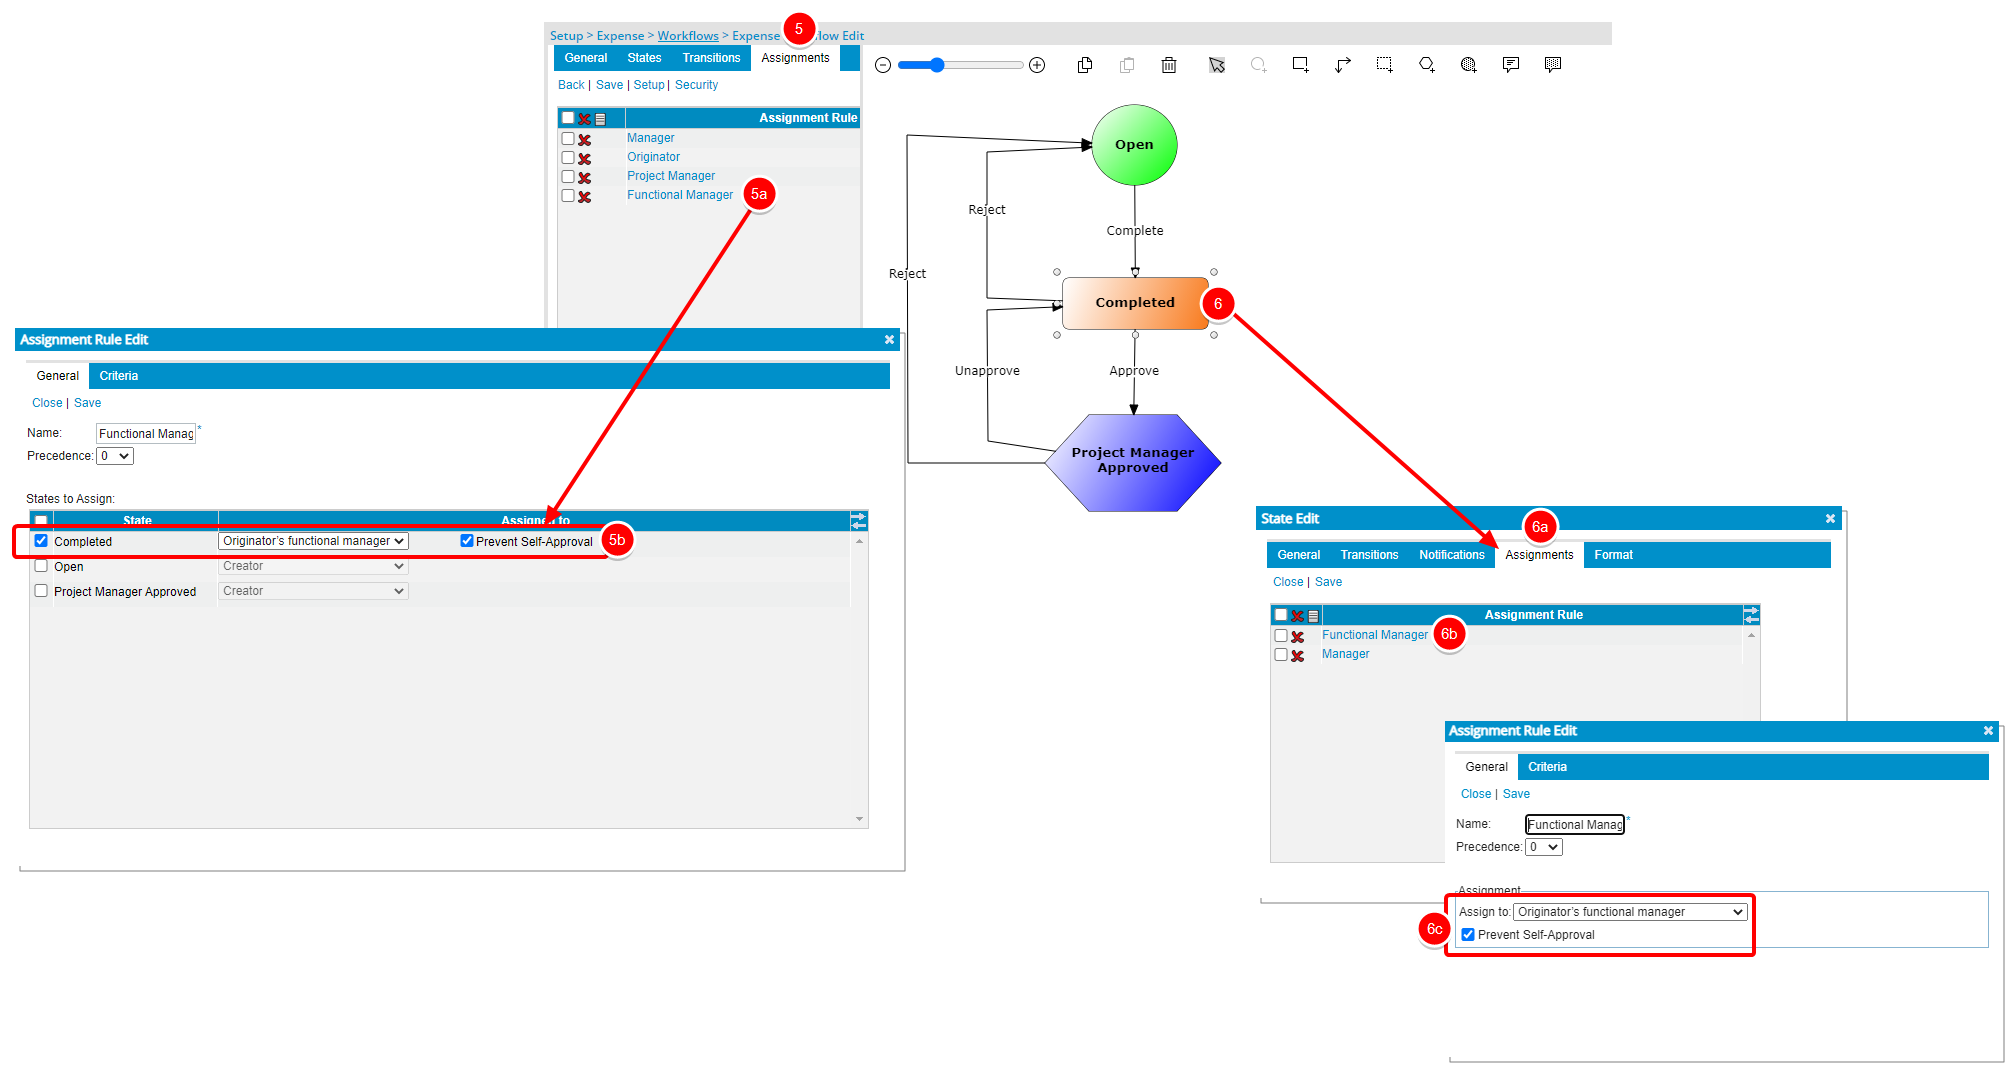
- Click the Assignments tab on the left pane
- Select an Assignment Rule you wish to modify
- Choose the Prevent Self-Approval option for a State assigned to Functional Group Manager.
- Or, double click the State on the graphical workflow.
- From the State Edit dialog box select the Assignments tab
- Select the Assignment Rule you wish to modify.
- Choose the Prevent Self-Approval option for a State assigned to Originator's functional group manager.

Note:
- The Prevent Self-Approval option is only visible and available when Originator's functional group manager is selected as the Assign to option.
- With this options is selected, upon a Functional Group Manager submitting their Expense Report:
- The Functional Group Manager’s Expense Report will be assigned to their Group’s Approval Manager.
- In cases where their Group’s Approval Manager is set as Out Of Office in PSA, their Group’s Approval Alternate Manager will be assigned to the State
- Click Save then Close to return to the State Edit dialog box,
- From the State Edit dialog box, click Close to return to the Timesheet Workflow Edit page.
- Click Save to save the workflow.