This article details how to create a Workflow Role. The example here illustrates a Timesheet Workflow Role, the manner in which other types of workflow roles are created is the same with the main difference being the navigation to access the Workflow Role Edit page:
- Expense Workflow Roles (Setup > Expense > System> Workflow Roles)
- Invoice Workflow Roles (Setup > Financial > Invoice Workflows > Workflow Roles)
- Leave Request Workflow Roles (Setup > Timesheet > Leave Request Workflows > Workflow Roles)
- Project Workflow Roles (Setup > Work > Project Workflows > Workflow Roles)
- Resource Request Workflow Roles (Setup > Workforce Planning > Resource Request Workflows > Workflow Roles)
- Timesheet Workflow Roles (Setup > Timesheet > Timesheet Workflows > Workflow Roles)
- Work Items Workflow Roles (Setup > Work > Work Item Workflows > Workflow Roles)
Create a Workflow Role:
For the purpose of this article we are going to create a Timesheet Workflow Role.
- From the Icon Bar click Setup
 .
. - From the Navigation Menu click Timesheet.
- From the available menu options select Timesheet Workflows.
- Upon the Workflows list page displaying click Workflow Roles.
- On the Timesheet Roles page, where the existing workflow roles are listed, click New.
- Inline editing will be enabled allowing you to enter the following information:
- Name
- Id
- Description
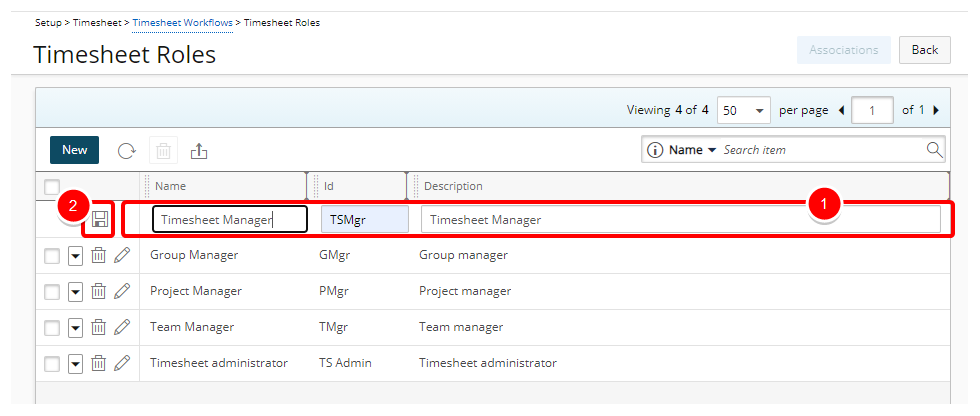
- Click Save
 .
.
Tip: Users/Security Profiles can be associated to a Workflow Role from the corresponding Workflow Role edit page by either:
- Choosing a Role and then clicking the Associations button.
Or - Accessing the Role context menu and then choosing Associations.
For more information refer to:
- Choosing a Role and then clicking the Associations button.
- Click Back to return to the Workflows list page.