Associate Forecast Cost Rate to a User
This article details how to associate a forecast cost rate to a user for the sole purpose of it being used, where applicable, in the Financial Planner (Project Edit page).
- From the Icon Bar click Setup
 .
. - From the Navigation Menu click Organization.
- From the available options select Users.
- Upon the Users list page displaying, click the name of the User you wish to edit, to access the User Edit page.
Tip: You may wish to narrow your Users list so that you retrieve just the right amount of information you need. To do so you can perform a search. Select a search criterion from the list of available search criteria and then enter a corresponding value in the Search box. Click the Search icon to narrow down the Users list. For more information on the contains-in logic search click here.
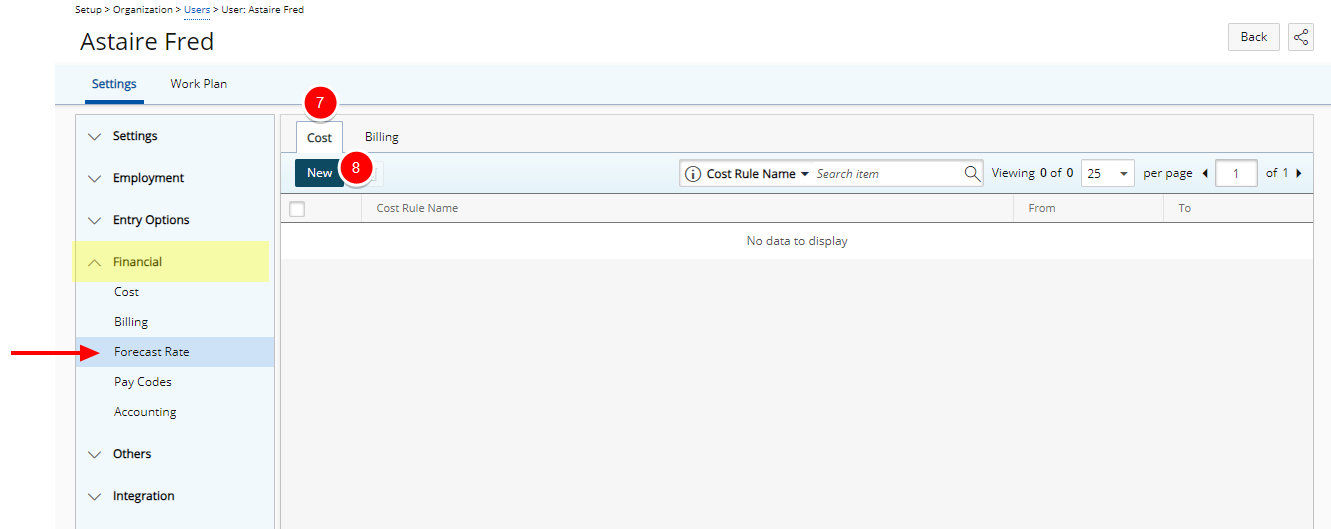
- Upon the User Edit page displaying, expand the Financial menu item.
- From the available options, click Forecast Rate.
- Upon the Forecast Rate Association page displaying, click the Cost tab.
- Click New.
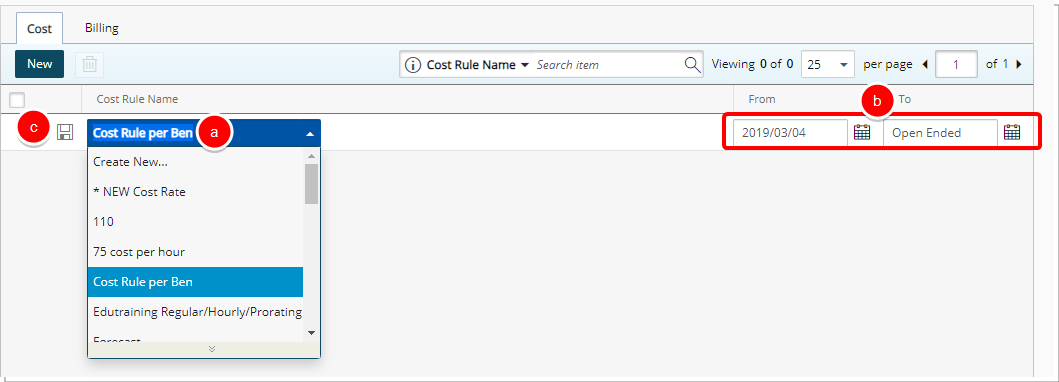
- Upon clicking the New button inline editing will be enabled. You can either select an exiting Cost Rule (Proceed to Step 10) or create a new one (Proceed to Step 11).
-
 Select a Forecast Cost Rule:
- Select an existing cost rule, or create a new one (please refer to the substeps below to create a new cost rule).
- If necessary, modify the effective From and/or To date, by either editing the date in the box or clicking the Calendar button and selecting the required date from there.
- Click the Save button.
-
Or Create a Forecast Cost Rule:
- Click Create New in the cost rule list box.
- Enter the rule Name, and Id if necessary.
- Change the Currency is required.
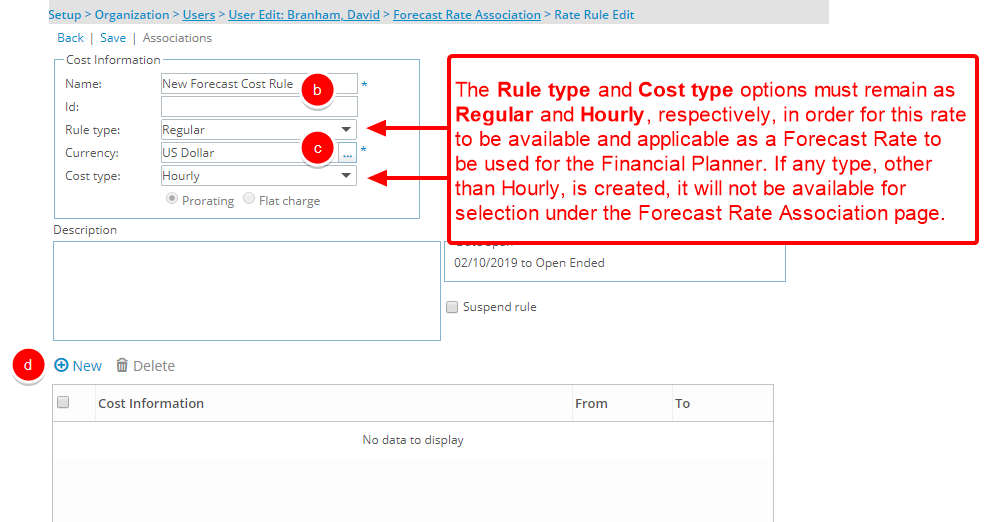
Note: The Rule type and Cost type options must remain as Regular and Hourly, respectively, in order for this rate to be available and applicable as a Forecast Rate to be used for the Financial Planner. If any type, other than Hourly, is created, it will not be available for selection under the Forecast Rate Association page.
- Click
 New.
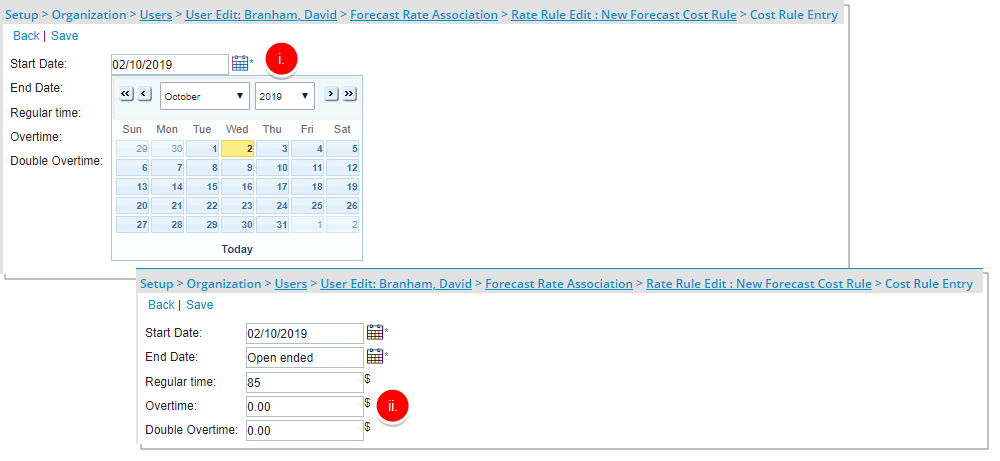
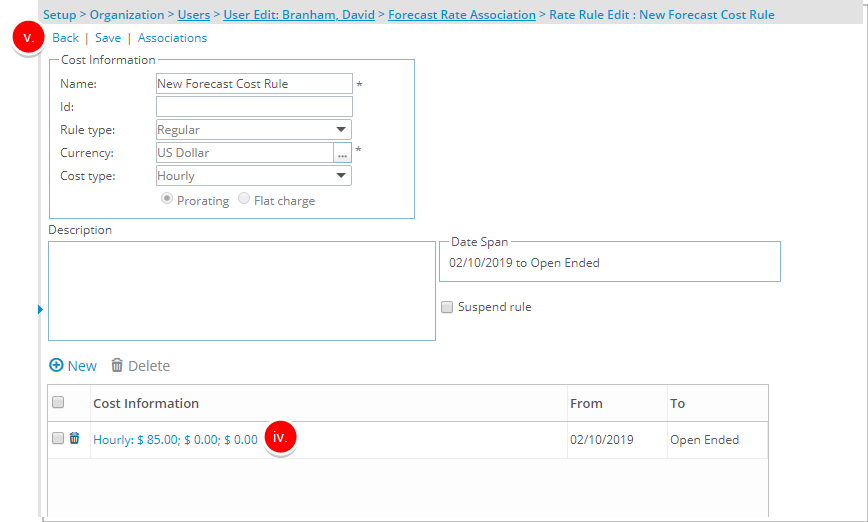
New. - Upon the Cost Rule Entry Edit page displaying:
- Modify the Start and/or End dates, if necessary, by clicking the Calendar button and selecting the required date.
- Enter the rate in the Regular time box, and if applicable in the Overtime and Double Overtime boxes.
Note: The maximum allowable value in Cost/Billing Rules (Financial System, Project, Client, Work Type, etc.) is $999,999,999.99, with the following exceptions for rules set at the Project and Task levels:
- Fixed Cost/Billing Rule (Prorating): Maximum allowable value is $9,999,999,999.99
- Fixed Cost/Billing Rule (Flat Charge): Maximum allowable value is $9,999,999,999,999.99
- Fixed Cost/Billing Rule (Tiered): Maximum allowable value is $9,999,999,999.00
- Click Save.
- View the newly added rate entry, for the specified period, under the Cost Information table.
- Click the Close
 button to exit the dialog box.
 - View the newly created rule now included as an option in the Cost Rule list box under the Forecast Rate Association page.
- Click the Close button to exit the dialog box.
- View the saved Forecast Cost Rule for the specified period.
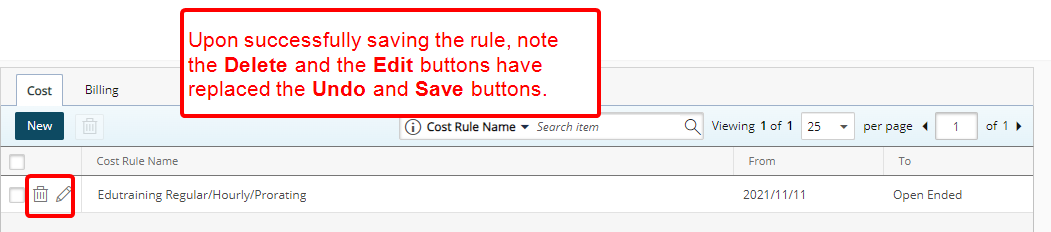
Note: Upon successfully saving the rule, note the Undo and Save buttons have replaced with Delete
 and Edit .
 - Click Back to return to the previous page.