View Assigned Projects from Users list
Within the Users list Column Selection ![]() , you have the option to add the Projects column. Once included, this column displays the number of projects each user is assigned to. Clicking this number will open the Assigned Projects dialog box.
, you have the option to add the Projects column. Once included, this column displays the number of projects each user is assigned to. Clicking this number will open the Assigned Projects dialog box.
This article details how to view the Assigned Projects from Users list and the available options to you.
- From the Icon Bar click Setup
 .
. - From the Navigation Menu click Organization.
- From the available options select Users.
- Upon the Users list page displaying, ensure that the Projects columns is included within the table header. If required you can add it through Column Selection
 .
.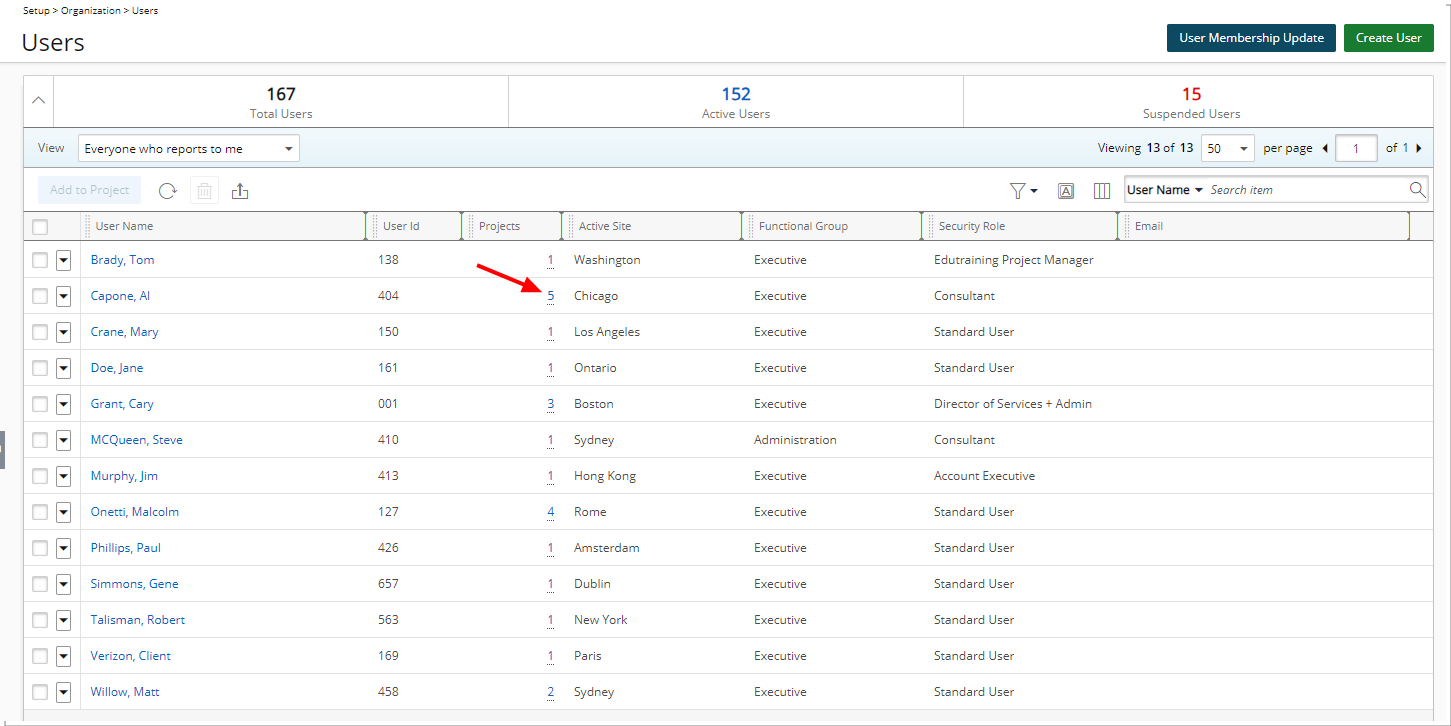
- Click the number displayed in the Projects columns for against the User you wish to view.
- View Assigned Projects.
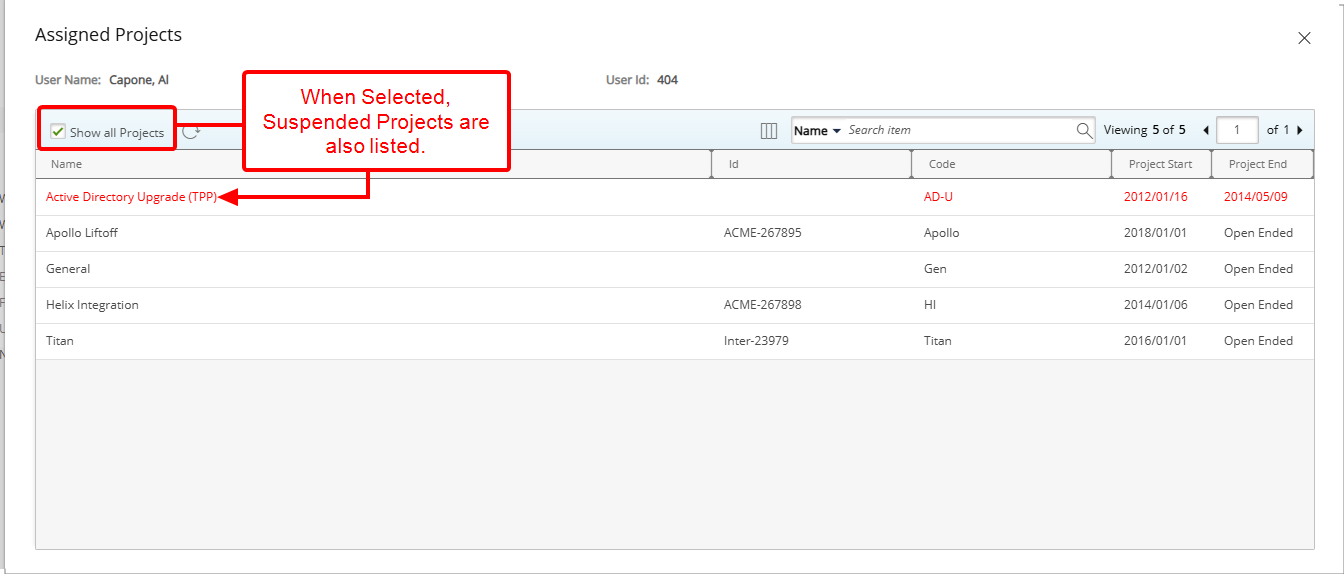
Note: By default all suspended Projects are hidden from the Assigned Projects dialog box. If you want to view both non-suspended and suspended Projects, select the Show all Projects option. Once selected, all Projects will appear within the list. Your selection for showing or hiding suspended Projects is remembered, ensuring your preferred view is consistently applied each time you log in.
Available options from the Assigned Projects dialog box
From the Assigned Projects dialog box you can:
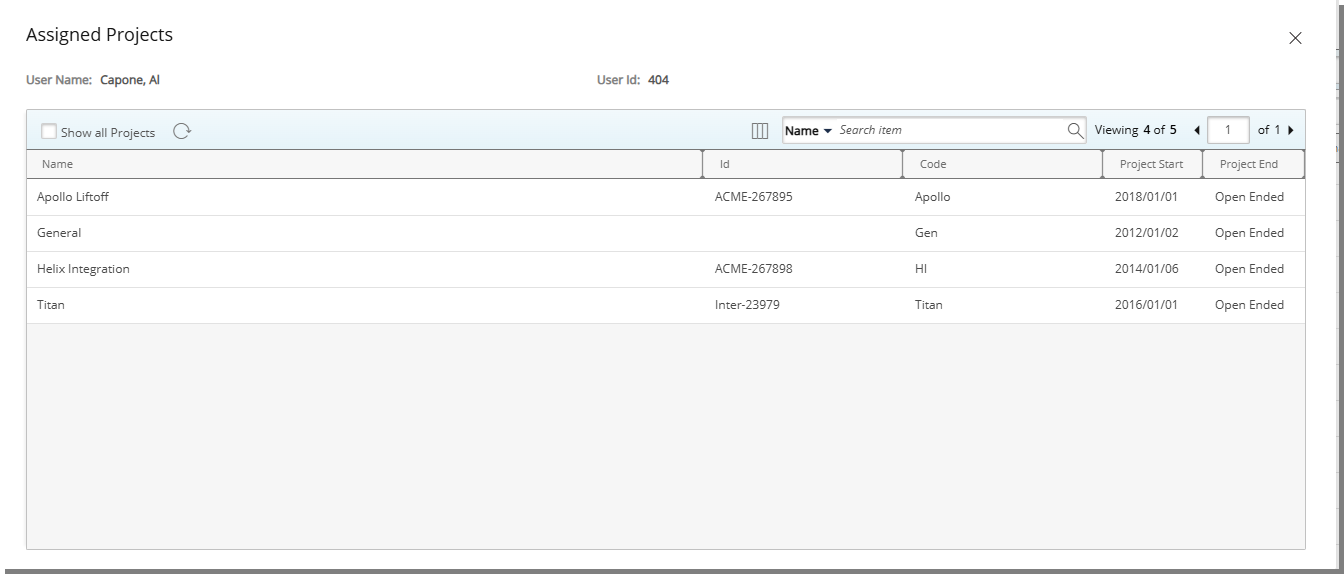
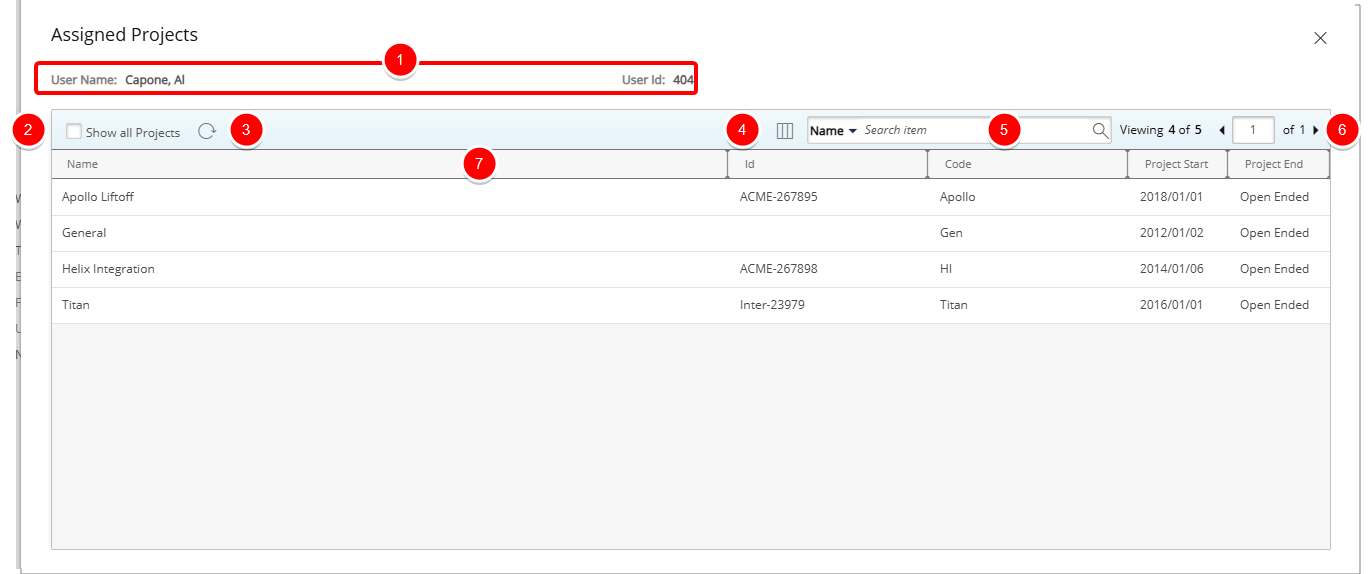
- View the details of the user such as User Name and the User Id.
- By default all suspended Projects are hidden from the Assigned Projects dialog box. If you want to view both non-suspended and suspended Projects, select the Show all Projects option. Once selected, all Projects will appear within the list.
Note: Your selection for showing or hiding suspended Projects is remembered, ensuring your preferred view is consistently applied each time you log in.
- Refresh
 the list.
 - By Default, the following columns are displayed:
- Name: Displays the names of the Project
- Id: Displays the Project ID
- Code: Displays the Project Code
- Project Start: Displays the Project Start Date
Project End: Displayed the Project End Date
From the Column Selection you can choose to include the following columns in the table: - Client: Displays the Client Name
- Offboarding Date: Displays the Offboarding Date
- Onboarding Date : Displays the Onboarding Date
- Project Manager: Displays the Project Manager Name
- By default you can Search
 for Projects based on: Name, Id, Code, Client and Project Manager. You can manage the availability of these search criteria through Column Selection .
 - Pagination is available at the top right corner to facilitate easy navigation across pages.
- From the table header:
- Sort the columns by ascending or descending order simply by clicking a column header. Note that an arrow indicates the descending (
 ) or ascending (
 ) order applied to the column.
 - Dynamically resize column(s), to your preferred width. Simply move your cursor to the column boundary (
 ) you want to resize. When the cursor becomes a resize cursor, click and drag the column accordingly.
- Sort the columns by ascending or descending order simply by clicking a column header. Note that an arrow indicates the descending (