This article covers how to create a new Leave Time.
- From the Icon Bar click Setup
 .
. - From the Navigation Menu click Timesheet.
- From the available menu options select Leave Time.
- Click New to open the Leave Time Edit page.
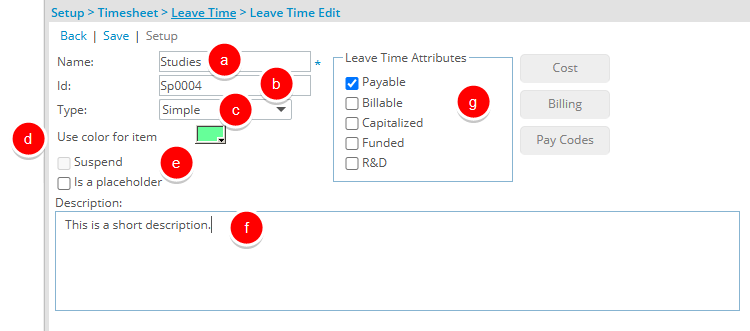
- Enter or select the following information as required:
- Enter a Name for the Leave Time in the Name box.
- Enter an ID for the Leave Time (optional).
- Select a Leave Time Type from the Type options: To-do, Simple, Meeting, Accrual or Break (the Leave Time types are user-defined).
- Select a color for the Leave Time by clicking the Use color for item box (optional).
Tip: The selected color will denote the background color of the cell in a Timesheet when time is entered against this Leave Time as well as the background color of the Leave Request bar within the Group Leave Time Calendar (Setup > Organization > Groups > Group Edit > Group Leave Time Calendar) and the Calendar View (Entries > Leave Request Manager).
- Select the Is a placeholder option if the Leave Time will only be used to maintain the structured hierarchy of the Leave Time list.
- Enter a short Description for the Leave Time.
- Select the appropriate Leave Time Attributes boxes to specify if the Leave Time is Payable, Billable, Capitalized, Funded or R&D.
- Click Save to apply your changes.
You can now proceed with Set Up Leave Time Processing Rules.
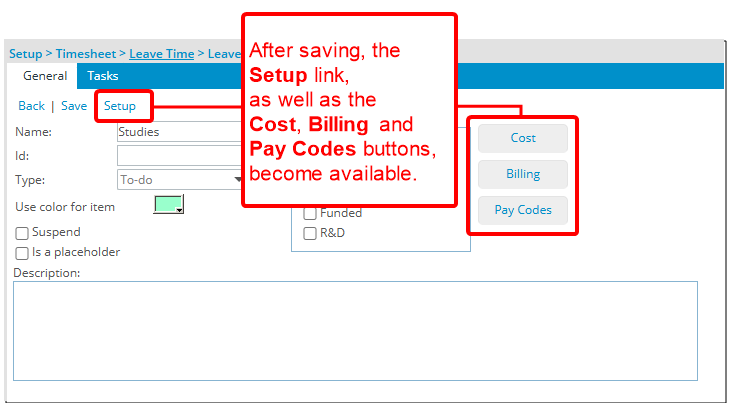
Note: After saving the Leave Time, the Setup link, as well as the Cost, Billing and Pay Codes buttons, become available.