Leave Time Tasks help categorize the types of leave users can request. This article explains how to configure and select which Leave Time Tasks appear on the Leave Request form, ensuring users only see relevant options.
This article details how to define which Leave Time Tasks display on the Leave Request form.
For further details on how to remove a Leave Time Task from the Leave Request form, see Remove a Leave Time Task from the Leave Request Form
Caution: The article outlined here applies to the new My Timesheet.
- Select the appropriate Timesheet Template from the Timesheet Templates page.
- Within the opened timesheet template, click the Setup tab.
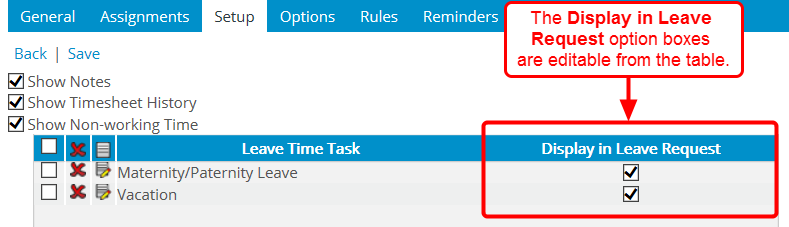
- Within the Leave Time Task table, there is now a Display in Leave Request option for each Leave Time Task added. This is one of the ways to opt or not to opt to have the leave time task display in the leave request form.
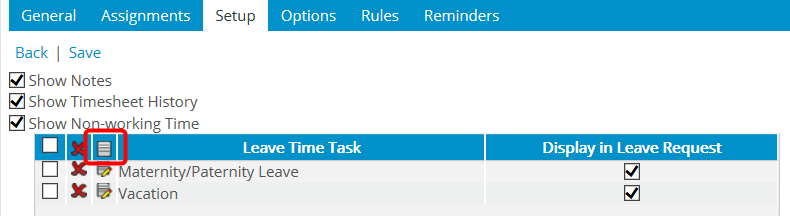
- Click the New
 button to add a Leave Time Task.
- From the Leave Time option list page, make a selection.
- Select the Display in the Leave Request option.
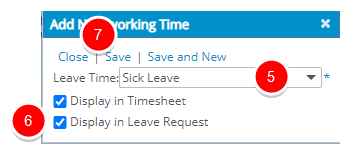
- Click Save and Close.
Note: The users associated to the selected Timesheet Template will see the Leave Time Tasks chosen to be displayed in the Leave Request form when they are logged into the application.
- Note the newly added Leave Time Task and the Display in Leave Request option having been selected.
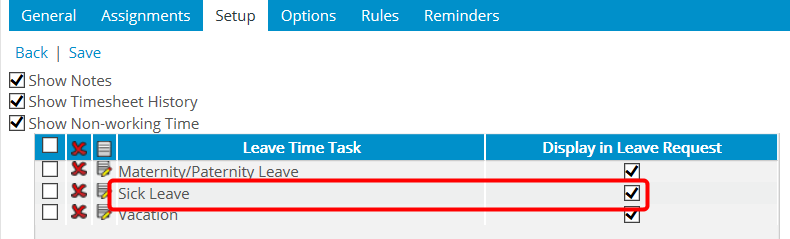
- Click Save.
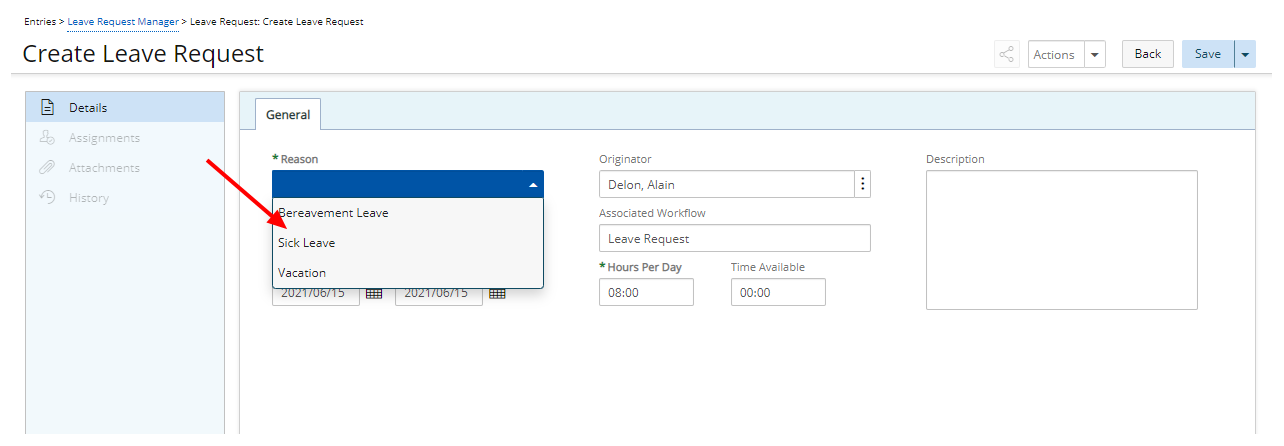
- As a user, access the Leave Request Manager page (Entries > Leave Request Manager) and click Create Leave Request.
- On Create Leave Request page, the Leave Time Task list option is referred to as Reason.
Note: It is at the discretion of your organization as to what the label is to be for the Leave Time Task list option.