Adding New Users
Users represent the individuals who have access to Eclipse PPM. Each user can log into the application and interact with it. Their ability to interact with Eclipse PPM is based off of the permissions that they obtain through the Security Policies and User Groups they belong to.
Administrators can easily add new Eclipse PPM users through the Administration page. Once added, new users will receive an email invitation to join Eclipse PPM.
Tip: If the user you would like to add already exists in Eclipse PPM as a Resource, see Create and Manage Users instead in order to connect the existing Resource profile with the new user's profile.
To add a new user to Eclipse PPM:
Before You Start: Eclipse PPM users require the "User Administration" permission from an Application Policy to add new users.
-
Select the Administration icon
 from the Navigation Menu:
-
Select Users from the "Security" menu:

-
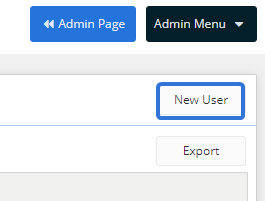
Select the New User button:

-
Enter the "Identification" settings for the new user:

-
First Name (required): The first name of the new user.
-
Last Name (required): The last name of the new user.
-
Initials (required): The new user's initials.
-
Email: The new user's email address.
Note: This does not need to be the email that will receive the invitation or any email alerts. That email will be defined in the "Login" field (Step 6).
-
Handle (required): Enter a unique handle that can be used to identify the user. Although multiple users might have the same name, no users can share the same handle.
Example: Chris wants to mention Josh Norris on a Comment, but there are two users with that name in his organization. He can look at the handle below the name to identify the correct one:

-
Employee ID: The user's employee ID within the organization.
Note: This field is only for identification purposes. Employee IDs are not used in Eclipse PPM.
-
Chat ID: An ID that can be used to reach the user on an instant chat program.
Note: This field is only for identification purposes. Chat IDs are not used in Eclipse PPM.
-
Phone: A work phone number that the user can be reached at.
-
Ext: The phone extension that the user can be reached at.
-
Fax: A fax number that the user can be reached at.
-
-
Enter the "User Settings" for the new user:

-
Login (required): The email address that the user will use to log in to Eclipse PPM. It will also receive any email notifications sent to the user.
-
Account Status: Determine whether the user is active or inactive. Users with an "Inactive" Account Status will not be able to log into Eclipse PPM.
Note: This should be set to "Active" unless you are creating a profile for a future user of Eclipse PPM.
Tip: Administrators can update the Account Status of multiple users simultaneously using Bulk Actions.
-
Account Type: Define the user's account as either "Standard", "Light", or "View Only".
Note: This selection will not affect any of the user's permissions in Eclipse PPM. It is simply to be used for organizing users.
Tip: Organizations that use Eclipse PPM have the freedom to define how Account Types are applied to their users. However, here are some suggested guidelines:
• Standard: The user will take many actions in Eclipse PPM, such as creating Projects, building Work Plans, and/or Resource Management. Administrators should also fall under this category.
• Light: The user only uses Eclipse PPM to make updates and track time. "Light" users should really only be entering time on Timesheets, updating Statuses and progresses, and leaving Comments. Users that take more actions than this should be categorized under "Standard".
• View Only: The user only uses Eclipse PPM to view data or pull reports. "View Only" users should never be making any changes within the application. -
User Groups: Type the name of a User Group into the text box and select it from the drop-down list to add the user to it. Repeat this to add the user to multiple User Groups.
Tip: Use the Select all button to add the user to every User Group or use the Clear button to remove the user from every selected User Group.

-
Application Policies: Type the name of an Application Policy into the text box and select it from the drop-down list to add the user to it. Repeat this to add the user to multiple Application Policies.
Tip: Use the Select all button to add the user to every Application Policy or use the Clear button to remove the user from every selected Application Policy.

-
Project Policy Templates: Type the name of a Project Policy Template into the text box and select it from the drop-down list to add the user to it. Repeat this to add the user to multiple Project Policy Templates.
Tip: Use the Select all button to add the user to every Project Policy Template or use the Clear button to remove the user from every selected Project Policy Template.

-
Program Policy Templates: Type the name of a Program Policy Template into the text box and select it from the drop-down list to add the user to it. Repeat this to add the user to multiple Program Policy Templates.
Tip: Use the Select all button to add the user to every Program Policy Template or use the Clear button to remove the user from every selected Program Policy Template.

-
-
Select the Save button:

After selecting Save, the new user will be saved to Eclipse PPM. An email invitation will be sent to the email address entered into the "Login" field.
If you would like the user to be a Resource in Eclipse PPM as well, see Creating Resources from Users.
To determine the types of permissions the user will have, see Policies and User Groups.