Create and Manage Users from the Resource Page
Resources represent individuals who can be assigned to work in Eclipse PPM. They can be added to Projects and assigned to Tasks that they will be responsible for.
It is important to remember that Resources and users are separate in Eclipse PPM. Once a Resource is created, there is no user profile attached to it. Non-user Resources can still be assigned to Projects and Tasks, but the individual represented by the Resource cannot actually access the application right away. Creating user profiles from existing Resources allows the users to see all the work they are assigned to, make updates, and submit time toward Projects and Tasks on their Timesheets.
Tip: If you are trying to create a new Resource from an existing user, see Creating Resources from Users instead.
Note: Users can also be created separately from Resources. See Create Users for more information.
This page covers the following topics:
Creating Users from the Resource page
Creating users from the Resource page allows a new user profile to be created from a preexisting Resource. This will allow the new user to see any assigned work, make updates, and submit time toward Projects and Tasks on their Timesheets (based on user permissions).
To create a user from the Resource page:
Before You Start: Eclipse PPM users require the "User Administration" permission from an Application Policy to add users in Eclipse PPM.
-
Select the Search icon
 from the Navigation Menu:
-
Select Resources:

-
Select the name of the Resource you would like to turn into a user:

Tip: Use the column header filters to navigate to the Resource.
Note: Only Resources with a "No" value in the "User" column can be turned into users. Resources with a "Yes" value in this column are already users.
-
Select the Create User button:

-
Enter the "User Settings" for the new user:

-
Login (required): The email address that the user will use to log in to Eclipse PPM. It will also receive any email notifications sent to the user.
-
Account Status: Determine whether the user is active or inactive. Users with an "Inactive" Account Status will not be able to log into Eclipse PPM.
Note: This should be set to "Active" unless you are creating a profile for a future user of Eclipse PPM.
-
Account Type: Define the user's account as either "Standard", "Light", or "View Only".
Note: This selection will not affect any of the user's permissions in Eclipse PPM. It is simply to be used for organizing users.
Tip: Organizations that use Eclipse PPM have the freedom to define how Account Types are applied to their users. However, here are some suggested guidelines:
• Standard: The user will take many actions in Eclipse PPM, such as creating Projects, building Work Plans, and/or Resource Management. Administrators should also fall under this category.
• Light: The user only uses Eclipse PPM to make updates and track time. "Light" users should really only be entering time on Timesheets, updating Statuses and progresses, and leaving Comments. Users that take more actions than this should be categorized under "Standard".
• View Only: The user only uses Eclipse PPM to view data or pull reports. "View Only" users should never be making any changes within the application. -
User Groups: Type the name of a User Group into the text box and select it from the drop-down list to add the user to it. Repeat this to add the user to multiple User Groups.
Tip: Use the Select all button to add the user to every User Group or use the Clear button to remove the user from every selected User Group.

-
Application Policies: Type the name of an Application Policy into the text box and select it from the drop-down list to add the user to it. Repeat this to add the user to multiple Application Policies.
Tip: Use the Select all button to add the user to every Application Policy or use the Clear button to remove the user from every selected Application Policy.

-
Project Policy Templates: Type the name of a Project Policy Template into the text box and select it from the drop-down list to add the user to it. Repeat this to add the user to multiple Project Policy Templates.
Tip: Use the Select all button to add the user to every Project Policy Template or use the Clear button to remove the user from every selected Project Policy Template.

-
Program Policy Templates: Type the name of a Program Policy Template into the text box and select it from the drop-down list to add the user to it. Repeat this to add the user to multiple Program Policy Templates.
Tip: Use the Select all button to add the user to every Program Policy Template or use the Clear button to remove the user from every selected Program Policy Template.

-
-
Select the Save button:

After selecting Save, the new user will be saved to Eclipse PPM. An email invitation will be sent to the email address entered into the "Login" field. This individual will exist as both a user and a Resource in Eclipse PPM.
Editing User Settings from the Resource page
A Resource's user settings can be edited from the Resource page at any time.
Note: Only users that are also Resources can be edited from the Resource page. If you would like to edit a user that is not also a Resource, see Edit Users.
To edit user settings from the Resource page:
Before You Start: Eclipse PPM users require the "User Administration" permission from an Application Policy to edit users in Eclipse PPM.
-
Select the Search icon
 from the Navigation Menu:
-
Select Resources:

-
Select the name of the Resource you would like to turn into a user:

Tip: Use the column header filters to navigate to the Resource.
Note: Only Resources with a "Yes" value in the "User" column can have their user settings edited. Resources with a "No" value in this column are not users.
-
Select the View User button:

-
Select the Edit User Settings button:

-
Edit the Resource's user settings:

-
Login (required): The email address that the user will use to log in to Eclipse PPM. It will also receive any email notifications sent to the user.
-
Account Status: Determine whether the user is active or inactive. Users with an "Inactive" Account Status will not be able to log into Eclipse PPM.
Note: This should be set to "Active" unless you are temporarily deactivating a user that will return to Eclipse PPM later.
-
Account Type: Define the user's account as either "Standard", "Light", or "View Only".
Note: This selection will not affect any of the user's permissions in Eclipse PPM. It is simply to be used for organizing users.
Tip: Organizations that use Eclipse PPM have the freedom to define how Account Types are applied to their users. However, here are some suggested guidelines:
• Standard: The user will take many actions in Eclipse PPM, such as creating Projects, building Work Plans, and/or Resource Management. Administrators should also fall under this category.
• Light: The user only uses Eclipse PPM to make updates and track time. "Light" users should really only be entering time on Timesheets, updating Statuses and progresses, and leaving Comments. Users that take more actions than this should be categorized under "Standard".
• View Only: The user only uses Eclipse PPM to view data or pull reports. "View Only" users should never be making any changes within the application.
-
-
Select the Save button:

After selecting Save, the Resource's user settings will be saved to Eclipse PPM.
Deleting Users from the Resource page
Resources can have their user profiles deleted from the Resources page. When this occurs, the Resource will still exist in Eclipse PPM but the individual represented by the Resource will no longer have access to the application.
Note: Only users that are also Resources can be deleted from the Resource page.
Tip: If the user may return to Eclipse PPM in the future, consider editing the user and selecting "Inactive" from the "Account Status" field. This will allow the user to keep all of their user data when they return to the application.
To delete users from the Resource page:
Before You Start: Eclipse PPM users require the "User Administration" permission from an Application Policy to delete users in Eclipse PPM.
-
Select the Search icon
 from the Navigation Menu:
-
Select Resources:

-
Select the name of the Resource you would like to turn into a user:

Tip: Use the column header filters to navigate to the Resource.
Note: Only Resources with a "Yes" value in the "User" column can have their user profiles deleted. Resources with a "No" value in this column are not users.
-
Select the View User button:

-
Open the User Menu:

-
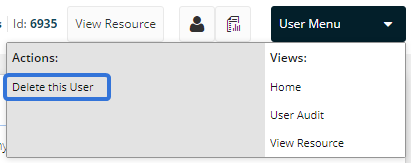
Select Delete this User:

-
Select Yes from the "Delete User" window:

After selecting Yes, the user will be deleted from Eclipse PPM. The Resource profile will still exist in the application.
If the Resource is turned into a user later on, none of the original user's data will be available.