2025R1.1 - New Features
Below is a summary of the new additions to PowerSteering in the 2025R1.1 release. PowerSteering 2025R1.1 is currently scheduled to be deployed to the staging site on July 30th, 2025 and deployed to the production site on August 17th, 2025. When this happens, the listed features will become available.
Note: This page will be updated as new functionality becomes available.
The following key features will be made available with the 2025R1.1 PowerSteering release:
What's Different:
PowerSteering now leverages artificial intelligence (AI) to predict likely end dates for projects.
Note: By using this new feature, you agree to Upland Software's AI terms.
While viewing the Summary pages of certain work items, users will notice a new timeline in the "Schedule" widget.
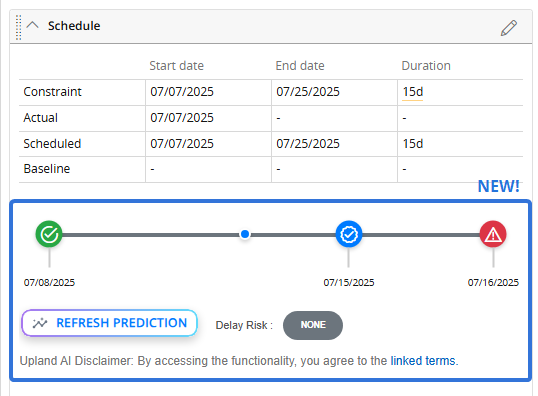
This timeline forecasts likely Actual End Dates using PowerSteering's AI-driven model that has been trained with over 80,000 real-life projects. Characteristics such as the work item's planned duration, current progress, and its place in the Work Tree are analyzed by machine-learning algorithms to predict probable completion dates.
Note: This is PowerSteering's first AI implementation and it is based on a generalized model. This means that early-stage predictions may have a wider confidence range, but it will get better over time.
Please keep in mind that these predictions are meant to be helpful, but the projections should not be solely relied on. They should not replace your work item's Scheduled End Dates.
The timeline contains four icons that represent four different dates:
-
 Current Date: The current calendar date.
 -
 Optimistic Completion Date: A calculated estimate of the earliest Actual End Date projected for the work item. This projection assumes that everything runs as smoothly as possible without any delays.
 -
 Predicted Completion Date: A calculated estimate of when the work item's Actual End Date will most likely arrive.
 -
 Pessimistic Completion Date: A calculated estimate of the latest probable Actual End Date for the work item. This projection assumes that things will go wrong or take longer than expected.
Tip: Scroll your cursor over any of the icons for a reminder of the date they represent.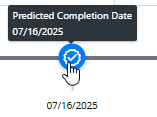
Note: These predicted dates will not change solely based on the time passed. This means that the current date can surpass the predicted Optimistic, Predicted, and Pessimistic Dates. Refreshing the predictions will not necessarily update these dates if they are no longer in the future.
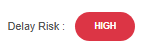
Additionally, the AI model assesses how likely it is that the work item will miss its Actual End Date. The "Delay Risk" field will display "None", "Medium", or "High" depending on the work item's perceived probability of delay.
The timeline will refresh itself along with the Summary page, but users can refresh the projections at any time by selecting the Refresh Predictions button.

The work item must meet the following criteria in order for the timeline to appear in the "Schedule" widget:
-
Its Object Type must be derived from Basic Work or Gated Project.
Note: The names of these Object Types might be different in your PowerSteering environment. Reach out to your PowerSteering representative if you are unsure what this means.
-
It's Actual Start Date must be at least five working days before the current date.
-
It's Actual Start Date must not be older than three years.
-
Its work status must be an active one.
Note: The Edit Work Status Names page indicates which work statuses are active and inactive.
-
It cannot be archived or deleted.
-
Neither its Top Project nor its Master Project can have a "Canceled" status.
Note: The "Canceled" work status name might be different in your PowerSteering environment. See Edit Work Status Names or contact an administrator for more information.
Note: The Top Project is the highest Project above a work item in the Work Tree hierarchy. The Master Project is the closest Project above a work item in the Work Tree hierarchy. If the work item is a Project itself, it will serve as its own Master Project.
Please note that in order to be considered a Project, a work item's Object Type must have the "Is project" checkbox selected during configuration. -
It must not be a Workflow Project.
Speak to your PowerSteering representative if you are interested in enabling this feature for your PowerSteering environment.
Benefit:
This new predictive AI model transforms end date forecasting from guesswork into a strategic advantage for Project Managers. Its data-driven end date predictions provide users with fewer surprises and better project control.
Among other things, end date predictions offer the following benefits:
-
Data-backed decision making: Instead of having to rely on gut feelings or past project experiences, Project Managers can base their decisions on objective, data informed forecasts from over 80,000 real PowerSteering projects.
-
Proactive risk management: Project Managers can simply view the timeline to see when the current date is nearing and/or surpassing the projected end dates, allowing them to adjust Resources, effort, and priorities.
-
Better planning: With clearer visibility into when projects are likely to be completed, Project and Portfolio Managers can sequence their initiatives more effectively. This will lead to reduced bottlenecks and conflicts.
This feature represents the beginning of PowerSteering's commitment to leveraging AI solutions to help project teams work more efficiently and achieve more success.
What's Different:
The Resource Review page is currently going through a renovation to reflect the new "UI 2.0" PowerSteering user interface. The 2025R1.0 release introduced Phase 1 of this transformation, and this release is introducing Phase 2. In particular, this release is rolling out the ability to filter Resource Review data and create new Resource Review Layouts using the new interface.
Resource Review icon bar
Prior to this release, "UI 2.0" only allowed Resource Review users to configure their preferred display settings. Phase 1 of the new interface included a Display button as well as a grayed-out Filter button that was expected to be activated in the next phase.


With this upgrade, both of these buttons have been abandoned. Instead, these functions (and more) are represented by a set of icons.

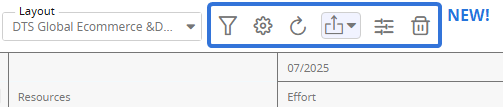
These new icons allow Resource Review users to carry out the following functions:


Filter Settings
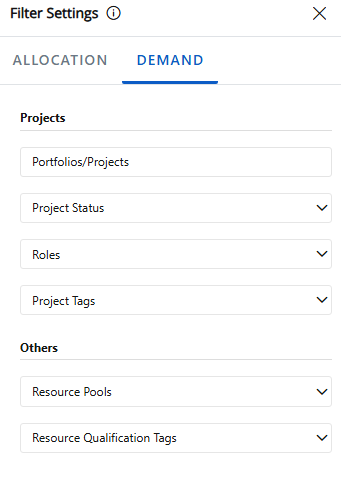
Selecting the Filter icon  opens up the "Filter Settings" window on the right-hand side of the screen.
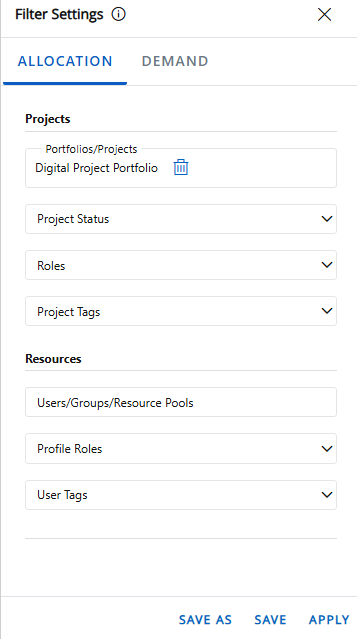
Similar to the legacy Resource Review interface, users can apply filters to the page to limit and refine the data that appears. Filters can be applied to both the Allocation section and the Demand section using the two tabs at the top of the window.
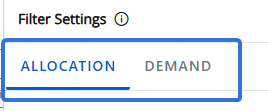
Select either of the tab names below for more information on their filters.
Note: The Allocation and Demand sections will not be affected by each other's filters. "Allocation" filters will not affect the Demand section and "Demand" filters will not affect the Allocation section.
The Resource assignments displayed on the Resource Review page's Allocation section (top section) are a result of the filters that have been placed on the "Allocation" tab. Resource assignments must satisfy all of the selected Project and Resource filters below in order to be displayed in the Allocation section.
Note: Filters that are left empty will not affect the results. However, no data will be loaded into the Allocation section if every field is left empty. Make sure at least one filter has been applied.
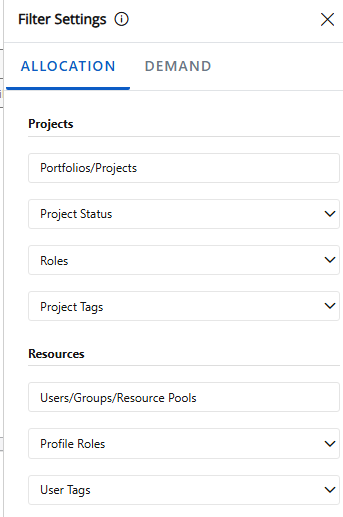
Select any of the "Allocation" categories below to learn more about their specific filters:
These filters determine which work items will be displayed in the Allocation section. Only assignments on work items that satisfy ALL of the filters will be included.
-
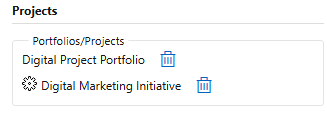
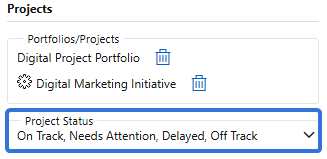
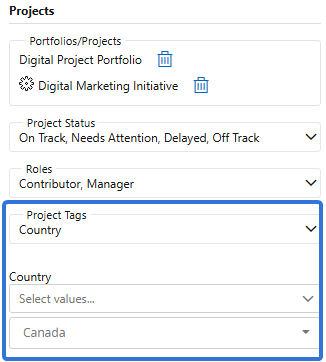
Portfolios/Projects: Only assignments on work items that are directly selected or belong to one of the selected Portfolios will be displayed.
Example: Marie wants to include all work items from her "Digital Project Portfolio" in the Allocation section, but she knows that a few Resources who report to her are also working on the "Digital Marketing Initiative" work item, which is not part of the Portfolio. Therefore, she decides to add the Portfolio and the Project to get a clear view of all relevant assignments.
-
Project Status: Only assignments on work items that currently have one of the selected statuses will be displayed.
Example: Although Marie has already selected the Portfolio (and additional Project) she would like to review, she is only interested in viewing work items that are currently active. She selects the active work statuses from the "Project Status" field.
-
Display canceled projects: Select this checkbox to include assignments from work items with a "Canceled" status.
Note: Work status names can be changed in PowerSteering; the "Canceled" status might be called something different in your PowerSteering environment. Speak to an administrator if you are unsure.
-
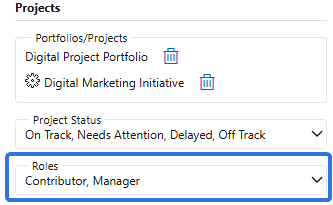
Roles: Only assignments toward at least one of the selected Roles will be displayed.
Note: This means that the assigned work item must have one of the selected Roles in the "Role" column in Project Central. For example, Jack is assigned as a "Contributor" to the "Digital Implementation of AI" work item:

To filter by Roles on User Profiles instead, use the "Profile Roles" filter below.Example: Marie decides that she is really only interested in reviewing effort that has been assigned as Contributor or Manager work. She selects both of these Roles from the "Roles" field.
-
Project Tags: Only assignments on work items that contain any of the indicated value(s) for any of the selected Tag(s) will be displayed.
First, use the "Project Tags" field to select which work item Tags you would like to filter the assignments by.

A new field will appear for each selected Tag.
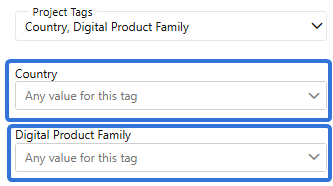
Select the field to determine how the Tag will be used to filter work items.
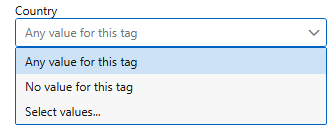
-
Any value for this tag: Work items must contain any value on the Tag in order for its assignments to be displayed.
-
No value for this tag: Work items must have the Tag associated with them, but they must not contain any values for it in order for their assignments to be displayed.
-
Select values...: An additional field will appear for the selected Tags. Selecting the field open up a window with the Tag values.
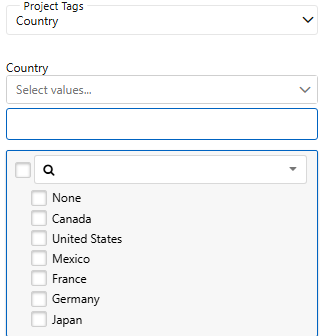
A work item must have at least one of the checked values selected on the Tag in order for its assignments to be displayed in the Allocation section.
Example: Marie decides she would only like to view Manager and Contributor effort that takes place in Canada. Thankfully, she can filter the assignments by the "Country" Tag. She uses the "Select values..." option and selects the "Canada" checkbox. Only assignments from work items with "Canada" selected for the "Country" Tag will be included.
-
These filters determine which Resources will be displayed in the Allocation section. Only assignments toward Resources that satisfy ALL of the filters will be included.
Note: Assignments will need to satisfy all of the "Resource" filters AND the "Project" filters above in order to be displayed in the Allocation section.
-
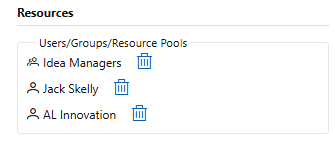
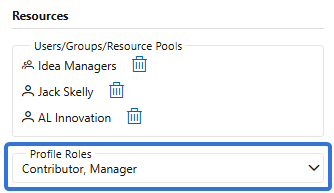
Users/Groups/Resource Pools: Assignments will only be displayed if the assigned Resource is directly selected or if the assigned Resource belongs to one of the selected User Groups or Resource Pools.
Example: Marie wants to see assignments toward Resources that belong to the "Idea Managers" User Group, as well as Resources that belong to the "AL Innovation" Resource Pool. However, she knows that one of her employees (Jack) does not belong to either of these, but she wants to view his assignments too. She selects all three entities ("Idea Managers", "AL Innovation", and Jack) from the "Users/Groups/Resource Pools" field.
-
Profile Roles: Assignments will only be displayed if the assigned Resource has at least one of the selected Roles on their User Profile.
Note: This means that the Role must be added to the Resource's User Profile.
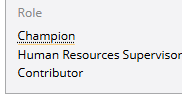
To filter assignments by assigned Roles, see the "Roles" filter above.Example: Marie selected "Contributor" and "Manager" from the "Roles" filter above, but the results include a lot of Resources that are only acting as Contributors and Managers on certain work items. She decides she only wants to see assignments toward these Roles from Resources who are actual Contributors and Managers in her organization. This is why she selects both "Contributor" and "Manager" from the "Profile Roles" filter as well.
-
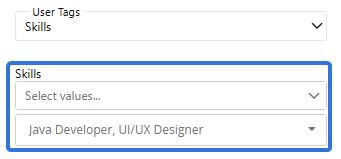
User Tags: Assignments will only be displayed if the assigned Resource contains any of the indicated values for any of the selected Tags.
Tip: User Tags can be edited on User Profiles.
First, use the "User Tags" field to select which Tags you would like to filter the assignments by.

A new field will appear for each selected Tag.
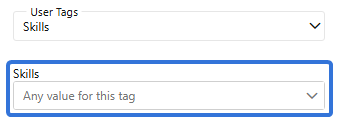
Select the field to determine how the Tag will be used to filter work items.
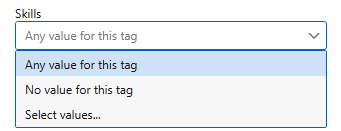
-
Any value for this tag: Users must contain any value on the Tag in order for their assignments to be displayed.
-
No value for this tag: Users must have the Tag associated with them, but they must not contain any values for it in order for their assignments to be displayed.
-
Select values...: An additional field will appear. Selecting the field will open up a window with the Tag values.
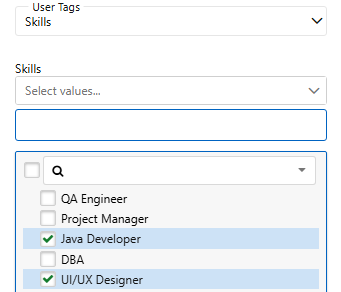
Users must have at least one of the checked values selected on the Tag in order for their assignments to be displayed in the Allocation section.
Example: For the sake of curiosity, Marie decides she would only like to view the assignments of Managers and Contributors that are skilled in Java Development and UI/UX Design. Thankfully, she can filter the Resource assignments by the "Skills" User Tag. She uses the "Select values..." option and selects the "Java Developer" and "UI/UX Designer" checkboxes. Only assignments toward Resources with at least one of these values selected for the "Skills" Tag on their User Profiles will be included.
-
The unstaffed demand displayed on the Resource Review page's Demand section (bottom section) are a result of the filters that have been placed on the "Demand" tab. Demand must satisfy all of the selected filters below in order to be displayed in the Demand section.
Note: Filters that are left empty will not affect the results. However, no data will be loaded into the Demand section if every field is left empty. Make sure at least one filter has been applied.
Select any of the "Demand" categories below to learn more about their specific filters:
These filters determine which work items will be displayed in the Demand section. Only demand on work items that satisfy ALL of the filters will be included.
-
Portfolios/Projects: Only demand on work items that are directly selected or belong to one of the selected Portfolios will be displayed.
Example: Marie wants to include all work items from her "Digital Project Portfolio" in the Demand section, but she knows that a few Resources who report to her are also working on the "Digital Marketing Initiative" work item, which is not part of the Portfolio. Therefore, she decides to add the Portfolio and the Project to get a clear view of all relevant assignments.
-
Project Status: Only demand on work items with one of the selected statuses will be displayed.
Example: Although Marie has already selected the Portfolio (and additional Project) she would like to review, she is only interested in viewing demand on work items that are currently active. She selects the active work statuses from the "Project Status" field.
-
Display canceled projects: Select this checkbox to include data from work items with a "Canceled" status.
Note: Work status names can be changed in PowerSteering; the "Canceled" status might be called something different in your PowerSteering environment. Speak to an administrator if you are unsure.
-
Roles: Only demand toward at least one of the selected Roles will be displayed.
Note: This means that the demand must have one of the selected Roles in the "Role" column in Project Central. For example, the work item below has no Resource assignment (making it unstaffed demand), but the "Contributor" Role has already been selected for it:

To filter by Roles on User Profiles, use the "Profile Roles" filter below. -
Project Tags: Only demand on work items that contain any of the indicated value(s) for any of the selected Tag(s) will be displayed.
First, use the "Project Tags" field to select which work item Tags you would like to filter the demand by.
A new field will appear for each selected Tag.
Select the field to determine how the Tag will be used to filter work items.
-
Any value for this tag: Work items must contain any value on the Tag in order for its demand to be displayed.
-
No value for this tag: Work items must have the Tag associated with them, but they must not contain any values for it in order for their demand to be displayed.
-
Select values...: An additional window will open up with the Tag values.
A work item must have at least one of the checked values selected on the Tag in order for its demand to be displayed in the Allocation section.
Example: Marie decides she would only like to view Manager and Contributor demand that takes place in Canada. Thankfully, she can filter the demand by the "Country" Tag. She uses the "Select values..." option and selects the "Canada" checkbox. Only demand from work items with "Canada" selected for the "Country" Tag will be included.
-
These filters further determine which demand will appear in the Demand section. Only demand that satisfies ALL of the filters will be displayed.
-
Resource Pools: Only unstaffed demand that has been assigned to the selected Resource Pool(s) will be included.
Note: This means that the demand must have one of the selected Roles in the "Role" column in Project Central. For example, the "Initial website mockups" work item below has no Resource assignment (making it unstaffed demand), but the "Tech Center" Resource Pool has already been selected for it:

-
Resource Qualification Tags: Only demand that contains any of the indicated value(s) for any of the selected Resource Qualification Tags will be displayed.
Note: Resource Qualification Tag values can be associated with unstaffed demand on Project Central.

In the example above, "Skills" is a Resource Qualification Tag that has been added as a column to a Project Central Layout. Both "Java" and "PMI" are the values that have been selected for the Tag.Note: Resource Qualification Tags must be configured through Resource Planning.
First, use the "Resource Qualification Tags" field to select Tags you would like to filter the demand by.

A new field will appear for each selected Tag.
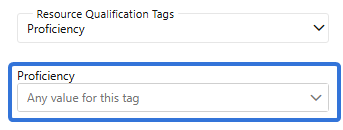
Select the field to determine how the Tag will be used to filter unstaffed demand.
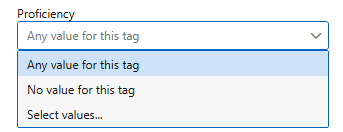
-
Any value for this tag:Demand must contain any value on the Tag to be displayed.
-
No value for this tag: Demand must have the Tag associated with it, but it must not contain any values for it to be displayed.
-
Select values...: An additional field will open up. Selecting it will open a window with the Tag values.

Demand must have at least one of the checked values selected on the Tag to be displayed in the Demand section.
-
Display Settings
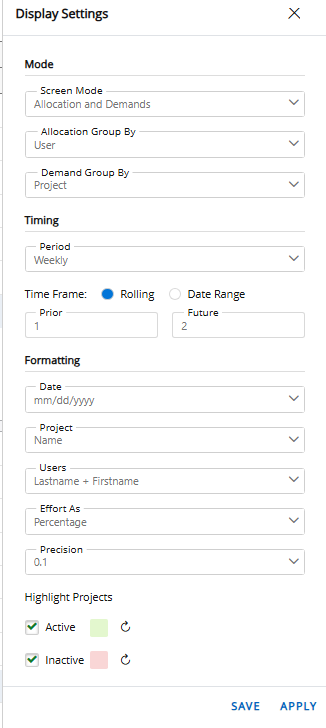
Selecting the Display icon opens up the "Display Settings" window on the right-hand side of the screen.
Refresh
Selecting the Refresh icon will refresh the Resource Review page with the most recent data.
Export
Selecting the Export icon  allows users to export Resource Review data into a Microsoft Excel spreadsheet. Users can choose to export data from either the Allocation or the Demand section.

When one of these sections is selected, its data will immediately be downloaded onto the user's device as a .xls file.
Collapse/Expand
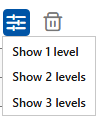
Selecting the Collapse/Expand icon  allows users to automatically hide or reveal certain data based on the hierarchy of the row item.
Note: Data can still be manually expanded and collapsed by selecting the "plus" or "minus" icons in a line item.
There are three options:
-
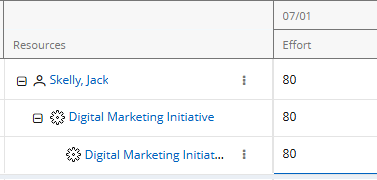
Show 1 level: All of the Resource Review data will be collapsed. Only the first level of items in the hierarchy will be displayed.

-
Show 2 levels: Only the first two levels of items in the hierarchy will be displayed.

-
Show 3 levels: Three levels of items in the hierarchy will be displayed.
Delete Current Layout
Selecting the Delete Current Layout icon  allows users to delete the Resource Review Layout they are currently viewing. Once deleted, a Resource Review Layout can no longer be applied to the page.
Note: Lack of permissions will not stop a user from deleting any Resource Review Layouts that they have created themselves or that have been shared with them.
Save new Resource Review Layouts
"UI 2.0" can now be used to create and save new Resource Review Layouts.
Note: Resource Review Layouts saved on the "UI 2.0" interface cannot be used on the legacy Resource Review page. See below for more information.
Once all of the desired filters and display settings have been configured, users will now find three options at the bottom of the "Filter Settings" and "Display Settings" windows.
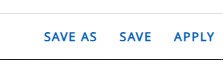
-
Save As: A new Resource Review Layout will be created for the current configuration of filters and display settings. This will open up the "Save Layout" window, which allows the user to create a name for the layout and determine whether other users can view it.
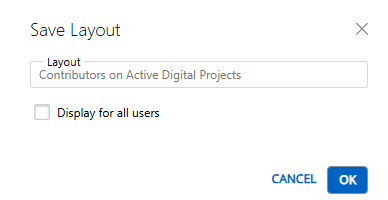
Note: Layouts that are displayed for all users can be deleted by any users that can view them.
-
Save: The filter and display changes will be saved to the current Resource Review Layout.
-
Apply: The filter and display changes will be applied to the data, but they will not be saved to any layout. Leaving or refreshing the page will result in the changes being lost.
Assign/Change allocations/demand and notify Project Owners
When users expand an Allocation or Demand line item to the third level on the legacy Resource Review page, a drop-down menu opens up.
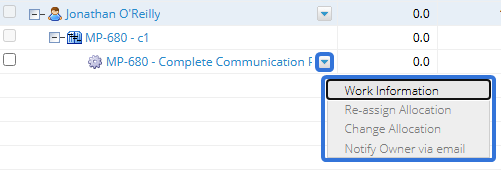
Prior to this release, this same drop-down on the new Resource Review interface did not contain the same options.
With this update, the full drop-down menu is now available for each work item in the Allocation and Demand sections.
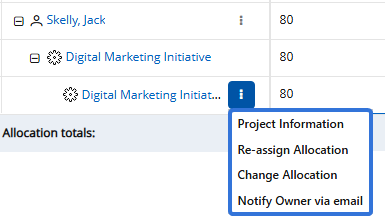
The following options are available through "UI 2.0":
-
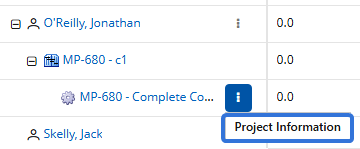
Project Information: This will open up a window that contains information about the work item.
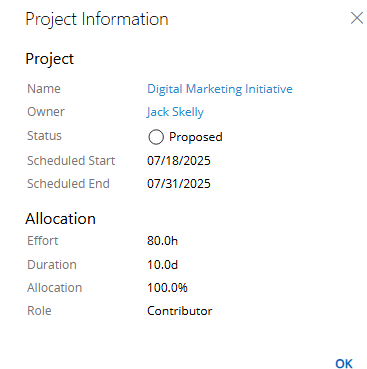
Note: The 2025R1.1 release now includes the work item name in the "Project Information" window.
-
Re-assign Allocation/Demand: Re-assign all of the allocation or demand to another Resource. A window will appear that provides three methods for finding a replacement Resource.

 Search
Enter a name (first or last) into the search bar and select the Search button. From the results table, select the "Plus" icon
 of the Resource you would like to assign.
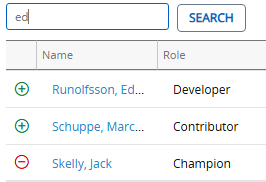
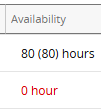
Tip: Scroll horizontally to the right to see the availability of each Resource.
 Best Matches
This option will provide a list of best-suited Resources, calculated by the required Role, the Resource Pool, and the Resources' Tag set (location, skills, etc.). From the results table, select the "Plus" icon
of the Resource you would like to assign.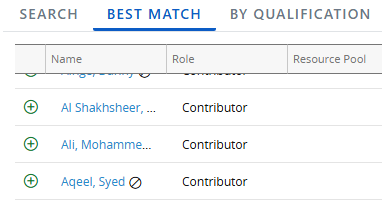 By Qualification
This option allows you to perform a Resource search based on chosen criteria, including Profile Roles, Resource Pools, and Resource Qualification Tags.
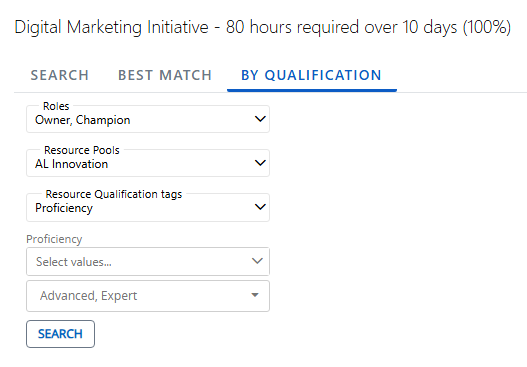
Note: Administrators can determine Resource Qualification Tags through Resource Planning.
Use the drop-down menus to select the criteria of your preferred Resource and select the Search button to compile a list of preferred Resources for the allocation.
Note: Resources only need to satisfy one of the selected values for each field. For example, if more than one value is selected for a Resource Qualification Tag, a Resource will only need one of those values selected for the Tag on their profile to be included in the results.
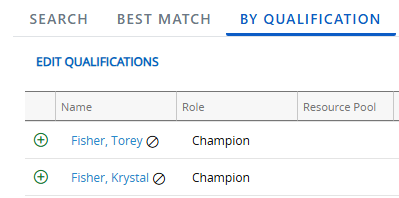
From the results table, select the "Plus" icon
of the Resource you would like to assign. -
Change Allocation/Demand: Determine other Resources that will receive the allocation or demand. As opposed to "Re-assign Allocation/Demand", this option can be used to divide the allocation or demand amongst multiple Resources.
A window will appear that provides three methods for finding Resources, as well as a "Split Allocation/Demand" tab that determines how the allocation or demand will be divided.
 Search
Enter a name (first or last) into the search bar and select the Search button. From the results table, select the "Plus" icon
of the Resources you would like to assign.
Tip: Scroll horizontally to the right to see the availability of each Resource.
After you have selected all of your Resources, press the OK button to add them to the "Split Demand" tab or use another tab ("Best Match" or "By Qualification") to find more Resources.
Best Matches
This option will provide a list of best-suited Resources, calculated by the required Role, the Resource Pool, and the Resources' Tag set (location, skills, etc.). From the results table, select the "Plus" icon
of the Resource you would like to assign.
After you have selected all of your Resources, press the OK button to add them to the "Split Demand" tab or use another tab ("Search" or "By Qualification") to find more Resources.
By Qualification
This option allows you to perform a Resource search based on chosen criteria, including Profile Roles, Resource Pools, and Resource Qualification Tags.
Note: Administrators can determine Resource Qualification Tags through Resource Planning.
Use the drop-down menus to select the criteria of your preferred Resource and select the Search button to compile a list of preferred Resources for the allocation.
Note: Resources only need to satisfy one of the selected values for each field. For example, if more than one value is selected for a Resource Qualification Tag, a Resource will only need one of those values selected for the Tag on their profile to be included in the results.
From the results table, select the "Plus" icon
of the Resource(s) you would like to assign.After you have selected all of your Resources, press the OK button to add them to the "Split Demand" tab or use another tab ("Search" or "Best Match") to find more Resources.
Split Demand
This tab allows the allocation or demand to be divided up and assigned to multiple users.
Note: Before using this tab, use the other three tabs to determine the Resources that will be listed on this page.

First, use the "Split Type" drop-down menu to determine how much of the allocation or demand will be divided by the listed Resources.
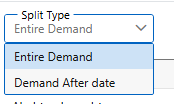
-
Entire Allocation/Demand: All of the work item's allocation or demand will be divided amongst the listed Resources.
-
Allocation/Demand After date: Only the work item's allocation or demand after a specific date will be divided amongst the listed Resources. The allocation or demand prior to this date will remain unaffected.
Use the "Date" field to determine this date.

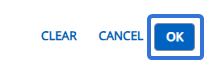
Next, determine how the allocation or demand will be divided amongst the listed Resources by entering percentages into the "Split Percentage" fields.
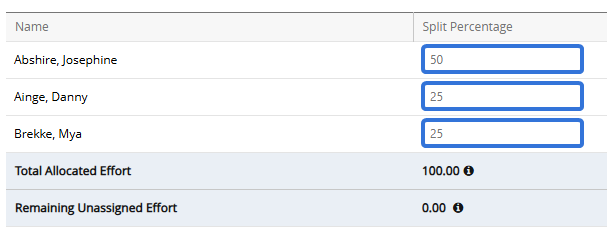
Finally, select the OK button in the bottom right-hand corner to finalize the assignments.
-
-
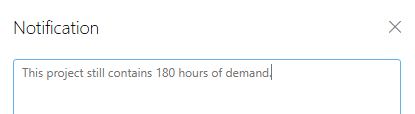
Notify Owner via email: Send a message to the work item's Owner about the allocation or demand. A "Notification" window will appear with a text box for the message.
Benefit:
This new interface matches the new look and feel that has been implemented across PowerSteering over the last couple of years. With this upgrade, users can most notably use the new interface to apply filters to Resource Review data and save new Resource Review Layouts. This is one of many ongoing updates being worked on to make PowerSteering more usable, unified, and intuitive.
Going forward, the new Resource Review page will introduce even more user-friendly components that will offer users the same Resource Review functionality that they are familiar with.
What's Different:
The legacy Resource Review interface and the "UI 2.0" Resource Review interface will no longer support each other's Resource Review Layouts after this release. Layouts saved on the legacy Resource Review page cannot be opened in the new Resource Review page and vice versa. There is no exception for Resource Review Layouts that were saved prior to this release.
Note: Resource Review Layouts saved on the legacy page can be seen by selecting Review → Resource Review from the Navigation Menu.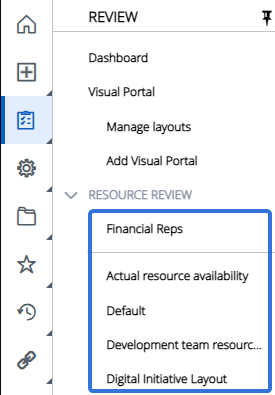
Resource Review Layouts saved on the new Resource Review interface can be seen on the new page itself under the "Layout" drop-down menu.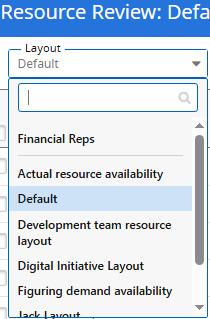
Due to all of the new features implemented into Phase 2 of the "UI 2.0" Resource Review interface, Resource Review Layouts created from each interface are no longer compatible with each other. Once the legacy Resource Review page is deprecated with a future release, legacy page layouts will no longer be available.
Note: A date for the legacy page deprecation has not yet been determined. PowerSteering users will receive plenty of notice before this deprecation takes place.
Recommended Action:
Users who wish to use their legacy page Resource Review Layouts on the new Resource Review interface should recreate and save them on the new page. Legacy layouts will no longer be available once the legacy page is deprecated, so they should be recreated before they can no longer serve as a reference.
Note: Please reach out to your PowerSteering representative if you would like any assistance recreating Resource Review Layouts.
The following enhancements will also be available with the 2025R1.1 release:
Alerts & Notifications
What's Different:
PowerSteering will now send an additional warning email when a report subscription is set to expire. This email will be sent out to the subscribed users one week before the report is scheduled to expire.
Note: Reminder emails will still be sent on the day the report expires.
This new email will resemble the email that is sent on the date of expiration.
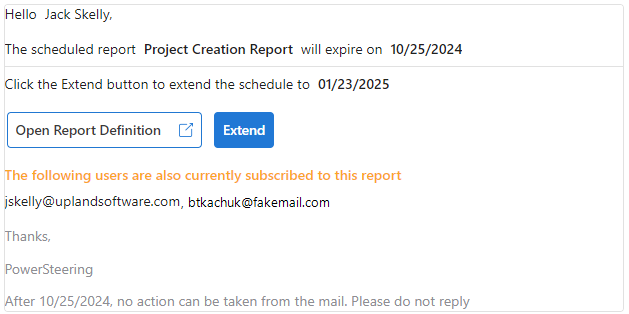
Note: If your organization is a Microsoft 365 tenant, the email will match this formatting. Users that are not tenants will see this email in plain text instead. If your organization is a tenant but you are not seeing this formatting, contact your PowerSteering representative.
If the report is extended, the second reminder email will be canceled.
Benefit:
Prior to this release, the warning email was only sent out the day the report subscription was set to expire. This was insufficient because reports would often expire on non-working days or days when users were too busy to address them. With this upgrade, users now have plenty of time to renew their report subscriptions and avoid any lapses in reporting cycles.
Financial Review
What's Different:
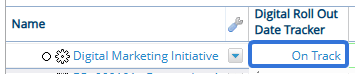
Users can now use column headers on the Financial Review page to sort and filter their data.
Prior to this release, Financial Review data could neither be sorted nor be filtered. None of the column headers contained the arrows that commonly open up a sort/filter window.

With this update, arrows have been added to column headers on the Financial Review page.

Note: Not all columns on the Financial Review page will feature a sort/filter arrow.
Selecting an arrow from a column header allows the user to sort and/or filter Financial Review data based on the column's values.
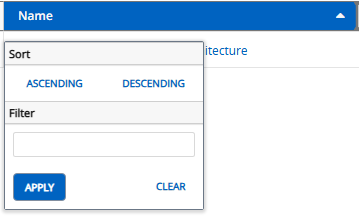
Note: These sort/filter windows are just like the ones that can be found on other PowerSteering data grids.
Benefit:
Sorting and filtering data is extremely useful, especially on the Financial Review page where users commonly deal with large amounts of numeric and work item-related data. Sorting allows users to easily navigate to their preferred work items (i.e. work items sorted in ascending alphabetical order) and filtering ensures that user are only viewing the data they wish to see (i.e. only displaying data from work items with an "On Track" status). Both of these tools make the Financial Review page less cluttered and easier to act on, which leads to better insights and faster decisions.
Measures
What's Different:
Measures can now be configured to automatically recalculate a value after Metrics on the same work item have been edited.
Note: This setting is inactive by default. If you would like to enable it for your PowerSteering environment, please reach out to a PowerSteering representative.
When this setting is active, all of a work item's Measures will automatically recalculate whenever changes are made to any of the work item's Metrics. These changes include edits to a Metric's numeric values, Tag/Custom Field values, or lock settings. Metric comments will not trigger a Measure recalculation.
Whenever Metric changes are saved, a green success banner will appear at the top of the screen to indicate that the work item's Measures have been recalculated.

Benefit:
Prior to this release, automatic Measure recalculation only occurred according to the History Schedule set on the Measure Template. The maximum number of times it could be set to automatically calculate was once per day. Unfortunately, this is not enough for PowerSteering users who constantly update their work item Metrics; Measures that relied on Metric data would be inaccurate between the time of the Metric update and the time of the scheduled Measure recalculation.
With this update, this inaccuracy period has been eliminated. Users can be sure that any Measure values that are calculated from Metric data are up-to-date and accurate.
What's Different:
The Measure Templates page now supports additional date values while configuring the Indicator Type. In particular, users can enter date values while selecting the Target Values of "Goal" indicators as well as the thresholds for "Variance" indicators while creating new Measures.
Prior to this release, users could not enter dates into either of these field types when "Date" was selected as the Display Format. In the case of "Goal" indicators, users would have to enter an EPOCH number to represent the date.
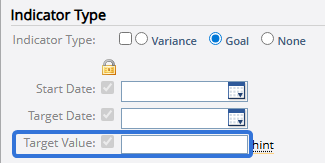
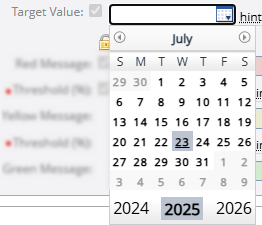
With this update, a date picker has been added to the "Target Value" field.
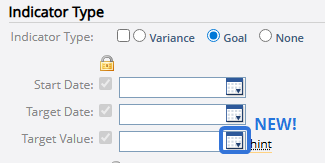
Users can directly select the Calendar icon  to choose an actual date that will serve as the Target Value for the Measure.
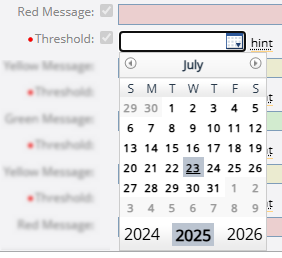
Also prior to this release, EPOCH numbers had to be entered in as threshold values for "Variance" indicators.
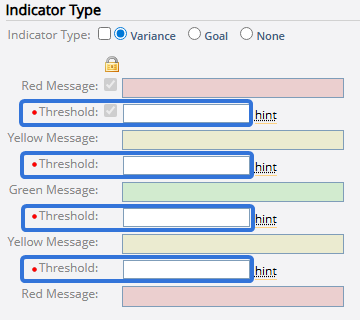
With this update, date pickers have been added to these fields as well.
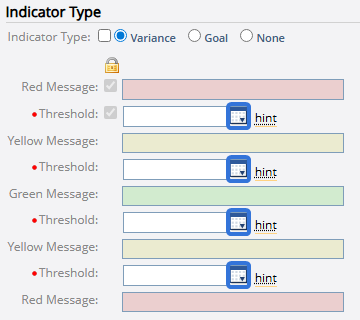
Users can directly select the Calendar icon to choose actual dates that will serve as thresholds for the Measure.
These date formats have also been extended to the Report Wizard. Prior to this release, for example, the "Variance (Fmt)" column would display the EPOCH number that represented a date.

The "Variance (Fmt)" column (as opposed to the raw "Variance" column) is expected to display values in a readable, intuitive format.
With this update, the "Variance (Fmt)" column now displays the value as a date.

Benefit:
Prior to this upgrade, users had to enter EPOCH numbers to represent both of these date values. This required users to temporarily learn about EPOCH numbers, which are highly technical and unintuitive compared to actual dates. Additionally, EPOCH numbers can be difficult to convert. This means that they take even more time and effort to calculate and they are more susceptible to error. Allowing users to select dates with a date picker instead of entering EPOCH numbers reduces errors, saves time, and improves overall accessibility while creating Measures in PowerSteering.
What's Different:
Users can now choose to display Measure indicator messages instead of numeric values on Dashboards and PowerSteering reports.
Note: Users can set indicator messages for each threshold while creating or editing Measure Templates.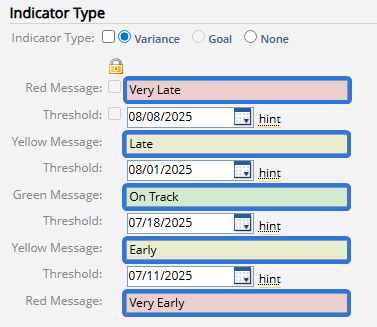
Select either of the components below for more information:
Prior to this release, administrators could only choose to display Measure values, indicators, or threshold background colors while configuring Measure columns on Dashboard Layouts.
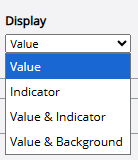
With this update, administrators can now choose to display the indicator message itself. Three new options have been added to the "Display" drop-down menu.
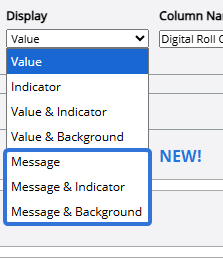
-
Message: The column will only display the indicator message that matches the Measure value.
-
Message & Indicator: The column will display the indicator message and the indicator icon that match the Measure value.

-
Message & Background: The column will display the indicator message with a background color that matches the threshold.

Tip: Scrolling over a Measure cell on a Dashboard will display the indicator message as well as the numeric value.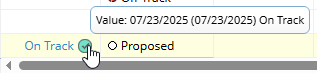
With this update, the Report Wizard now features a new "Indicator message" column option under the "Measure / Raw" category.

This column will display the indicator message that corresponds with the current Measure value.

Benefit:
Displaying text-based indicator messages in the place of numeric Measure values increases clarity and readability for users by making Dashboards and reports more understandable at a glance. Although background colors on Dashboards provide helpful visual cues, indicator messages add precision that describes the value more accurately (e.g., seeing "High Risk" instead of just a red background).
Users
What's Different:
The last login date and time will now be displayed on the User Profiles of no-access users.
Prior to this release, the "Last Login" field was only displayed on the User Profiles of active PowerSteering users. With this update, it has been added to the profiles of no-access users as well.
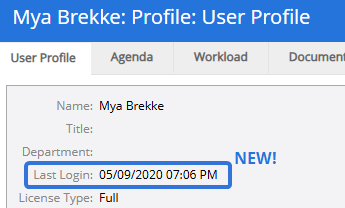
This field will display the date and time of the last user login before the user was changed to no-access.
Benefit:
This new field will indicate the last time a user interacted with PowerSteering before their access was revoked. This can be useful for auditing and security reviews, especially while attempting to determine why and how a user lost access to the application.