Content Record Details Panel
The Details panel provides quick access to details of a content record that are useful and help you perform many tasks. These details include Content Summary , Feedback , Keywords, Learned Terms, Library References, Preview, Usage, Similar Content , Linked Content , Revisions, and Review Job History.To open the context sensitive Details panel on the right of the Library page, double-click a content record. Select the required details from the View drop-down menu. The Content ID and Title are displayed at the top of the panel.
Content Summary
The Content Summary of a content record gives an overview of the content record's status and additional details like comments, alert messages, checkout, linked content IDs, etc.

Examples of the Content summary in the Details panel. It shows that the content record is not check out, has alerts enabled, has expiration date, is bundled, has no feedback, has comments, and is linked to 3 records. The alert message and comment are visible. Click to expand.
You can show, hide, and order fields that will be displayed in the Content Summary View.
- Click the Configure Content Summary
 icon. The "Configure Content Summary" dialog appears.
 - To filter the column list, enter text into the search box.
- Select your desired field(s) using the checkboxes or by clicking the rows and using CTRL+CLICK or SHIFT+CLICK to select multiple records. Select the Select All option from the More Options
 menu to enable all the columns and use the Left
  and Right
  icons to move the columns between the Available and Selected columns to determine which columns will be displayed on the grid.
 - To determine grid order: drag and drop any Selected Fields, select specific field checkboxes and use the Move to Top or Move to Bottom options from the More Options menu, or select specific column checkboxes and use the Up
 and Down
  icons to order the columns.
 - Click Restore Default to return to the default settings.
- Click Save to save the changes and close the dialog or Cancel to close without saving changes.
Feedback
You can see the feedback and replies by users in a discussion thread. You can reply in a thread. You can also provide separate feedback by using the "Submit Feedback" button. For more information, see Feedback.
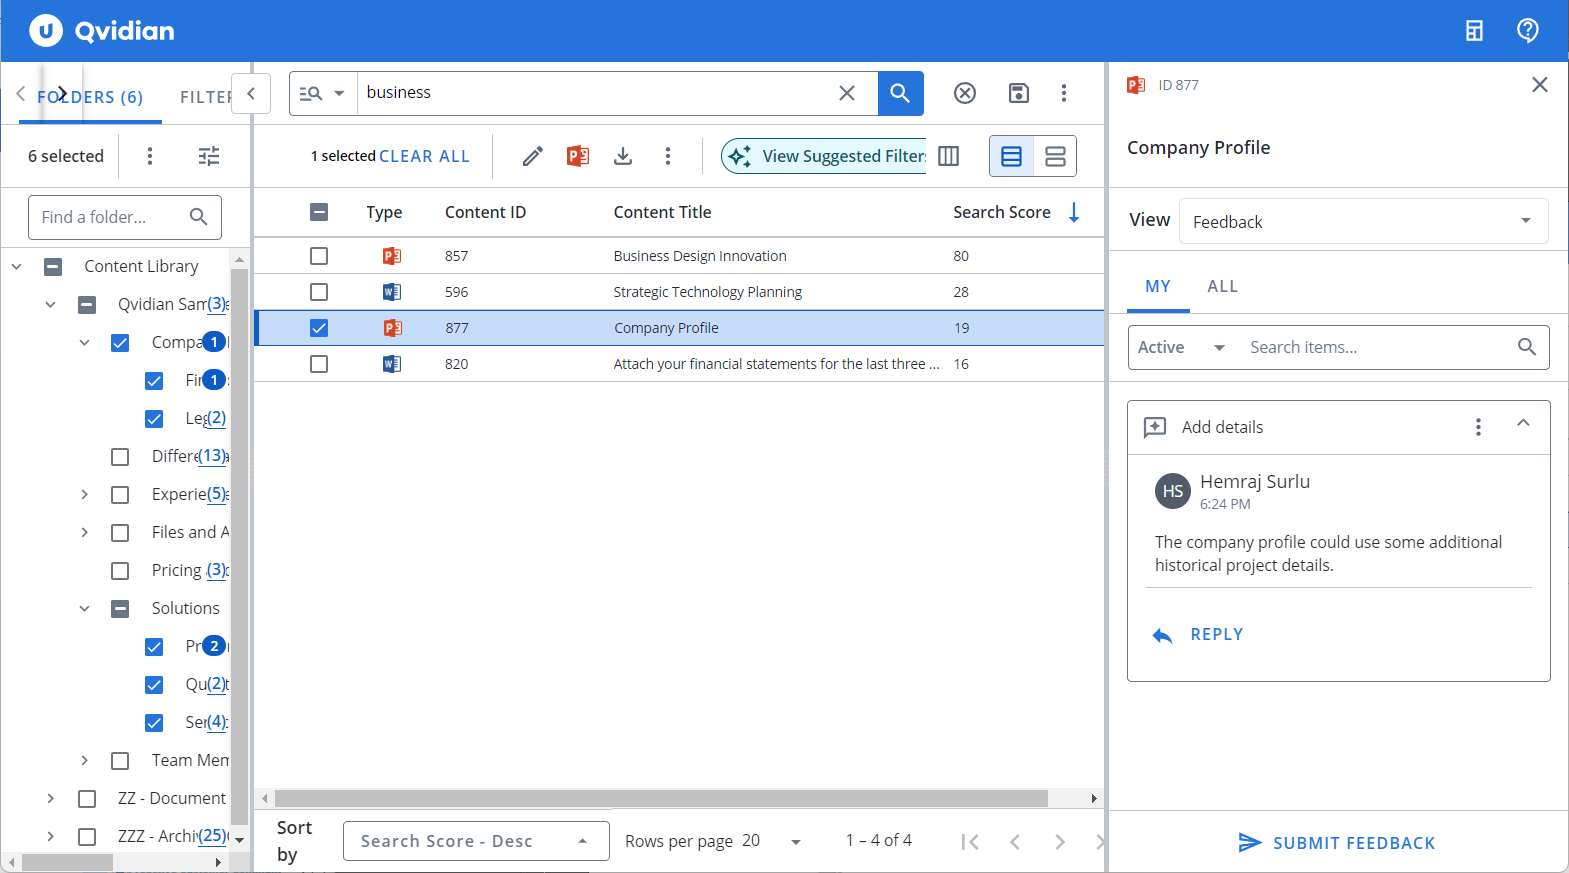
Examples of Feedback in the Details panel. It shows the feedback in expanded view, option to reply to a feedback, and the "Submit Feedback" button at the bottom. Click to expand.
- Click the My toggle to view your feedback.
- Click the All toggle to view all feedback.
- Choose Active from the dropdown menu to view currently active feedback.
- Choose Archived from the dropdown menu to view archived feedback.
- To search for specific feedback, enter text into the search box at the top right of the grid, and click the Search
 icon or Enter.
 - To re-display all feedback in the grid, delete the entire entry in the box by clicking the X.
- Click Submit Feedback. The "Submit Feedback" dialog displays.
- Click the Edit
 icon to choose which Recipients will receive the feedback. The "Edit Recipients" dialog displays.
 - Filter the list of recipients that are displayed: All, Selected, or Unselected.
- Enter text into the Type to find and manage recipients.... search field, and click the Search icon or Enter.
- Select the desired recipients by clicking their name. Once selected, the name will be highlighted blue and contain a blue checkmark. Click the recipient again to remove the recipient from the list.
- Click Done.
- Select the feedback Type from the dropdown list: Content Comment, Content Problem, Content Question, or Content Suggestion.
- Enter a Title.
- Enter any Comments.
- Upload any attachments by clicking Browse Files or dragging and dropping the desired files into the area.
- Click Save.
- Hover over the desired feedback item.
- Click the More Options menu and select View Thread. The full feedback thread will display in the panel.
All replies from users can be viewed in the thread. There are several options to reply to a feedback item:
- Click the Reply button on the feedback item.
- Click the More Options menu and select Reply.
- Hover over the desired feedback item.
- Click the More Options menu and select Edit Recipients. The "Edit Recipients" dialog will display.
- Filter the list of recipients that are displayed: All, Selected, or Unselected.
- Enter text into the Type to find and manage recipients.... search field, and click the Search icon or Enter.
- Select the desired recipients by clicking their name. Once selected, the name will be highlighted blue and contain a blue checkmark. Click the recipient again to remove the recipient from the list.
- Click Done.
- Hover over the feedback item that you want to close.
- Click the More Options menu and select Mark As Closed. The "Mark As Closed" dialog will display.
- Click the Edit icon to choose which Recipients will be notified. The "Edit Recipients" dialog displays.
- Filter the list of recipients that are displayed: All, Selected, or Unselected.
- Enter text into the Type to find and manage recipients.... search field, and click the Search icon or Enter.
- Select the desired recipients by clicking their name. Once selected, the name will be highlighted blue and contain a blue checkmark. Click the recipient again to remove the recipient from the list.
- Click Done.
- If desired, update the feedback Type from the dropdown list: Comment, Problem, Question, or Suggestion.
- Select the Closure Reason.
- Enter any Comments.
- Upload any attachments by clicking Browse Files or dragging and dropping the desired files into the area.
- If you do not wish to receive a notification email about this feedback, select the Do not send me a notification email checkbox.
- Click Mark As Closed.
- Hover over the desired feedback.
- Click the More Options menu and select Delete. The "Confirm Deletion" dialog will display.
- Click Delete.
Keywords
In this view you can see the keywords, which are words or phrases explicitly assigned to content records to categorize them. They also help to search the record.
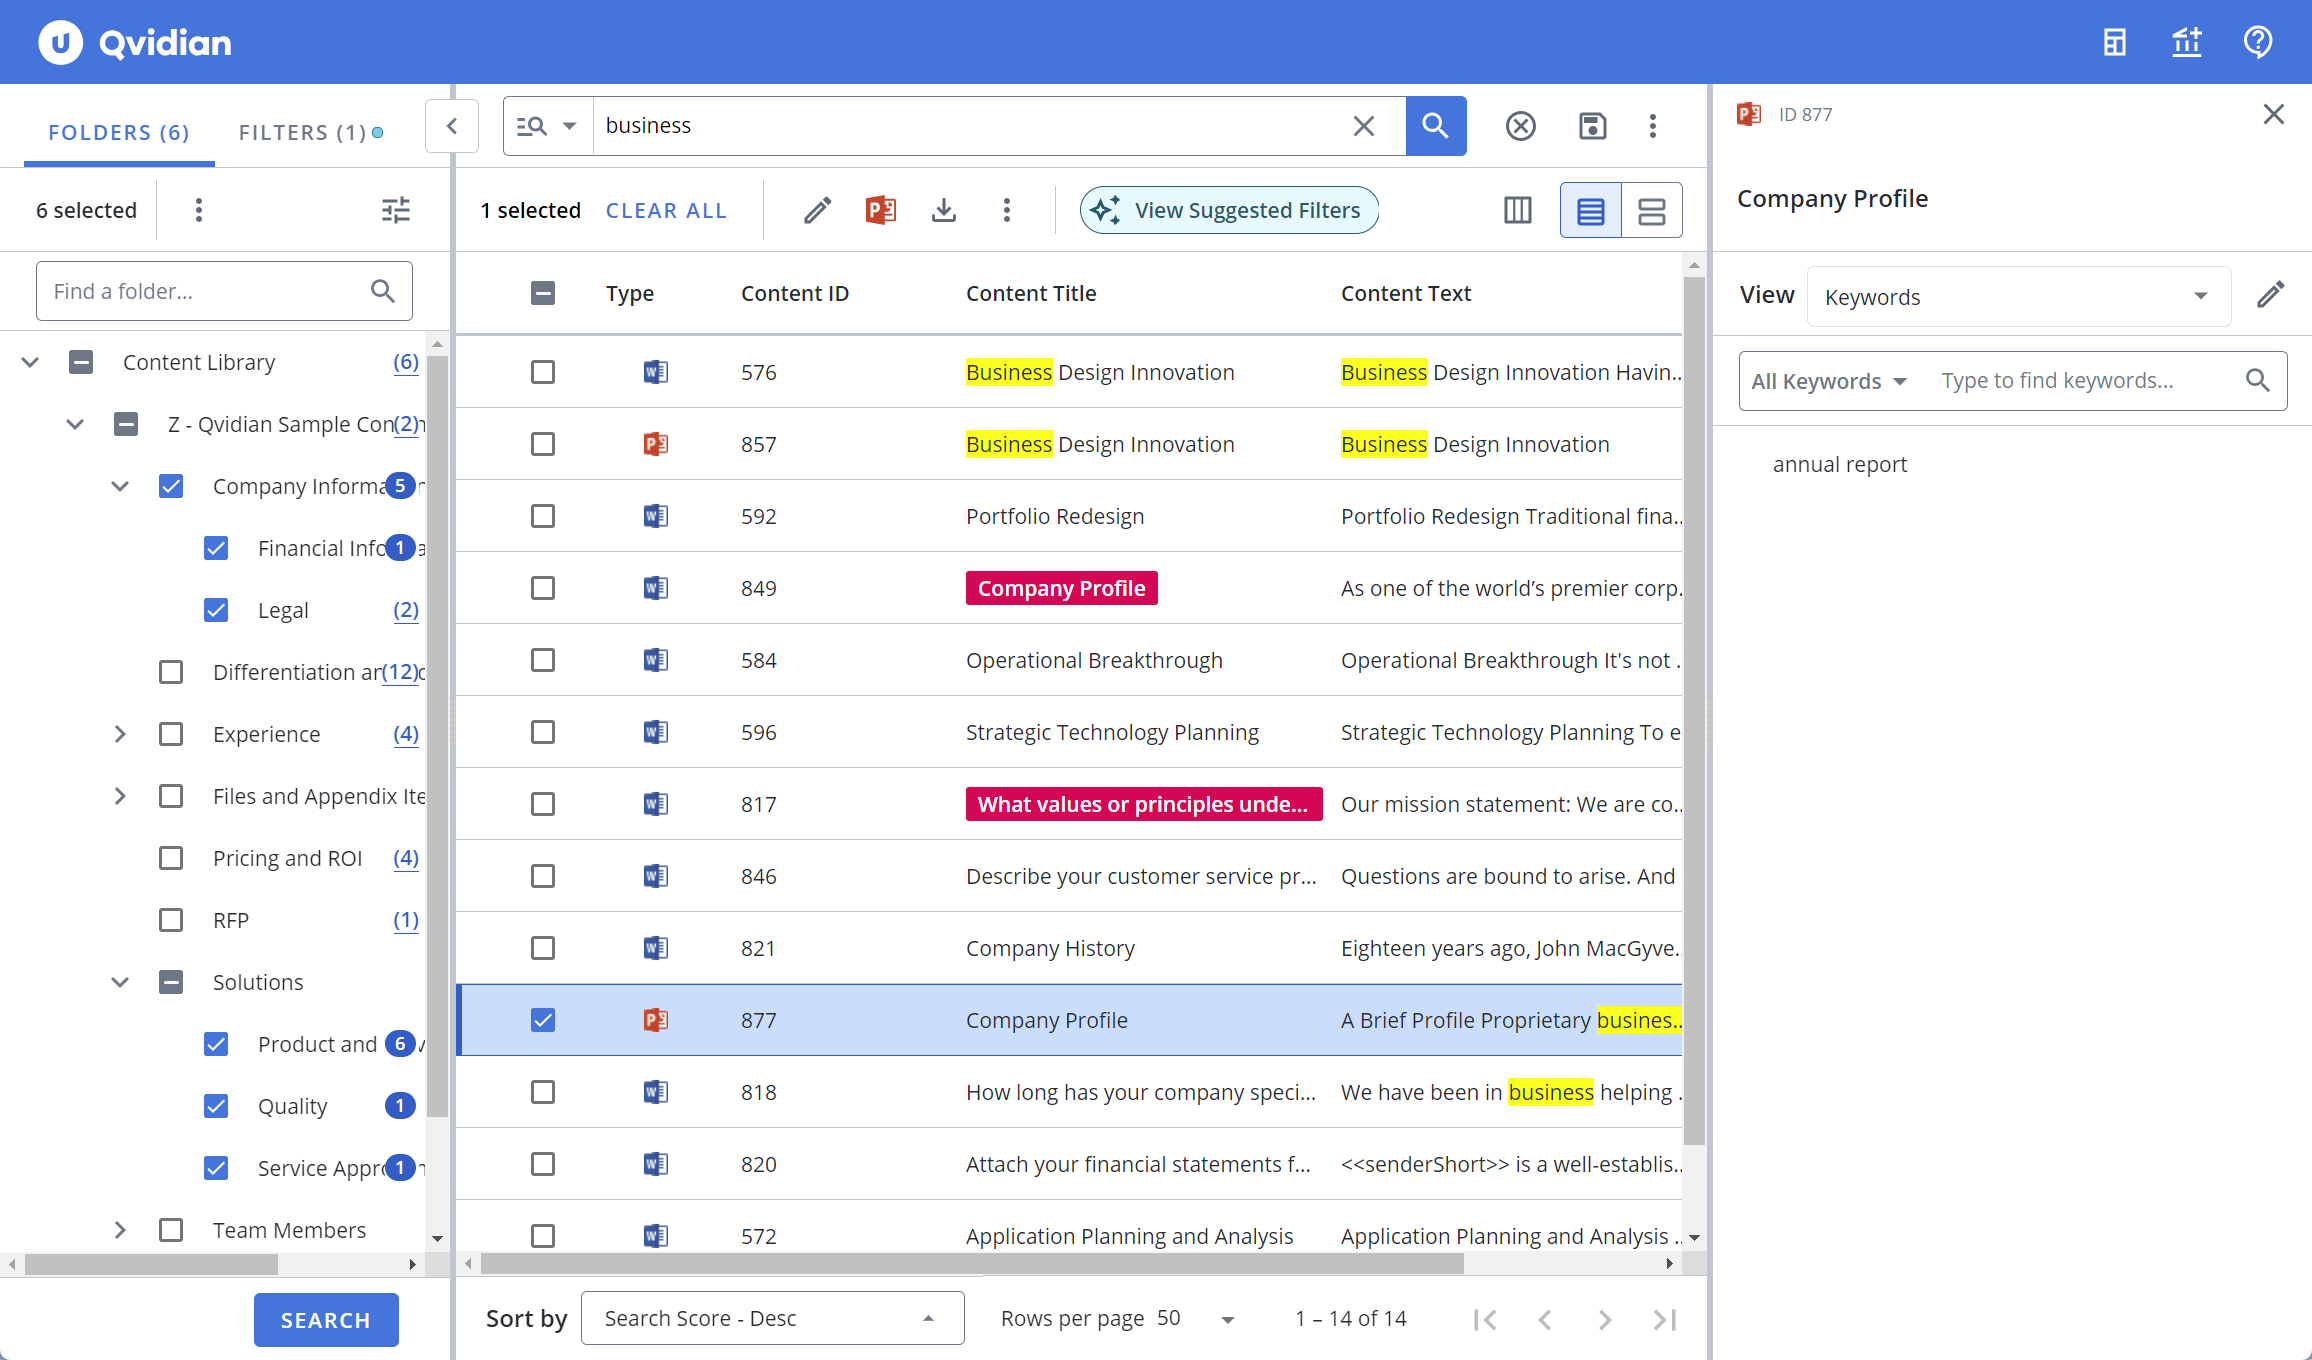
Examples of Keywords in the Details panel. Click to expand.
- Choose All Keywords from the dropdown menu and select the subset of keywords you want to search.
- To search for specific keyword, enter text into the search box at the top right of the grid, and click the Search icon or Enter.
- To re-display all keywords, delete the entire entry in the box by clicking the X.
- Click the Edit icon to edit the keywords. The "Edit Content Properties" page will display.
Note: For more information, see About editing content records.
Learned Terms
In this view you can see the learned terms. When users acknowledge that a content record returned in a search is an appropriate match for the search text by using the record, search terms are automatically added to record as learned terms to improve search results. A record is considered used when it is: downloaded, copied when in HTML Full Size Preview mode, accepted into an RFP in a created document, or dragged and dropped into an RFP subsection in a project (not including AutoFill).
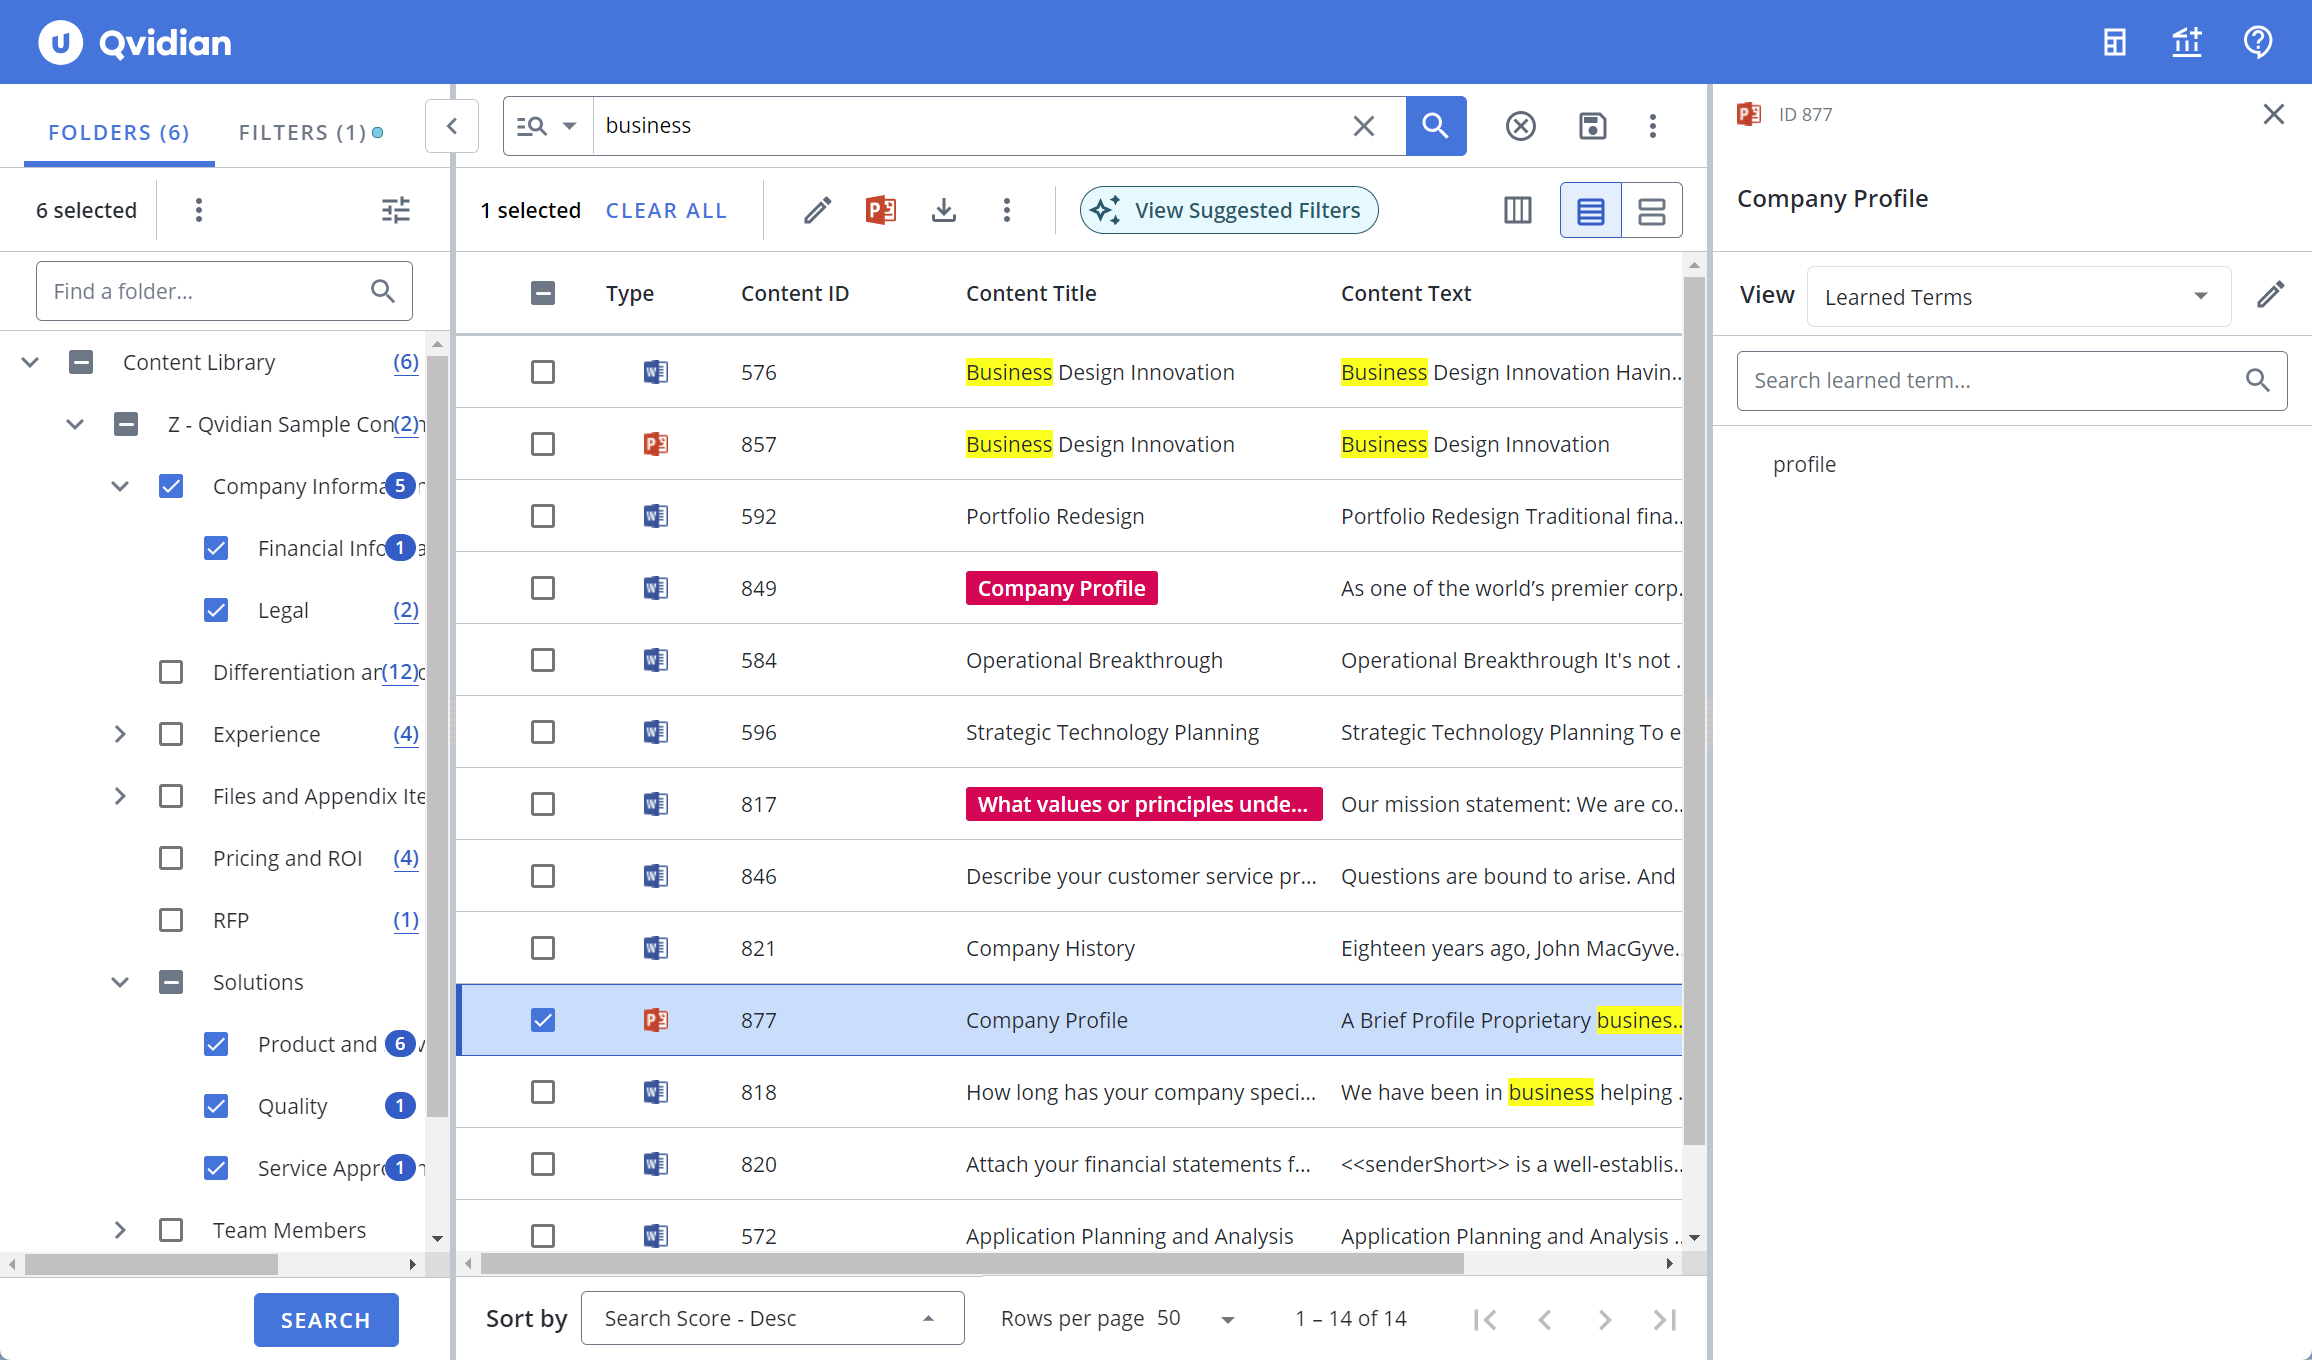
Examples of Learned Terms in the Details panel. Click to expand.
- To search for specific learned terms, enter text into the search box at the top right of the grid, and click the Search icon or Enter.
- To re-display all learned terms, delete the entire entry in the box by clicking the X.
- Click the Edit icon to edit the learned terms. The "Edit Content Properties" page will display.
Note: For more information, see About editing content records.
Library References
In this view you can see the list of content records referenced by the selected content record in the "References" tab. And the list of content records referencing the selected content record in the "Referenced By" tab. You can also search for a content record if you have a long list of reference records. Click the expand button to right of a listed record to see more details of a reference record. The More Option button on the top right of the listed records allows you to perform all the actions you can perform on the record from the library panel. This is convenient as you do not have to search for the reference record in the library view to perform some actions on it. For more information, see Create a library reference.
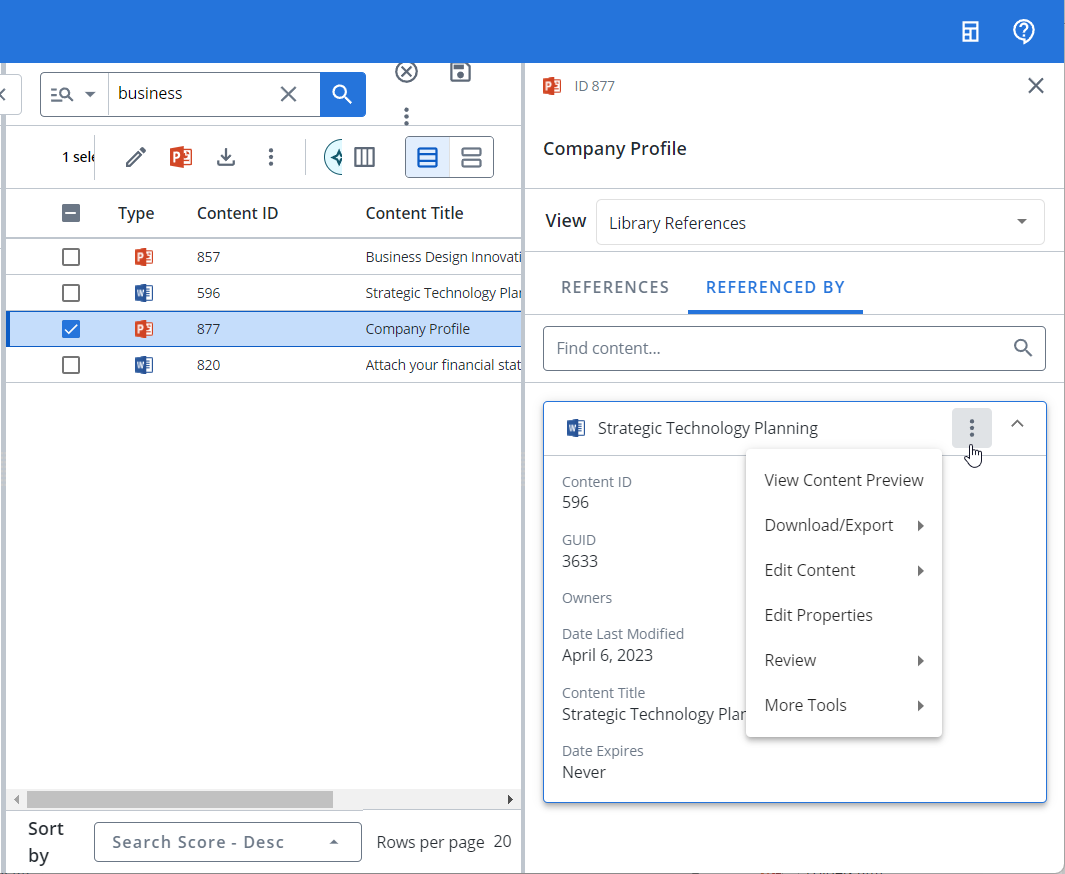
Example of Library References in the Details panel. It shows the overlaid More Options menu that provides the ability to perform all standard Library actions on the record. The Referenced By tab shows the record titled "Strategic Technology Planning" that references the selected record titled "Company Profile "in the search results list panel. Click to expand.
- Click the References toggle to view all the references in your content.
- Click the Referenced By toggle to view all the content that referenced this record.
- To search for specific content, enter text into the search box at the top right of the grid, and click the Search icon or Enter.
- To re-display all content in the grid, delete the entire entry in the box by clicking the X.
- Click the expand icon to view basic information on the library reference.
- Click the More Options menu and select View Content Preview from the dropdown menu.
Click the More Options menu and from the Download/Export menu option select one of the following:
- Download
- Download without Code Replacement
- Export Content
Note: For more information on downloading or exporting a content record, see Extract content records.
Click the More Options menu and from the Edit Content menu option select one of the following:
- Click the More Options menu and select Edit Properties from the dropdown menu. The "Edit Content Properties" page will display.
Note: For more information, see About editing content records.
Click the More Options menu and from the Review menu option select one of the following:
Click the More Options menu and from the More Tools menu option select one of the following:
- Copy To
- Move To
- Delete
- Add Bookmark
- Add to Architect Tray
- Link Content
- Copy Reference Code
- Generate Web URL
- Find and Replace Properties: Available properties will be listed in the "Find and Replace" dialog.
- To search for a specific property, enter text into the "Find" field and click the Search icon or Enter.
- Select the checkboxes of the properties you wish to replace and click Next.
- Enter the term into the "Find" field and click Find. The results will appear below.
- Select all the occurrences you wish to replace and enter the new term in the "Replace with" field and click Replace
- To search for a specific property, enter text into the "Find" field and click the Search
Linked Content
This view lists the record's Content Management, Also See, and Translation links with the link configuration details. You can expand or collapse each listed record. The More Options menu button allows you to perform all library actions on the linked record, including editing or deleting the link. For more information, see Content Management links.

Example of Linked Content view in the Details panel. It shows two records with links to the selected record. The "Attach your financial transaction ..." record contains an "Also See" link. The "Company Profile" record contains a Translation link. The expanded 'Company Profile' record shows the link configuration details. Click to expand.
You can open all the linked records in a new tab to process them further.
- Click the View links in a new tab
 icon beside the search bar.
- To search for specific content, enter text into the search box at the top right of the grid, and click the Search icon or Enter.
- To re-display all content in the grid, delete the entire entry in the box by clicking the X.
- Click the expand icon to view basic information on the linked content.
- Click the More Options menu and select View Content Preview from the dropdown menu.
Click the More Options menu and from the Download/Export menu option select one of the following:
- Download
- Download without Code Replacement
- Export Content
Note: For more information on downloading or exporting a content record, see Extract content records.
- Click the More Options menu and select Linked Content > Edit Link from the dropdown menu. The "Edit Linked Content" dialog will appear.
- Add or remove the Link Type using the Content Management, See Also, and Translation checkboxes.
- If your are configuring a Translation link, you can edit the following Translation Options:
- Choose the radio button next to one of the record IDs to identify it as the parent record.
- Choose the Translation is up to date checkbox to indicate the translation is correct.
-
Choose the desired notification type from the Notifications Options section.
-
Click Save.
- Click the More Options menu and select Linked Content > Delete Link from the dropdown menu.
Click the More Options menu and from the Edit Content menu option select one of the following:
- Click the More Options menu and select Edit Properties from the dropdown menu. The "Edit Content Properties" page will display.
Note: For more information, see About editing content records.
Click the More Options menu and from the Review menu option select one of the following:
Click the More Options menu and from the More Tools menu option select one of the following:
- Copy To
- Move To
- Delete
- Add Bookmark
- Add to Architect Tray
- Link Content
- Copy Reference Code
- Generate Web URL
- Find and Replace Properties: Available properties will be listed in the "Find and Replace" dialog.
- To search for a specific property, enter text into the "Find" field and click the Search icon or Enter.
- Select the checkboxes of the properties you wish to replace and click Next.
- Enter the term into the "Find" field and click Find. The results will appear below.
- Select all the occurrences you wish to replace and enter the new term in the "Replace with" field and click Replace
- To search for a specific property, enter text into the "Find" field and click the Search
Preview
This view allows you to preview the content record as an image or HTML and highlights search text. Click the Open Preview in new window ![]() icon for a larger preview. The Preview view gives you the following display options:
icon for a larger preview. The Preview view gives you the following display options:
- Image: This displays an image of the content record.
- HTML: This displays the HTML text of the content record. This text can be copied and pasted. The HTML preview zoom slider, which defaults at 100% and is available between 50-400% zoom, can be controlled via the zoom control bar or the right/left/up/down keyboard options at 25% increments and will remember the zoom setting last used.
- Highlight: The search text is highlighted.
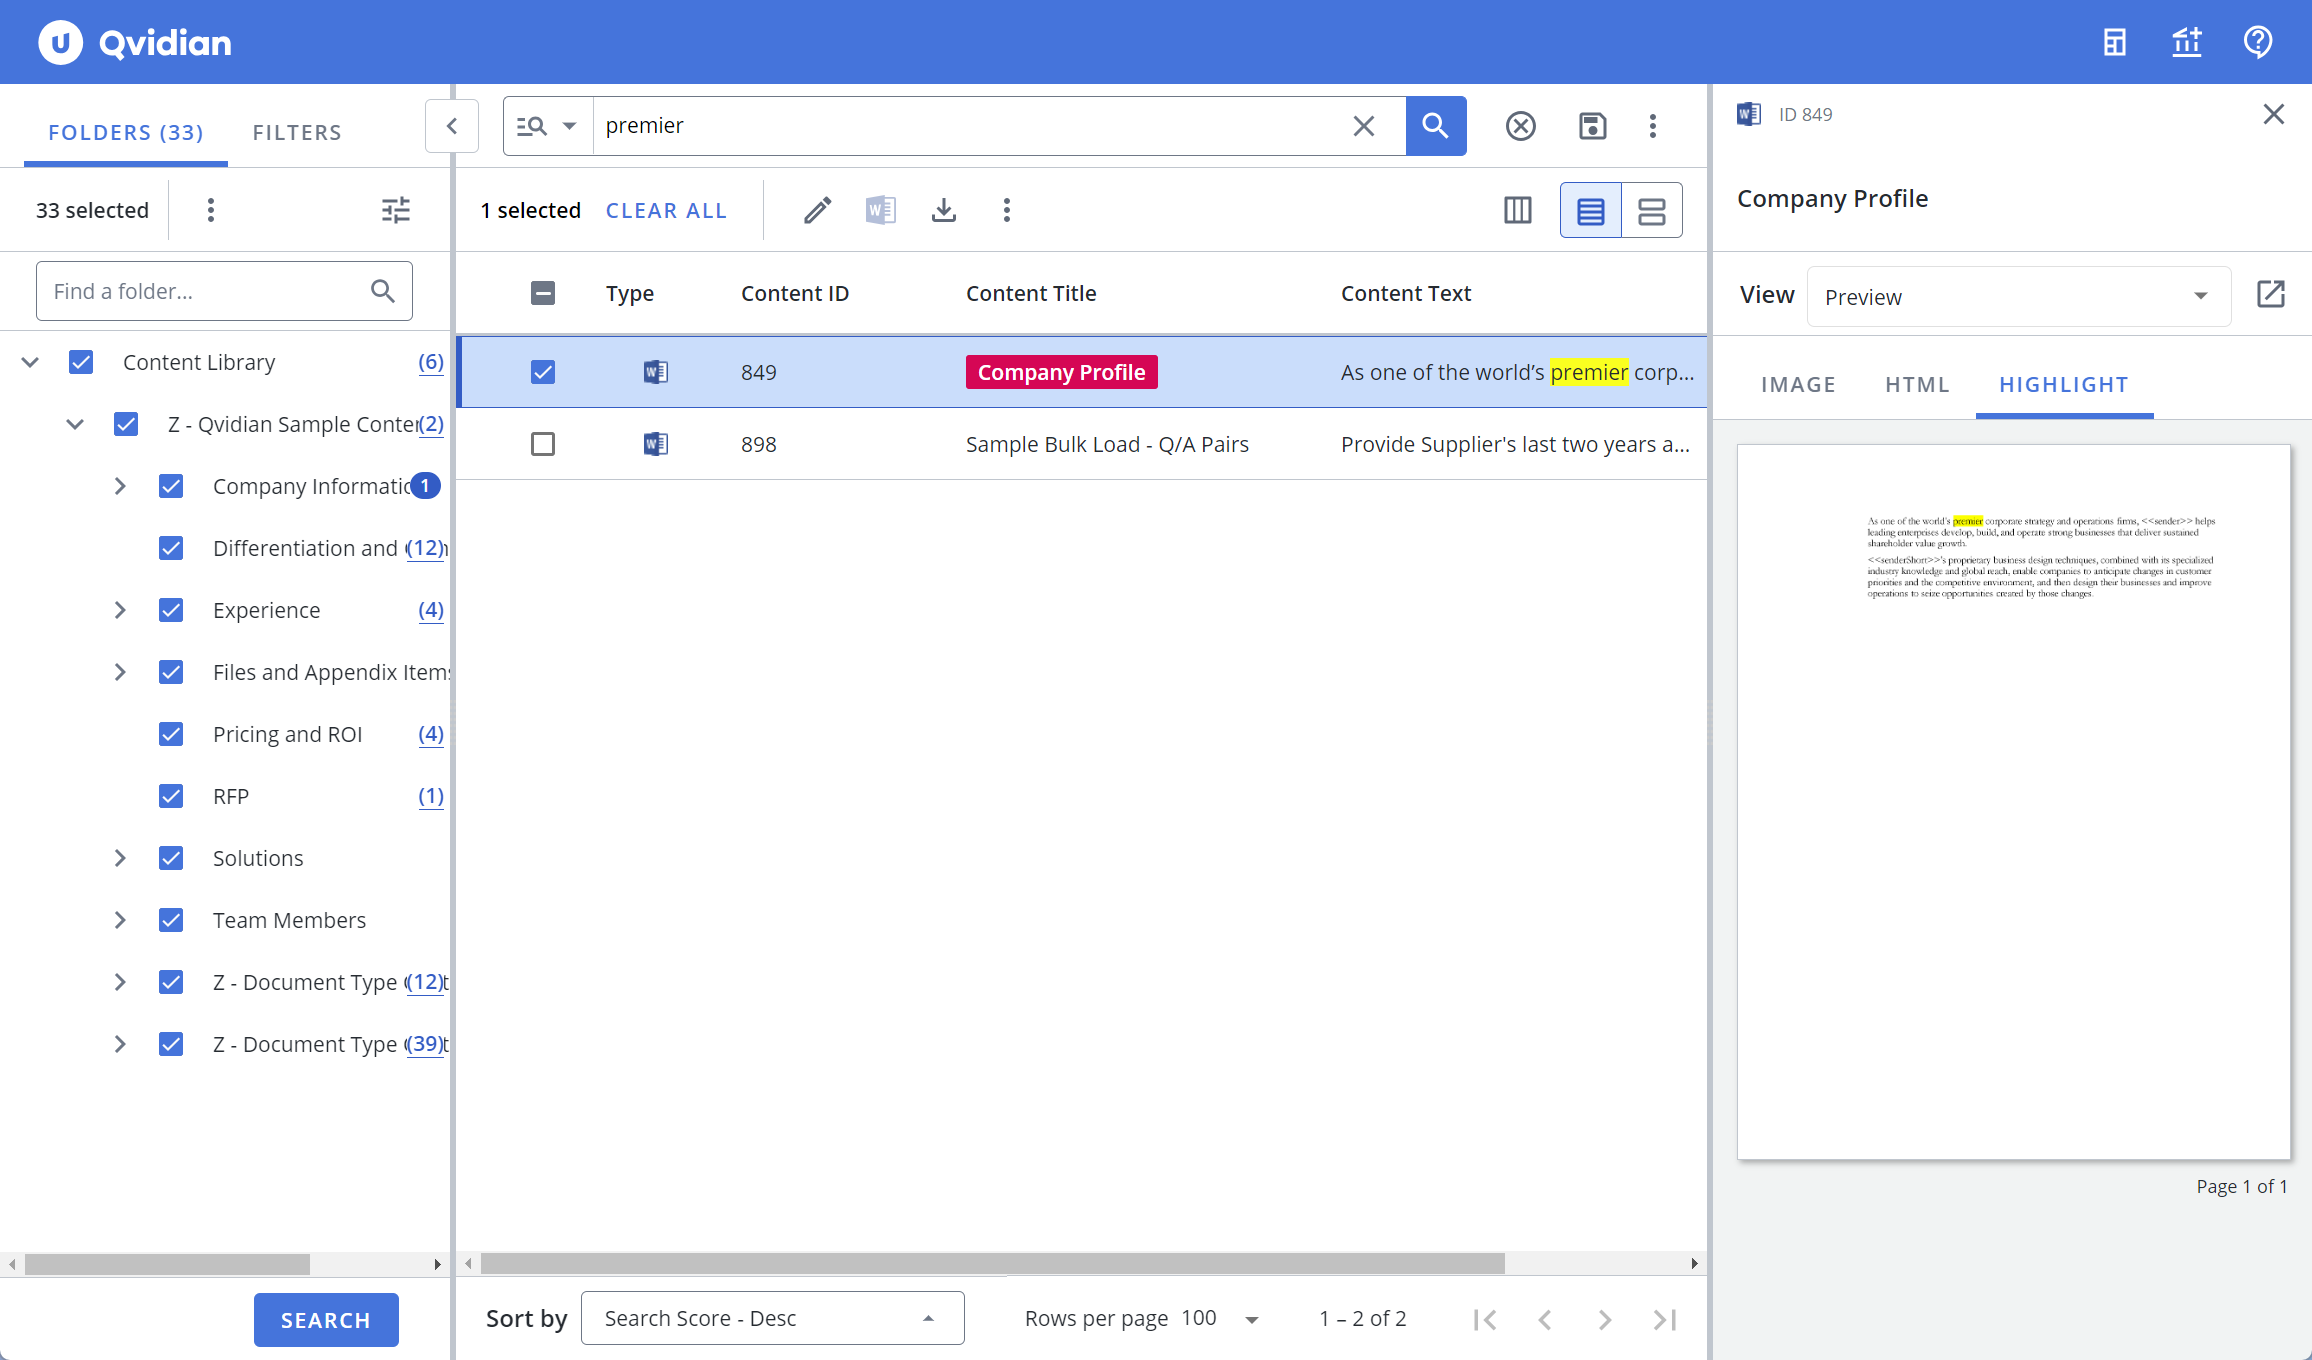
Example of Preview view in the Details panel. It shows the "Highlight" tab, which highlights search text in the preview. Click to expand.
Review Job History
This view lists all the review jobs in which the content record has been included, along with the following:
- Review Job Title: Name of the review jobs in which the revision occurred.
- Date: The date the record was approved and added back to the library.
- Approved: The review job manager who approved the revision.
- Last revision: Downloads the last version of the document before saved Track Changes were accepted and turned off.
- Export: Creates a report of the activity on the record included in a job including the date the action was taken, the type of action and by whom it was performed, and the review job manager who approved the revision.
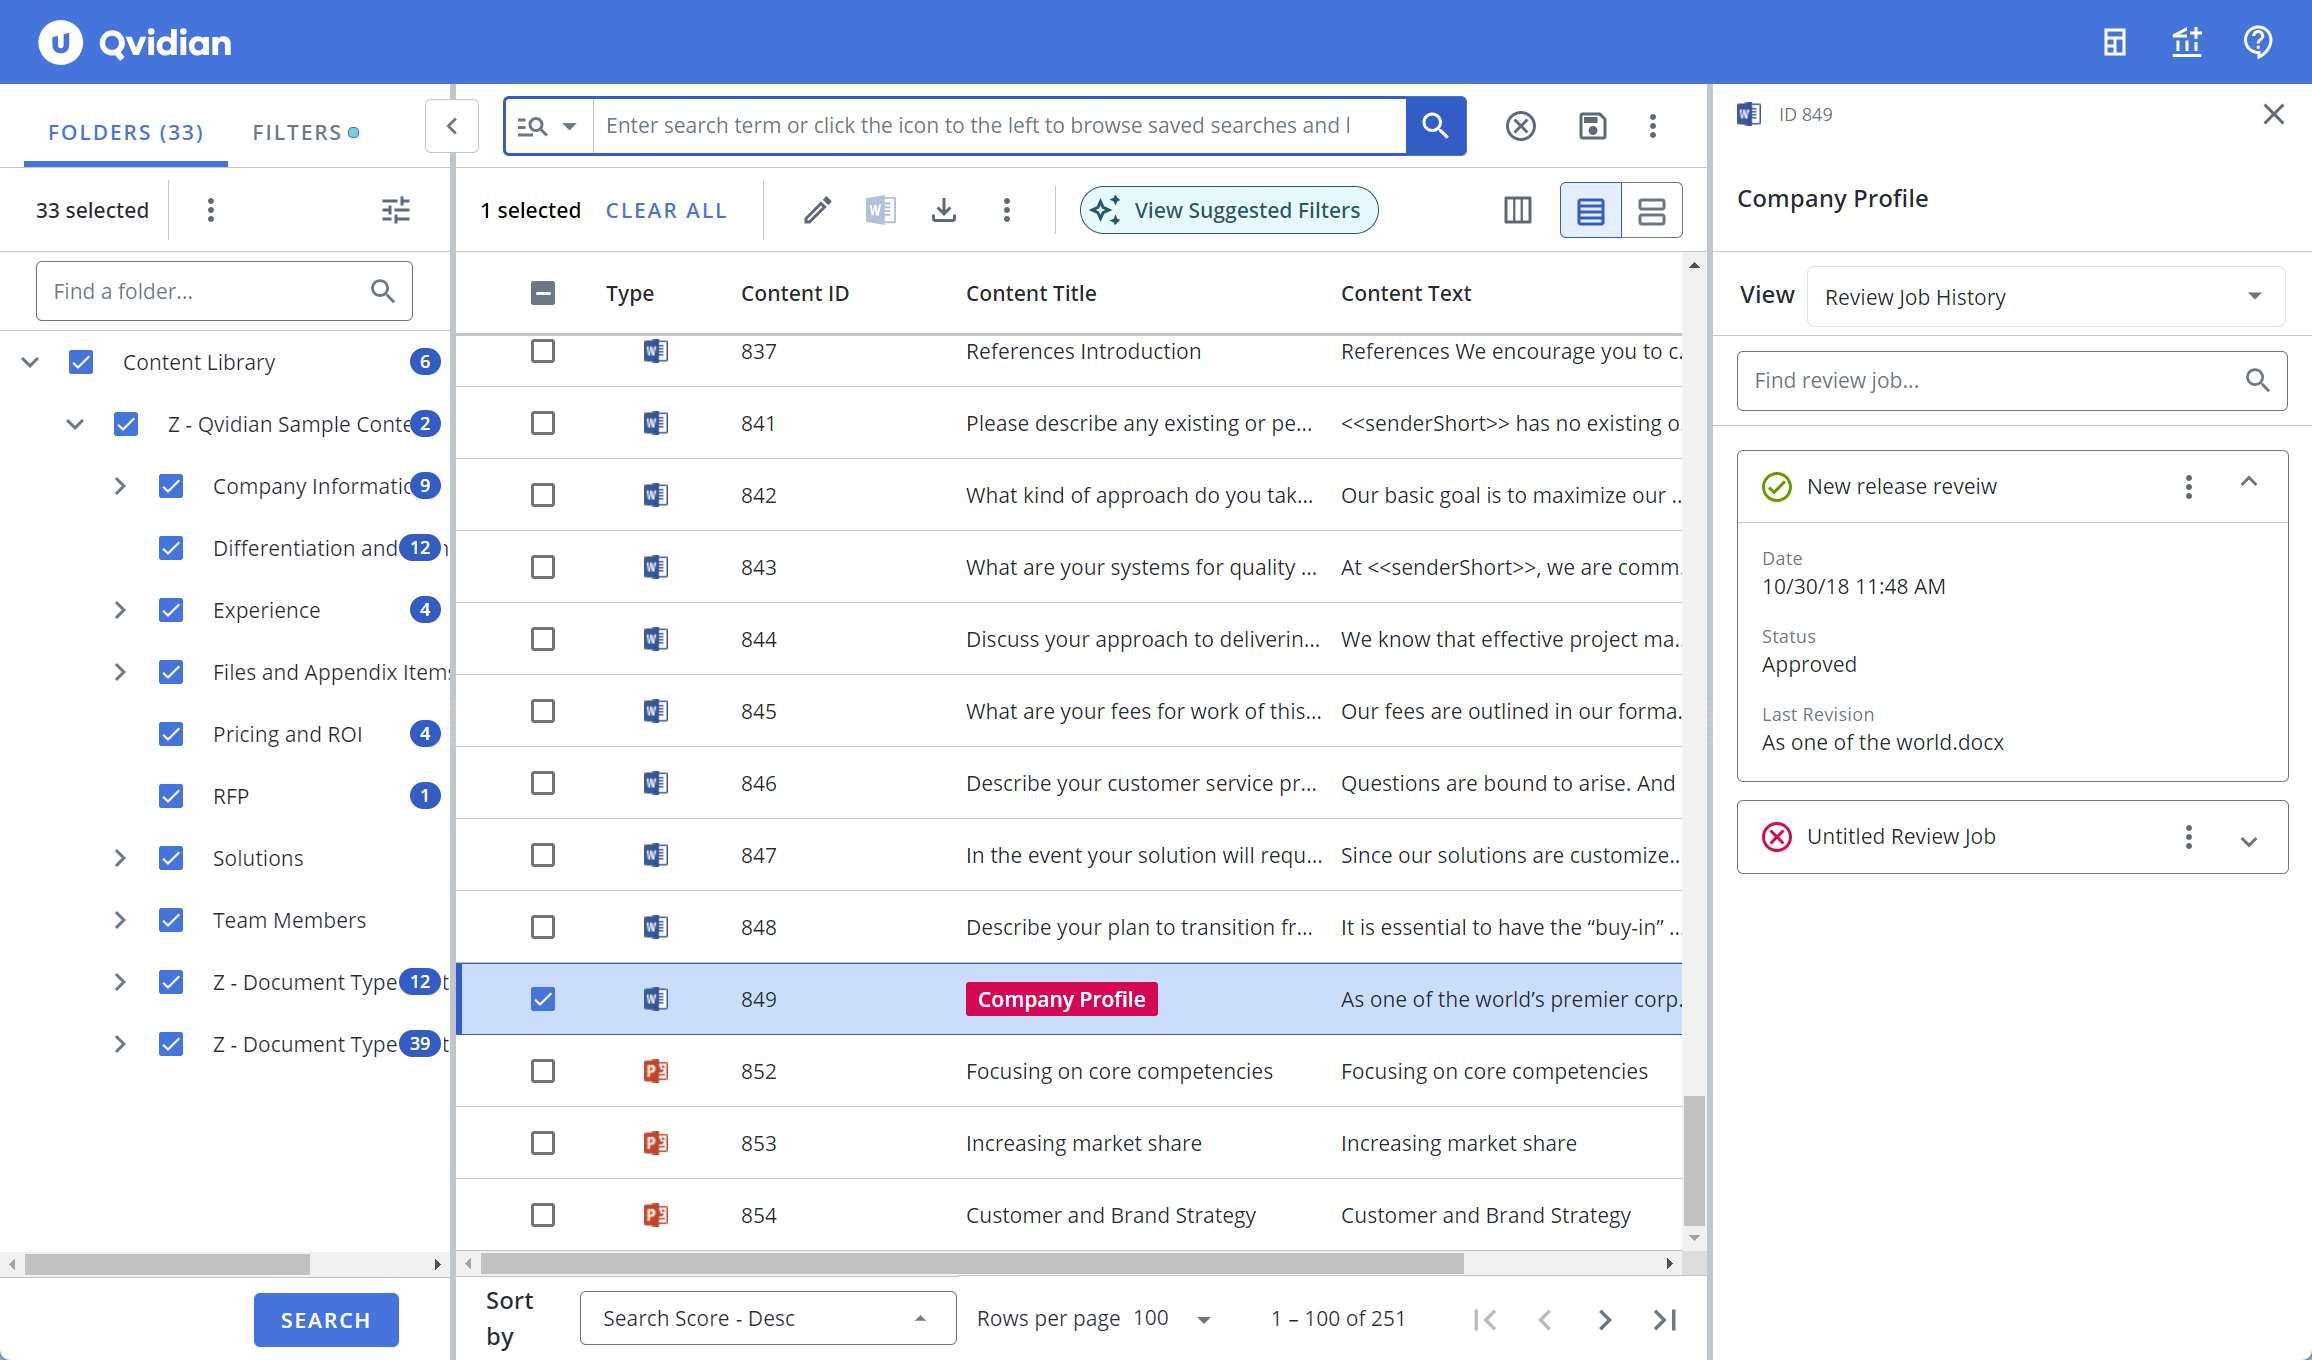
Example of Review Job History view in the Details panel. It shows the details of a review job.Click to expand.
- To search for specific review jobs, enter text into the search box at the top right of the grid, and click the Search icon or Enter.
- To re-display all content in the grid, delete the entire entry in the box by clicking the X.
- Click the expand icon to view basic information on the review job.
- Click the More Options menu and select Download Last Revision from the dropdown menu.
- Click the More Options menu and select Export Activity Report from the dropdown menu. The "Export Activity Report" dialog will appear.
- Enter a Name for the report.
- Click Save.
Revisions
The Revisions view lists previous versions of the content record.
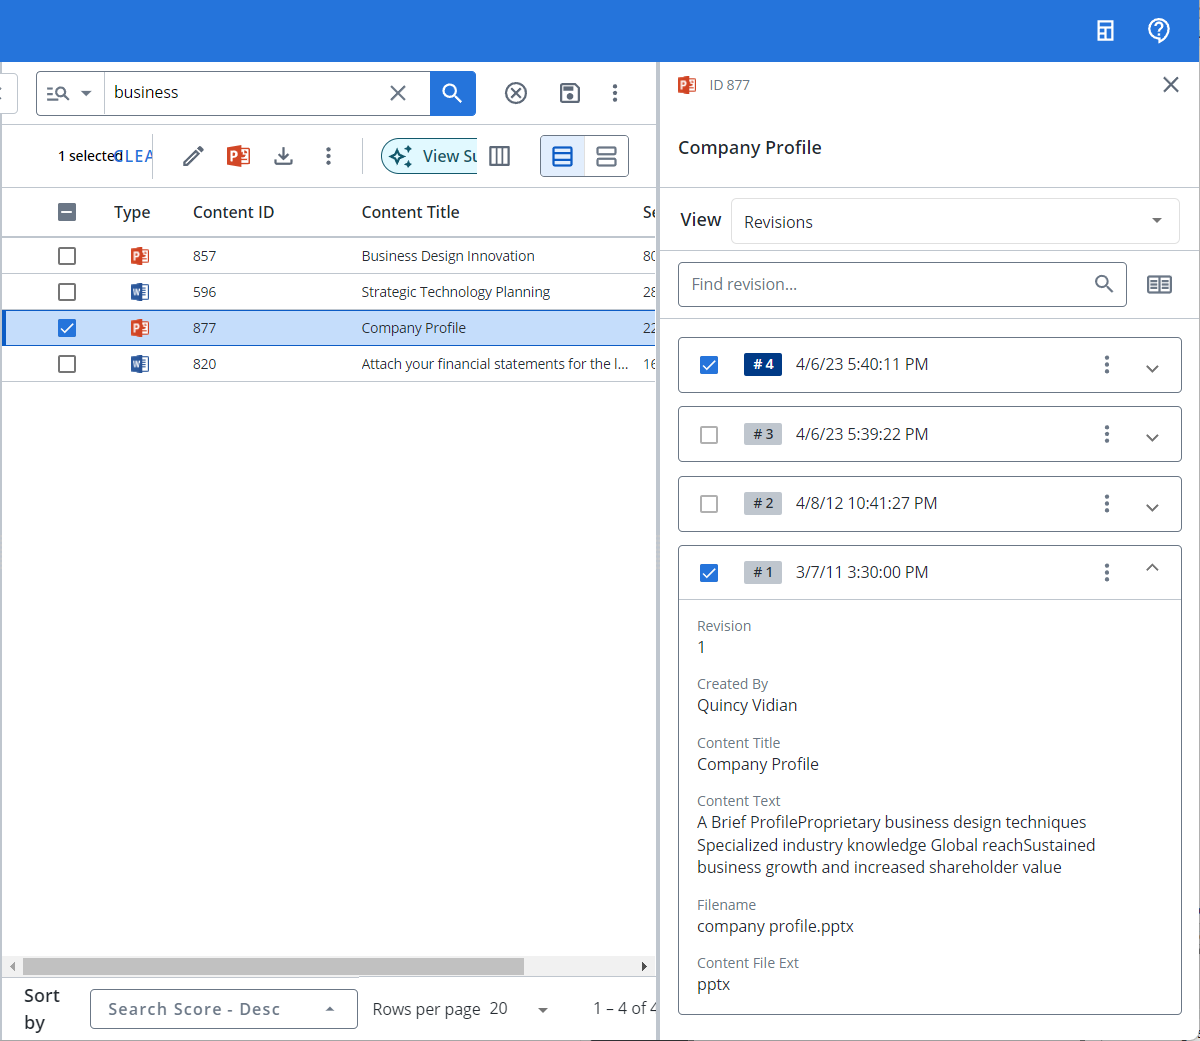
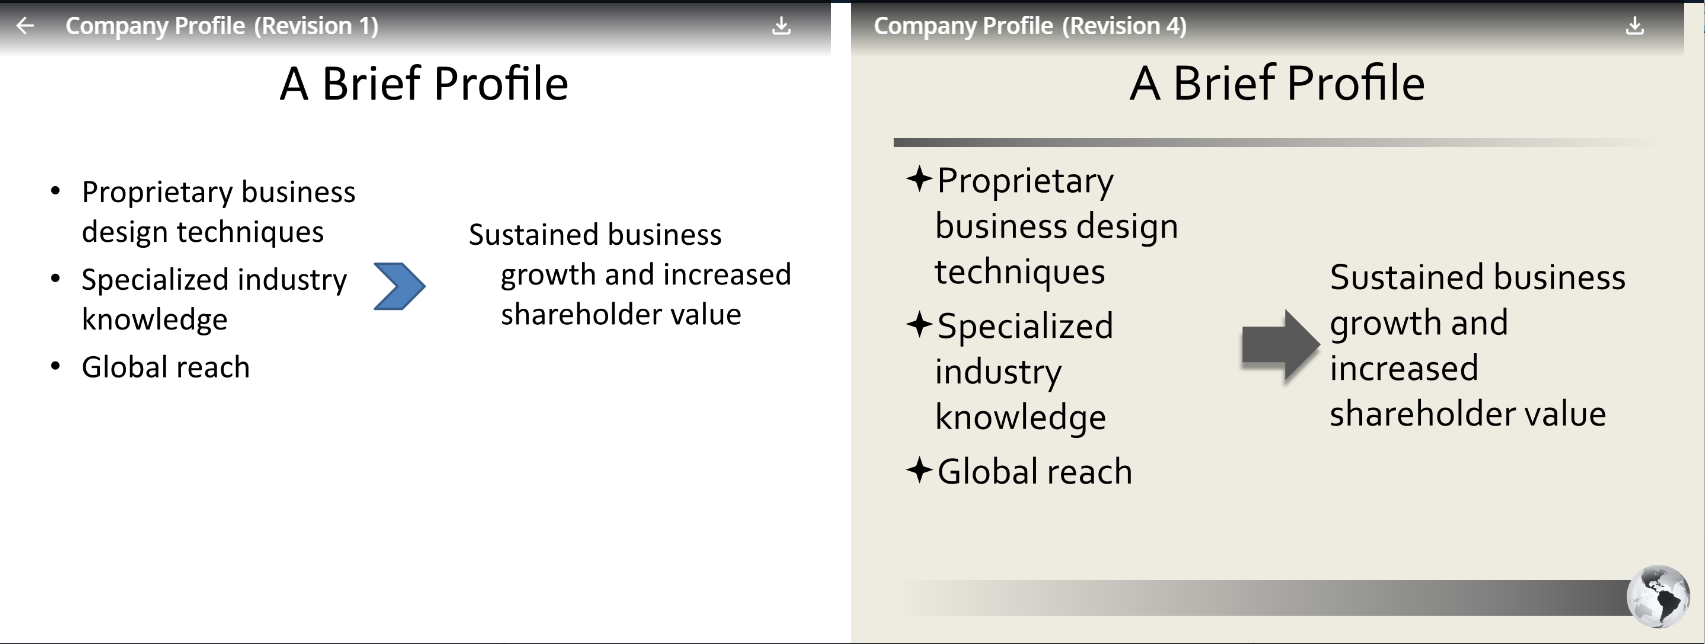
From left to right: Example of Revisions in the Details panel and side-by-side comparison of two revisions. Revision in the Details panel also shows one of the versions expanded. Click to expand.
- To search for a specific revision, enter text into the search box at the top right of the grid, and click the Search icon or Enter.
- To re-display all content in the grid, delete the entire entry in the box by clicking the X.
- Click the expand icon to view basic information on the revision.
- Click the More Options menu and select Launch Preview in New Window from the dropdown menu.
- Click the More Options menu and select Download from the dropdown menu.
- Select the checkboxes of the two revisions you want to compare.
- Click the Compare
 icon to the right of the search bar.
 - Select View Side-by-Side Preview. The revisions will be displayed side by side.
- You can download each version and zoom in and out. Click the "Back" icon to return to the library.
Similar Content
The Similar Content view is a very useful tool that allows you to find duplicate content records or content records which have similar content. This will help you organize your content records that are similar in nature but serve different purposes and categorize them accordingly. The similar content records found in the library are listed in decreasing order of match. A score of 100 could mean that the content could be duplicates. In this case a score of 99 shows that all the terms in the selected PowerPoint slide record is closely matched by the MS word record with the same title with a ranking of 99.
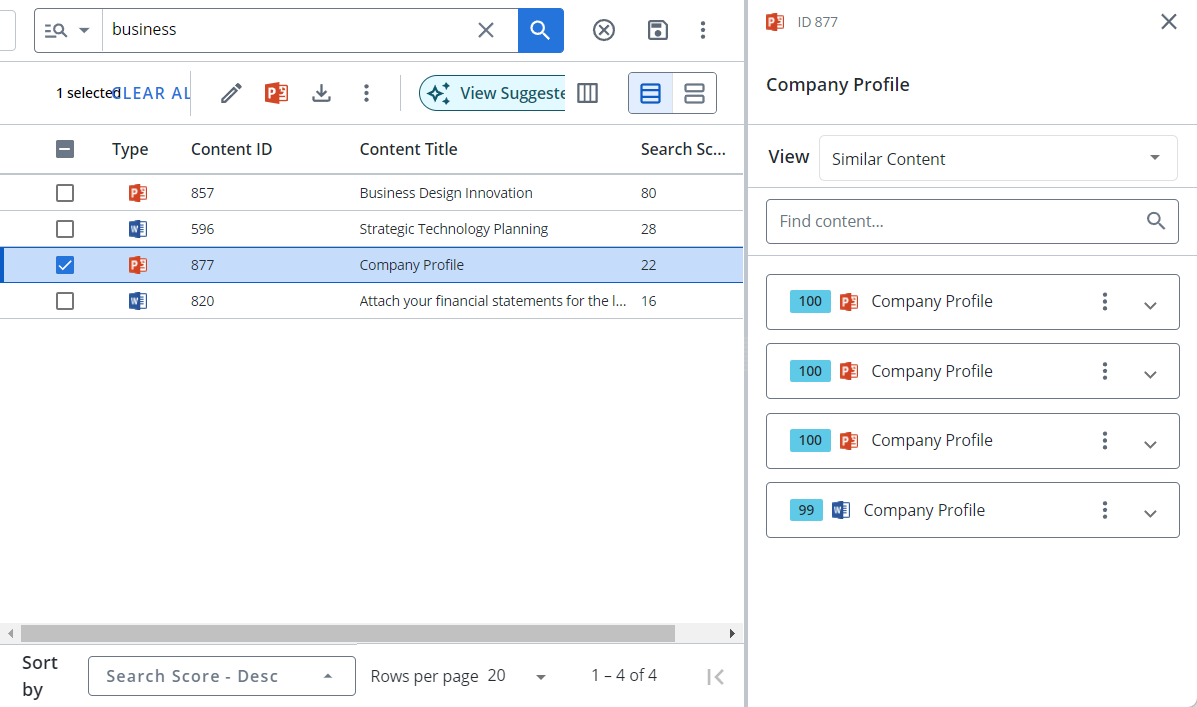
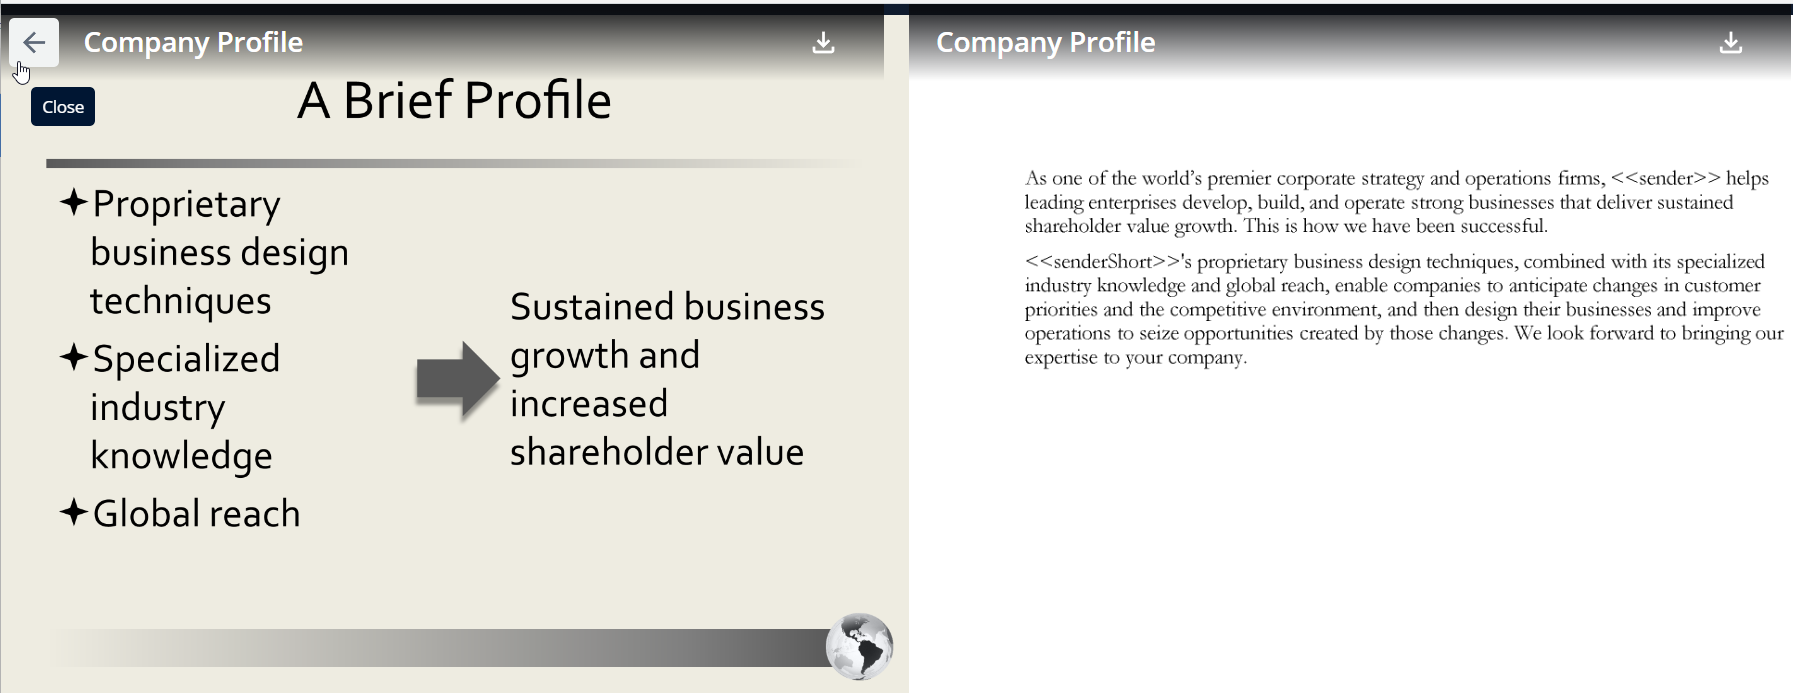
From left to right: Example of Similar Content view in the Details panel and side-by-side comparison of similar content. Ranking scores to the left of the records show the degree of match. Click to expand.
- To search for specific content, enter text into the search box at the top right of the grid, and click the Search icon or Enter.
- To re-display all content in the grid, delete the entire entry in the box by clicking the X.
- Click the expand icon to view basic information on the content.
- Click the More Options menu and select View Side-by-Side Preview. The similar content will be displayed side by side for easy comparison.
- You can download each version and zoom in and out. Click the "Back" icon to return to the library.
You can download the content with track changes enabled to see all the changes that have been made.
- Click the More Options menu and select View Track Changes Comparison from the dropdown menu.
- Click the More Options menu and select View Content Preview from the dropdown menu.
Click the More Options menu and from the Download/Export menu option select one of the following:
- Download
- Download without Code Replacement
- Export Content
Note: For more information on downloading or exporting a content record, see Extract content records.
Click the More Options menu and from the Edit Content menu option select one of the following:
- Click the More Options menu and select Edit Properties from the dropdown menu. The "Edit Content Properties" page will display.
Note: For more information, see About editing content records.
Click the More Options menu and from the Review menu option select one of the following:
Click the More Options menu and from the More Tools menu option select one of the following:
- Copy To
- Move To
- Delete
- Add Bookmark
- Add to Architect Tray
- Link Content
- Copy Reference Code
- Generate Web URL
- Find and Replace Properties: Available properties will be listed in the "Find and Replace" dialog.
- To search for a specific property, enter text into the "Find" field and click the Search icon or Enter.
- Select the checkboxes of the properties you wish to replace and click Next.
- Enter the term into the "Find" field and click Find. The results will appear below.
- Select all the occurrences you wish to replace and enter the new term in the "Replace with" field and click Replace
- To search for a specific property, enter text into the "Find" field and click the Search
Usage
The Usage tab provides information on how a content record is used and the type of documents in which it is being used. Content records that are currently being used in a created document cannot be deleted. Content Managers can use the Usage view to review the content usage and decide if content should be removed or updated. The Usage details are available in three tabs and displays the different usage of the content record in projects, document types, and bundles.
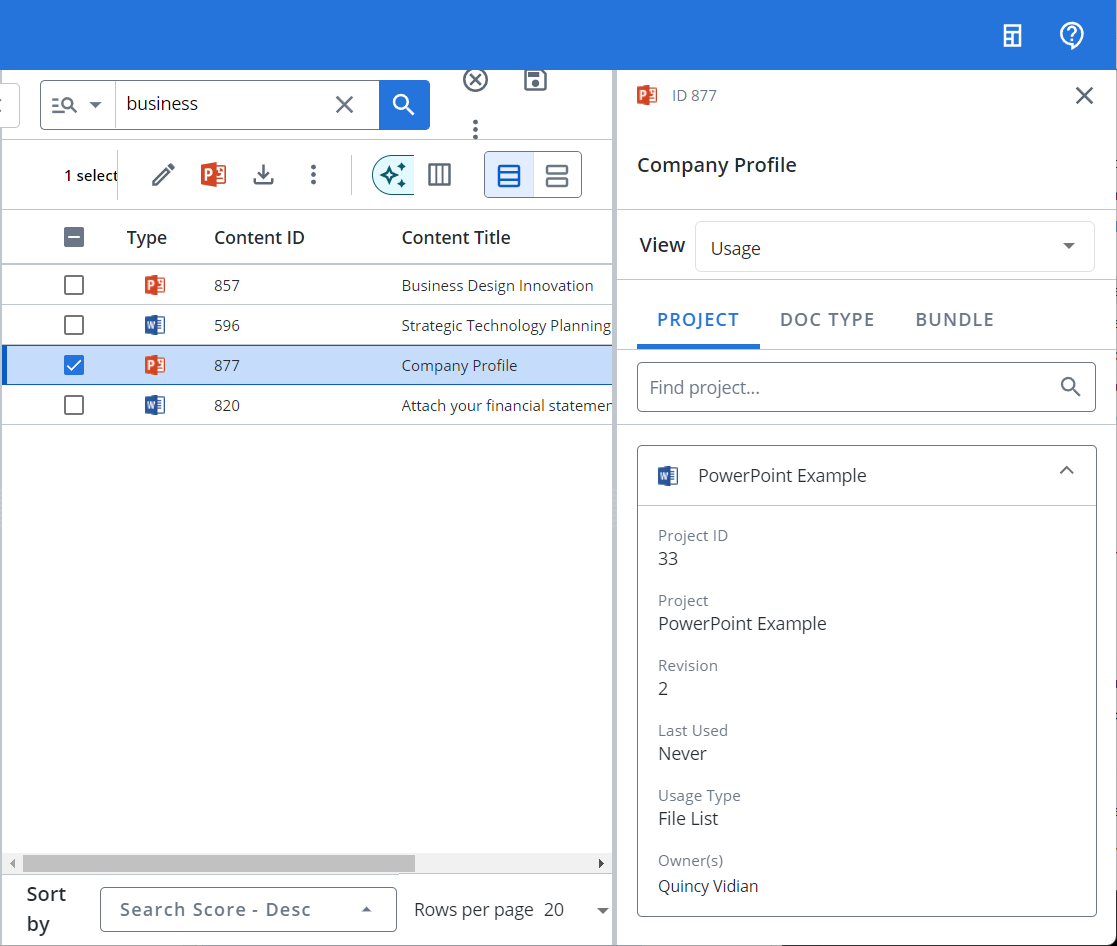

From left to right: Example of Usage view in the Details panel. "Project "tab, "Doc Type" tab and "Bundle" tab. Click to expand.
- To search, enter text into the search box at the top right of the grid, and click the Search icon or Enter.
- To re-display all content in the grid, delete the entire entry in the box by clicking the X.
- Click the expand icon to view basic information on the content.
Project usage tracks the created documents and projects, in which the content is used, and includes the following information:
- Project Document ID
- Project Name
- Document Type
- Date of the last Revision to the Project (does not include revisions to individual records)
- Date the project was Last Used
- Usage Type, such as Accepted Answer, if Accept was elected from the Actions menu, or Selected Item, if it was chosen on a selection dialog
- Owner(s) of the project
Doc Type usage tracks the documents types in which the content is used, and includes the following information:
- Title of the Document Type
- Document Type ID
- Document Type
- Section Name of the Document Section in which the record is included
- Subsection Name of the document subsection in which the record is included
- Type of document, such as presentation or document
Bundles Usage provides the following details on the bundles in which the content is included:
- Content Title
- Date the Bundle Expires on
- Revision number of the bundle
- Owner(s)