Selection Driven Content section (projects)
For this section, you can select a predefined number of grouped selection items and items within those groups. Optionally, the selected groups can be moved up or down in the list to the desired order for the built project.
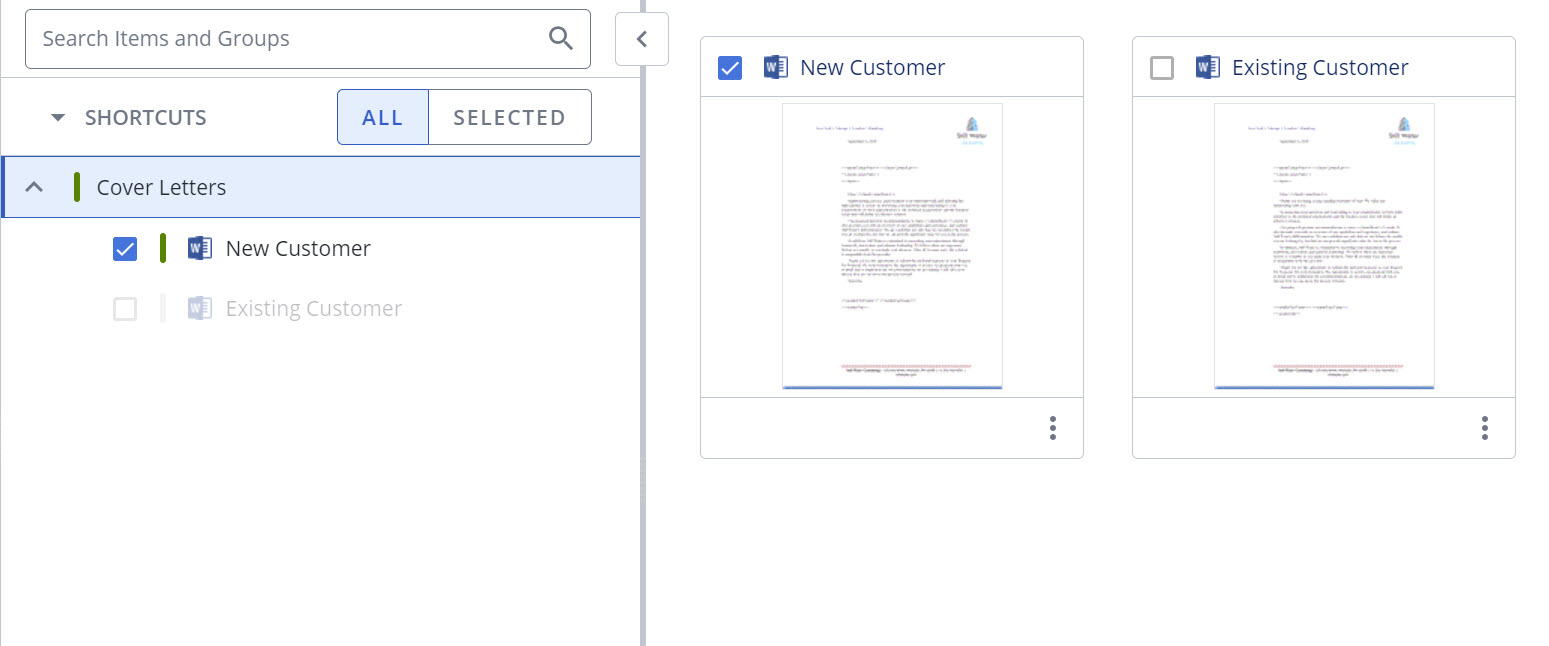
Example: If a Selection Driven Content section is named "Cover Letters" and architected with five selection items each with cover letter content, on the Cover Letter page, users can select one of these cover letters for use in the document.
Note: When a Dynamic Slide component is architected, grouped items added to the Selection Driven Content component are merged into one or more slides. These selections will display for this component so end users can select the content to display on one or more slides in the Project.
The following examples of Selection Driven sections show the various ways Selection Groups and Selection Items can be used. Click on the images to expand.
Cover Letters
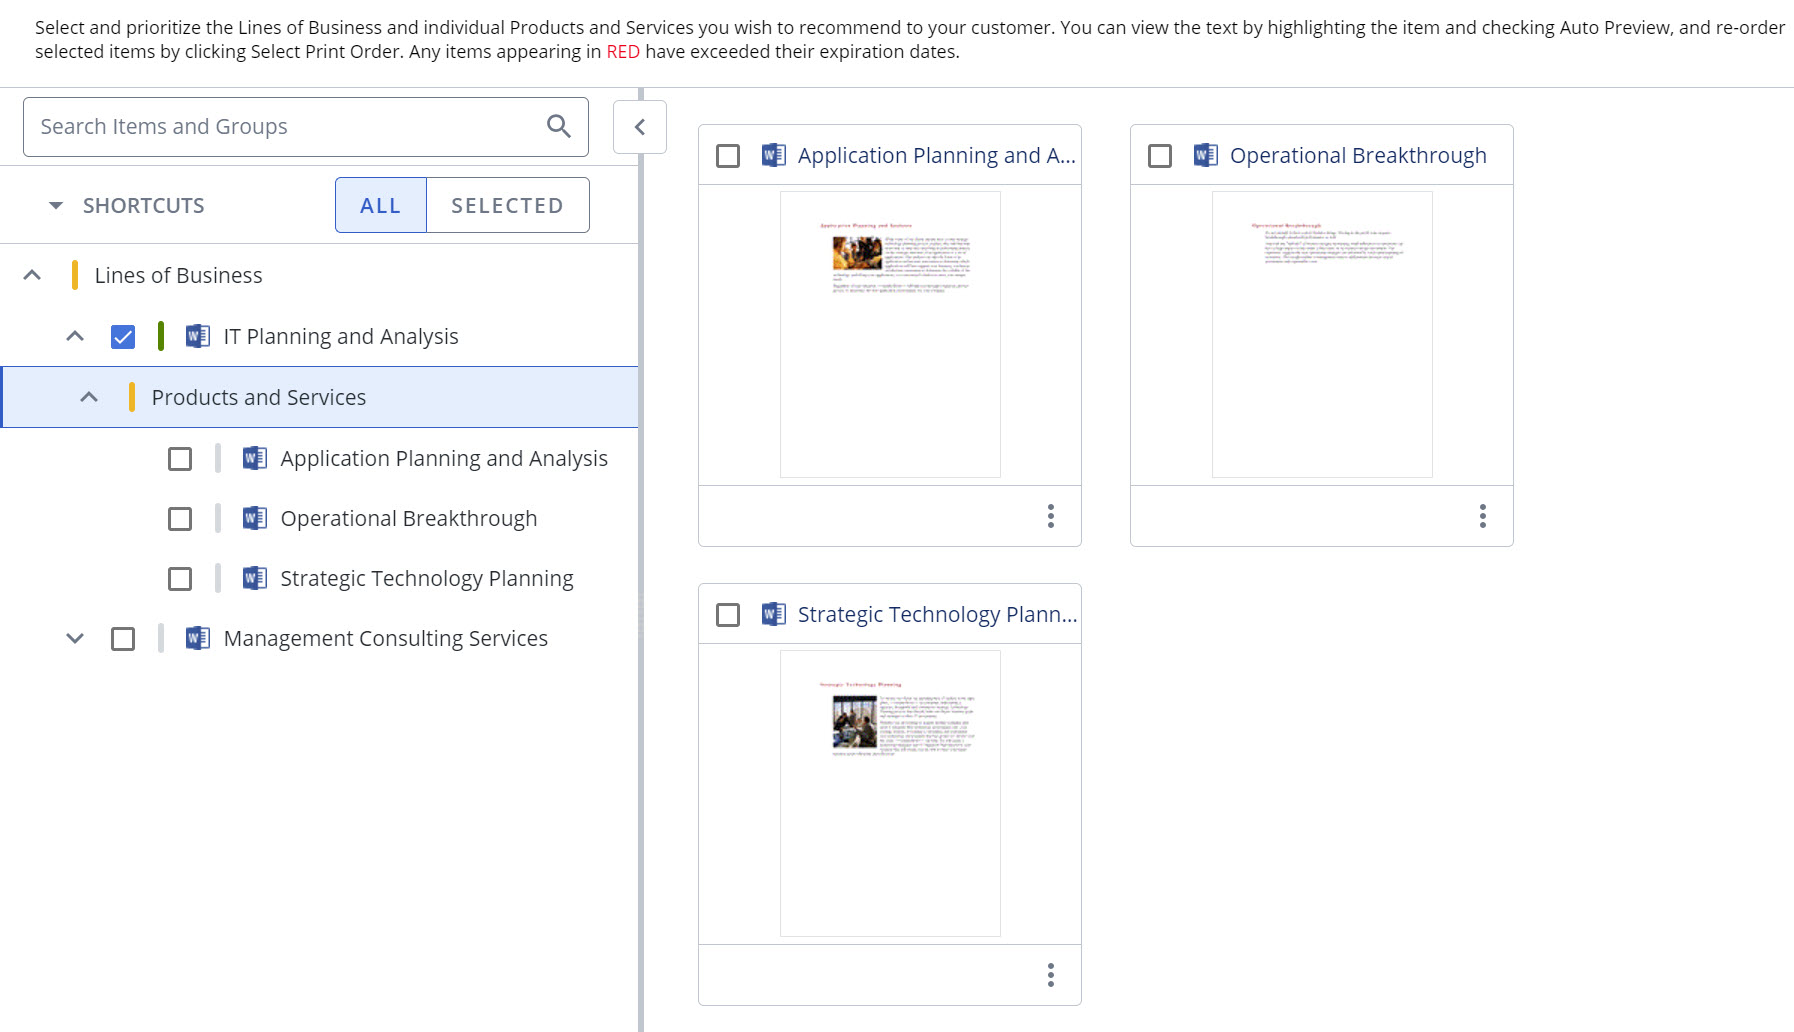
Products and Services
Slides
Navigate the Selection Driven Content section
- Select the desired selection driven section or subsection. A panel featuring: a navigation tree, search bar, filter, and Shortcuts option will appear.
- To search for particular items and groups within your selection driven section:
- Enter the text into the Search Items and Groups field and click the Search
 icon or Enter.
 - To filter any longer or more complex selection trees, select one of the following display options from the toggle:
- All: Displays all available selection driven sections.
- Selected: Only displays selection driven groups and items in your project that have been selected.
- To access and create preset content selection combinations, see Creating and Using Shortcuts.
- Click any of the available project workspace icons, to navigate through the required sections in the workspace.

Note: Once the desired result is selected, its content is displayed in preview mode within the workspace.
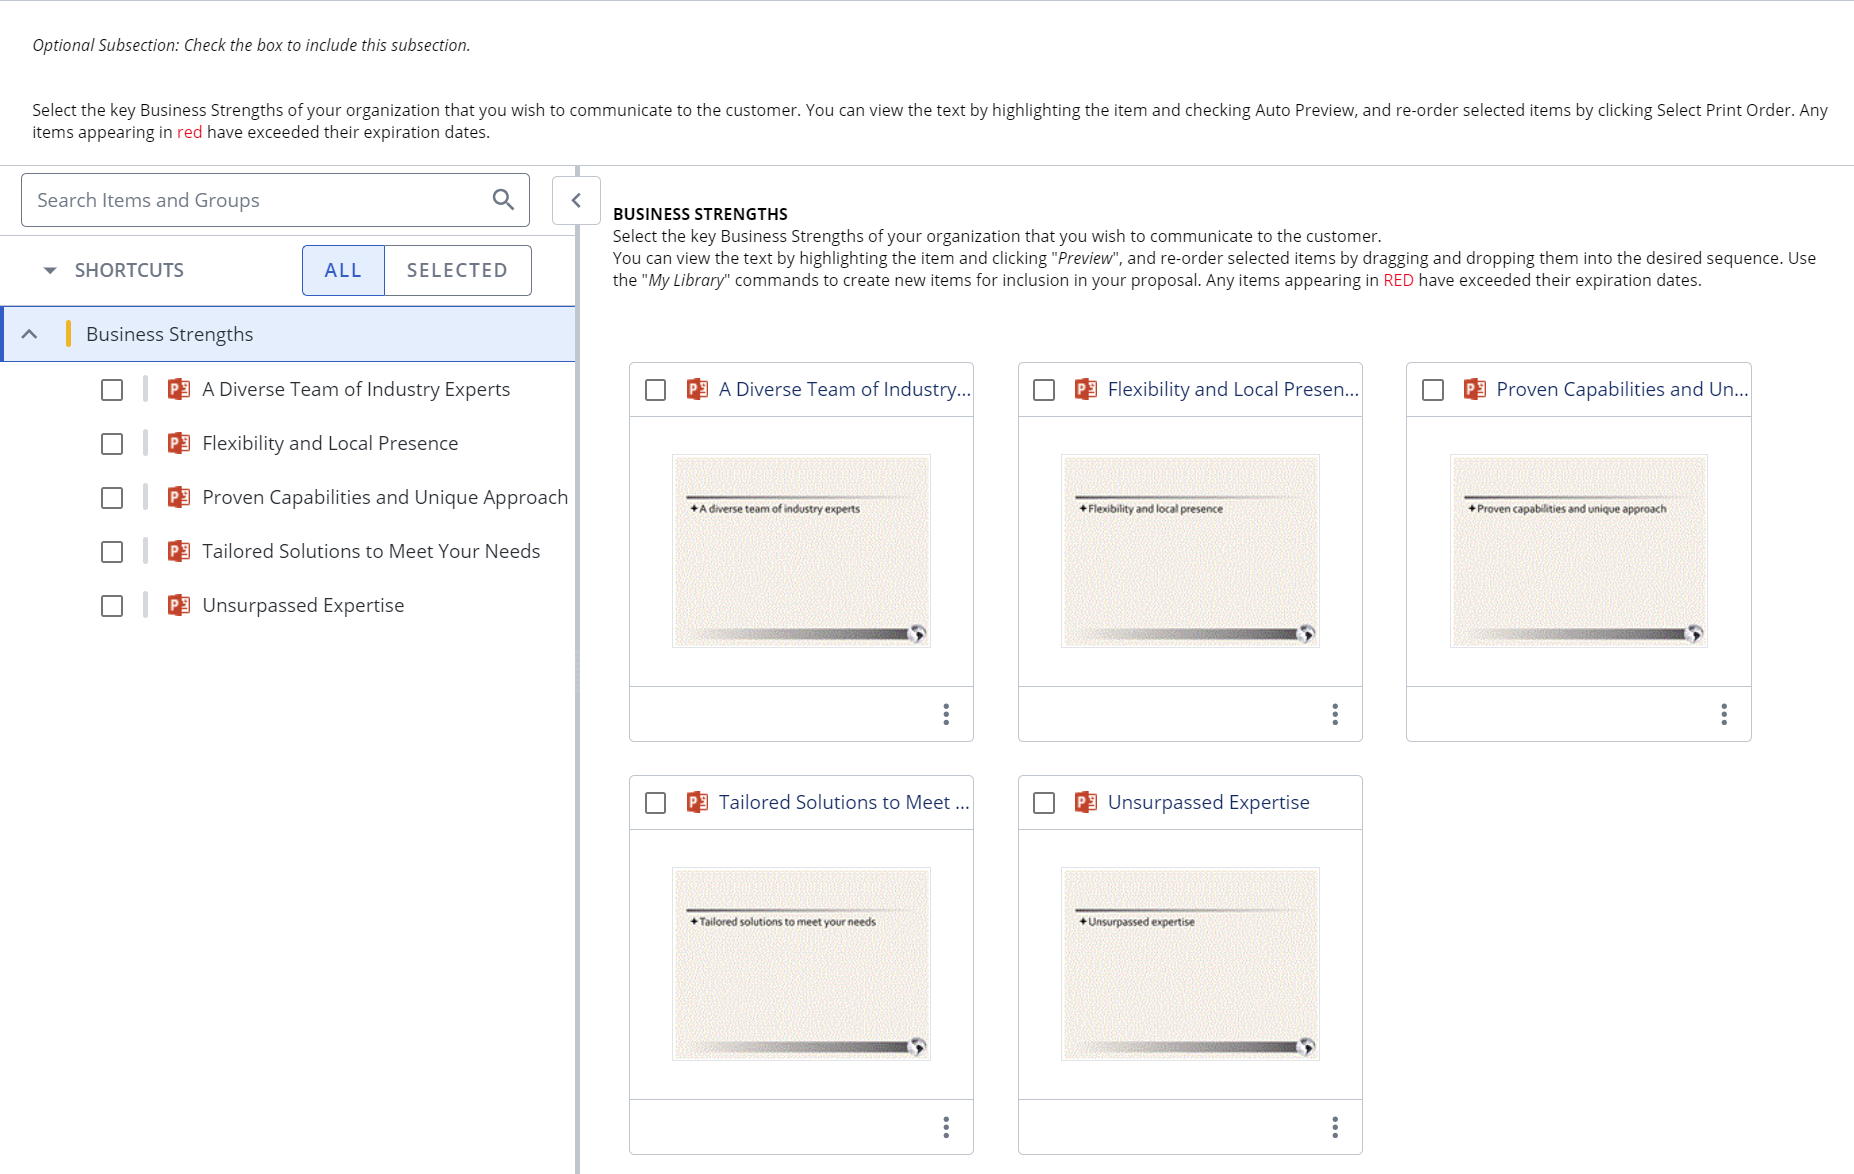
When a selection group's label is yellow, then you are required to select one or more selection item (item content) for the group. When you check an item's box, it will either complete the selection for the group, turning its label green, not complete the group, and/or expand its child items.
- Select parent and child items in a group until you have completed the required selection count.
- Once all required fields are complete and saved, the section label turns green.
Note: If the number of available selections matches the minimum number of required selections, the available selections will automatically be chosen. To disable the AutoselectMinSelections setting, see Global settings.
Caution: When an item's content has expired, the item's font will change to red. The expiration property for the content will need to be modified. When an item's content is in an alert state, a red alert displays for the selection item (parent and/or child).
Access and create preset content selection combinations to accelerate document creation.
Example: Your organization might want to create shortcuts for common industries or regions.
- Select the checkbox(es) of the subsection items you wish to include in the project and reuse in subsequent projects.
- Select Create Shortcut from the Shortcut dropdown menu.
- Enter a Name of Shortcut in the "Create Shortcut" dialog.
- Click Save. The saved shortcut displays in the Shortcuts dropdown for reuse in subsequent projects.
- To apply an existing shortcut, select the desired shortcut from the Shortcuts dropdown menu. The shortcut will be applied to all applicable sections and/or sub-sections.
Note: To delete a shortcut, hover over the desired shortcut and click the Delete  icon.
icon.
- To preview an item's content, including Bundles, click the item in the tree list. The content for the selected item displays in the right pane.
Note: You can preview content with or without data entry fields filled in.
You can reorder sections, groups in a selection section and items in a group before building the project. Architects determine which sections are moveable and which are fixed.
- Select the Project Overview section to preview your entire project and verify the print order of all your files.
- To reorder sections, groups or items, simply drag and drop to the desired position in the project.
- When completed, click Finish and Build or Build Package to build the project. When the project is built, the selected items will print in the order displayed in the project.
Note: For more information on building a package, see Build a Package.
Work with the Selection Driven Content section
If the Doc Type architect selects the "Allow assignments and editing in Projects" checkbox and the "Allow editing of Static/Selection Content when enabled" permission is enabled at the user or role level for project participants, the Selection Driven Content sections will be editable. This allows the Selection Driven Content sections to contain pre-configured starting content that project owners and writers can customize for each project, resulting in a more efficient and robust collaboration directly in a project and is an alternative to File List Components in existing Doc Types. Edits made to the content within a project do not impact the master version of the content stored in the Qvidian library.
Note: The owner of the Selection Driven Content Subsection can perform any of the tasks below, as well as manage any assignments they have created.
- Right-click the file in the workspace or click the More
 menu.
menu. - Select one of the following, as applicable:
- Edit in Word
- Edit in Excel
- Edit in PowerPoint
- Edit as desired.
- Click the Save icon in the upper left corner of the Microsoft Office application to save the file back to the project, and then close the file.
If you have a Microsoft 365 online account and the "EnableOffice365" global setting is turned on, you can edit a Word or PowerPoint file in Office for the Web
- Right-click the file in the workspace or click the More menu.
- Select Edit in Office for the Web.
- Edit as desired, and then close the browser tab when finished. Changes are automatically saved.
You can download a file in the project
- Right-click the file in the workspace or click the More menu.
- Select Download.
If you have opened a file for editing, you can cancel the edit to allow others to work on the file.
- Right-click the file in the workspace or click the More menu.
- Select Cancel Checkout.
If your project has a data entry screen, you can enter values for custom fields to replace corresponding merge codes in the file. You can preview the file in the workspace with these custom fields populated.
- Do one of the following:
- Double-click the thumbnail.
- Click the More menu and select View Full Preview.
- Right-click the file and select View Full Preview.
- Slide the Preview Custom Fields toggle to On. This setting will be remembered for this and any other projects you open.
- Right-click the file in the workspace or click the More menu.
- Select Delete. You will be asked to confirm the deletion.
- Right-click the file in the workspace or click the More menu.
- Select Assignments.
- If available, select an existing workflow or create a new workflow.
- (Optional) Enter a Task Name. By default, the system will name new workflow tasks “Workflow Task,” allowing users to leave the default workflow task name unchanged to create workflows faster when there’s no need to replace the default name with something more descriptive. Admins can change this default to the name they prefer via the “DefaultWorkflowTask” Global Setting.
-
 Set the due Date and Time ˅
- Click the calendar icon to open the calendar.
- Browse to the required month and year and click on a date to set the date. Use the left and right arrows on the top right to move to the previous or next month. Use the drop-down to select the year.
- Set the time using one of the methods below:
- Click the clock icon to open the clock.
- Click in the hours and minutes fields and enter a new time.
- Click the up or down arrows on the hours, minutes.
- Use the drop-down to select AM or PM.
Note: This will be the task's due date. The default date is the due date of the project.
- Click the Add Assignees button to add assignees to that task. The "Add Assignees" dialog appears.
- Narrow down the list by selecting: Users, Participants, or Teams from the dropdown menu. Once a user outside the project is assigned, they are automatically added as a project Participant.
- Enter two or more letters into the search bar to locate a specific user. Results begin populating below the search bar once text is entered.
- Click the X icon to exit out of the "Add Assignees" dialog and save any changes.
Note: Once selected, a blue checkmark appears to the left of the participants' initials. To remove an assignee, click the participant name again so that the blue checkmark is no longer visible.
- Select the desired Edit Permissions:
- Editable: These participants can answer and edit their slices or edit their file, and mark their workflow task as complete. By default, tasks are in "Editable" mode.
- Read-only: These participants only have permission to approve or reject answers by marking their workflow task complete or reopening a previous participant’s workflow task.
- Select the desired Completion Rule:
- Anyone: Requires all participants to complete their task before the workflow can move to the next task. By default, all tasks are set to "Anyone."
- Everyone: Only requires one participant to complete the assigned task.
- (Optional) Click the More Actions menu to complete or delete the task; or when there are multiple tasks, move the task up/down or to the top/bottom of the workflow.
- Click Done.
- (Optional) Click Add task to add more tasks to your workflow.
- (Optional) Drag and drop the tasks to rearrange the order of the workflow or select one of the following options from the More menu: Complete Task, Move Up, Move to Top, Move Down, Move to Bottom, Delete.
- (Optional) To save this assignment workflow for future use, click Save for Reuse. This eliminates the need for commonly used workflows to be recreated manually every time they're needed.
- Enter a Workflow Name.
- (Optional) Unselect the Save participants to workflow checkbox to save the tasks in your workflow without including its participants. By default, this checkbox is selected so Upland Qvidian will remember the participants associated with saved workflows.
- (Optional) Update your Share Settings. By default, a saved workflow is "Private" and therefore only visible to the project owner that created it. To make a saved workflow available to all permissioned users, select "Global."
- Click Save.
- Click Save.
Example: You may want to require only one of the participants to complete the task if you have assigned it to a team, but any member of the group can answer it. You may want to require all the participants to complete the task if the question contains multiple parts, or requires approval from all participants.
Note: For information on editing existing assignments, see Project assignments.
The "Editable" and "Read-only" task mode assignees are responsible for editing and verifying their assigned files. "Editable" mode assignees have permission to download and edit files. "Read-only" mode assignees have permission to approve the file or reject it and send it back to the "Editable" mode assignee(s). The workflow task may require all assigned participants to complete the task before the workflow can move forward.
- Locate your assignment task:
- Navigate to My Tasks.
- Right click the file, select More Actions > Assignments.
- Locate your assignment task.
- If a "Editable" mode task assignee, right-click the file in the workspace or in the navigation panel, and then select one of the following:
- Edit in Word, Edit in Excel, Edit in PowerPoint:The content opens in Word, Excel or PowerPoint. Edit as needed and then click the Save button in the upper left corner.
- Edit in Office for the Web: The content opens in Office for the Web. You may be prompted to log into Microsoft 365. Edit as needed close the Office for the Web browser window or tab. Changes to the file are saved automatically.
- Download: Downloads the file without checking it out.
- Upload Revision: Click to upload a new file to replace the existing one. This option is only available for PDF and image files.
- If a "Read-only" mode task assignee, review the assigned file.
- Depending on how you navigated to your task, click the Complete Task
 icon or select the Complete Task option from the More menu.
 - The assignment workflow will move to the next task. For more information on completing assignments, see Complete your project assignments.
Note: If the "Read-only" mode assignee does not approve the content, they can change your assignment task's status from complete back to incomplete. If this occurs, you will receive an email notification with the reviewer’s reasons for sending back the answer and a link to the project.
Note: If marked "Everyone", the workflow task requires all assigned participants to complete the task before the workflow can move forward. If marked "Anyone", the workflow task only requires one of the assigned participants to complete the task before the workflow can move forward.
Project components that have work to complete, such as Selection Content, Structured Content, Data Entry, Agenda Slides, Static Content (with editing enabled), File List, and RFP sections can be assigned to project participants. Once assigned to a component, owners can edit content, update data, and manage workflows.
To assign ownership of any project components do one of the following:
- Drag and drop project participants from the Participants tab into the desired title bar.
- Click the Add Participants
 icon and select the participants from the "Add Participants to Section" dialog.
Note: When ownership of a component is assigned, ownership of any child subsections or subsections that share the same data is also applied.
Caution: Users cannot be assigned to subsections that do not have any work to complete, such as Dynamic Slides. Static Content sections with the ability to edit content would allow assignments for users with the “Allow editing of Static/Selection Content when enabled” permission, but static content sections without the ability edit content would not.