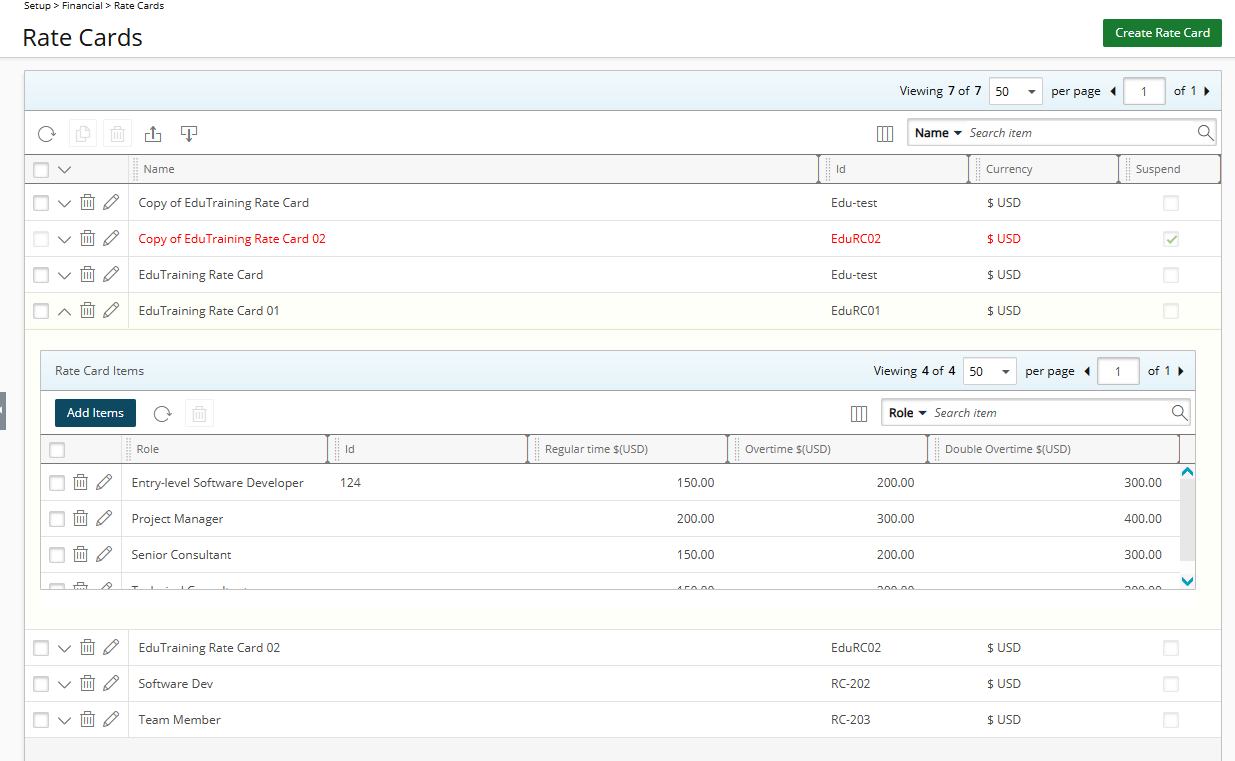
From the Rate Cards list page, you can view, manage and create Financial Rate Cards. By default, the page lists all Rate Cards in alphabetical order.
Rate Cards created at Financial System level
This article details how to access the System-level Rate Cards list page and the available options to you.
Accessing the System-level Rate Cards list page
- From the Icon Bar click Setup
 .
. - From the Navigation Menu click Financial to expand the corresponding menu.
- From the Financial menu items, click Rate Cards.
Available options from the System-level Rate Cards list page
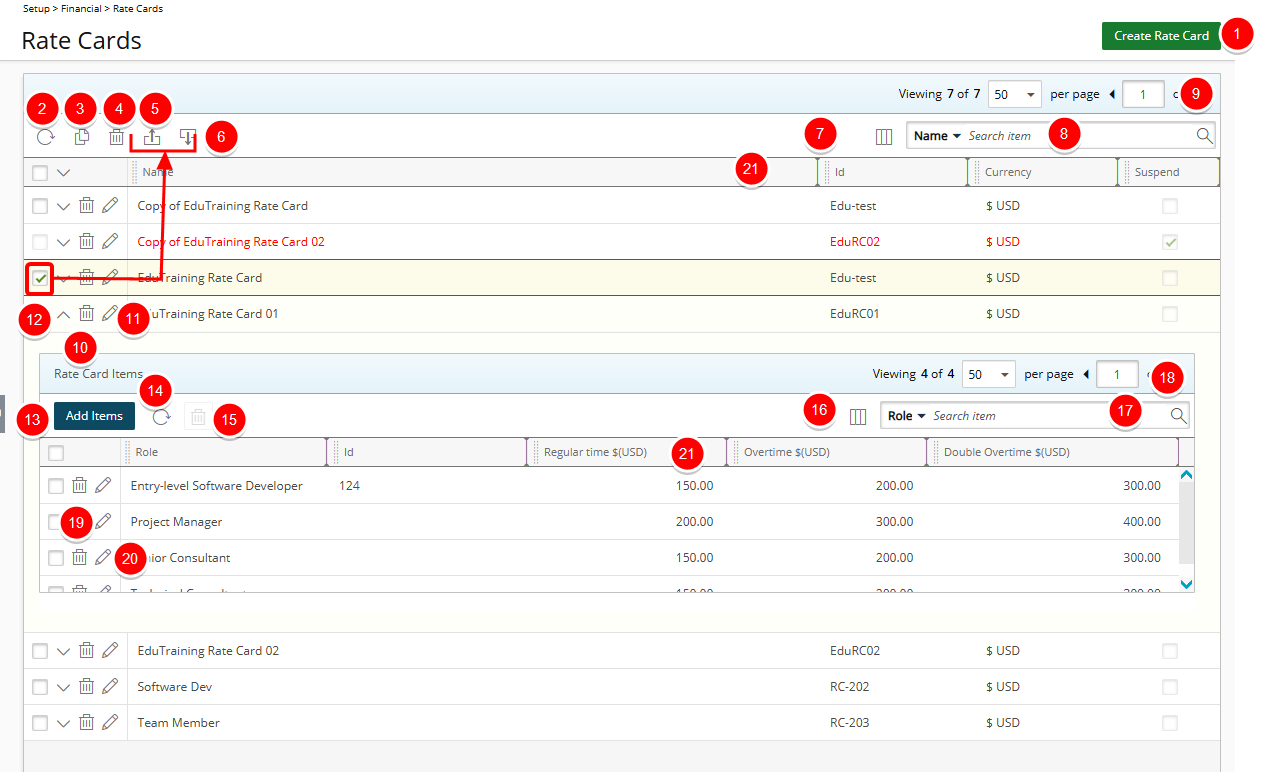
- Use the Create Rate Card button to define a new rate card.
- Refresh
 the list.
 - Copy
 selected Rate Card.
 - Delete
 selected Rate Card.
 - Export
 the list of Rate Cards to Excel.
 - Import
 Rate Cards from a predefined Excel Template.
 - The following columns are displayed by default: Name, Id, Currency and Suspend. You can manage the columns from Column Selection
 .
. - Search
 for Rate Cards based on Name and Id. You can choose to include the Currency criteria from Column Selection .
 - Pagination is available at the top right corner to facilitate easy navigation across pages.
- Delete Rate Card.
- Modify
 Rate Card.
 - The Rate Card Items are created/managed from the drawer by clicking the expand arrow (
 ).
). - Click Add Items to add Roles and their associated rates to the Rate Card.
- Refresh the list.
- Delete selected Rate Card Item.
- The following columns are displayed by default: Role, Id, Regular time, Overtime and Double Overtime. You can manage the columns from Column Selection .
- Search for Rate Cards Items based on Role, Id, Regular time, Overtime and Double Overtime.
- Pagination is available at the top right corner to facilitate easy navigation across pages.
- Delete Rate Card Item.
- Modify Rate Card Item.
- From the table headers:
- You can easily sort the columns by ascending or descending order simply by clicking a column header. Note that an arrow indicates the descending (
 ) or ascending (
 ) order applied to the column.
 - You can dynamically resize column(s), to your preferred width. Simply move your cursor to the column boundary
 you want to resize. When the cursor becomes a resize cursor, click and drag the column accordingly.
 - Click
 and move a column to the desired position.
- You can easily sort the columns by ascending or descending order simply by clicking a column header. Note that an arrow indicates the descending (