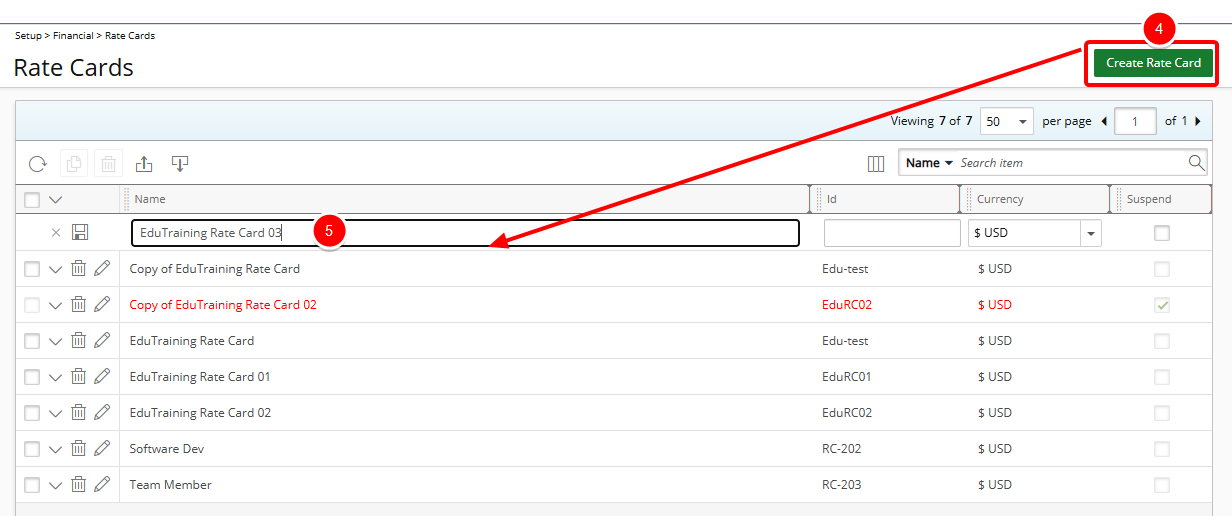
From the Rate Cards list page, you can view, manage and create Financial Rate Cards. By default, the page lists all Rate Cards in alphabetical order.
This article details how to create new Rate Cards at the system level to define rates for roles, services, or other billing components.
Creating a System-level Rate Card
- From the Icon Bar click Setup
 .
. - From the Navigation Menu click Financial to expand the corresponding menu.
- From the Financial menu items, click Rate Cards.
- From the Rate Cards list page click the Create Rate Card button.
- A new line item is added allowing you to define the Name, Id and Currency.
Note:
- Currency cannot be changed once a Rate Card is saved.
- You can Suspend a Rate Card when editing it.
-
To save your Rate Card and continue adding items, click the Save
 button.
 Tip: If you want to cancel the process, click the Cancel
 button.
Adding Items to the System-level Rate Card
Upon saving the System-level Rate Card you can then add items.
- The Rate Card Items drawer will be displayed upon creating a Rate Card. If not already open, click Expand
 located against the Rate Card name to access the Rate Card Items drawer.
 - Click Add Items.
- Select the required Roles from the left table.
- Click the Add
 button to add them to the selected items on the right.
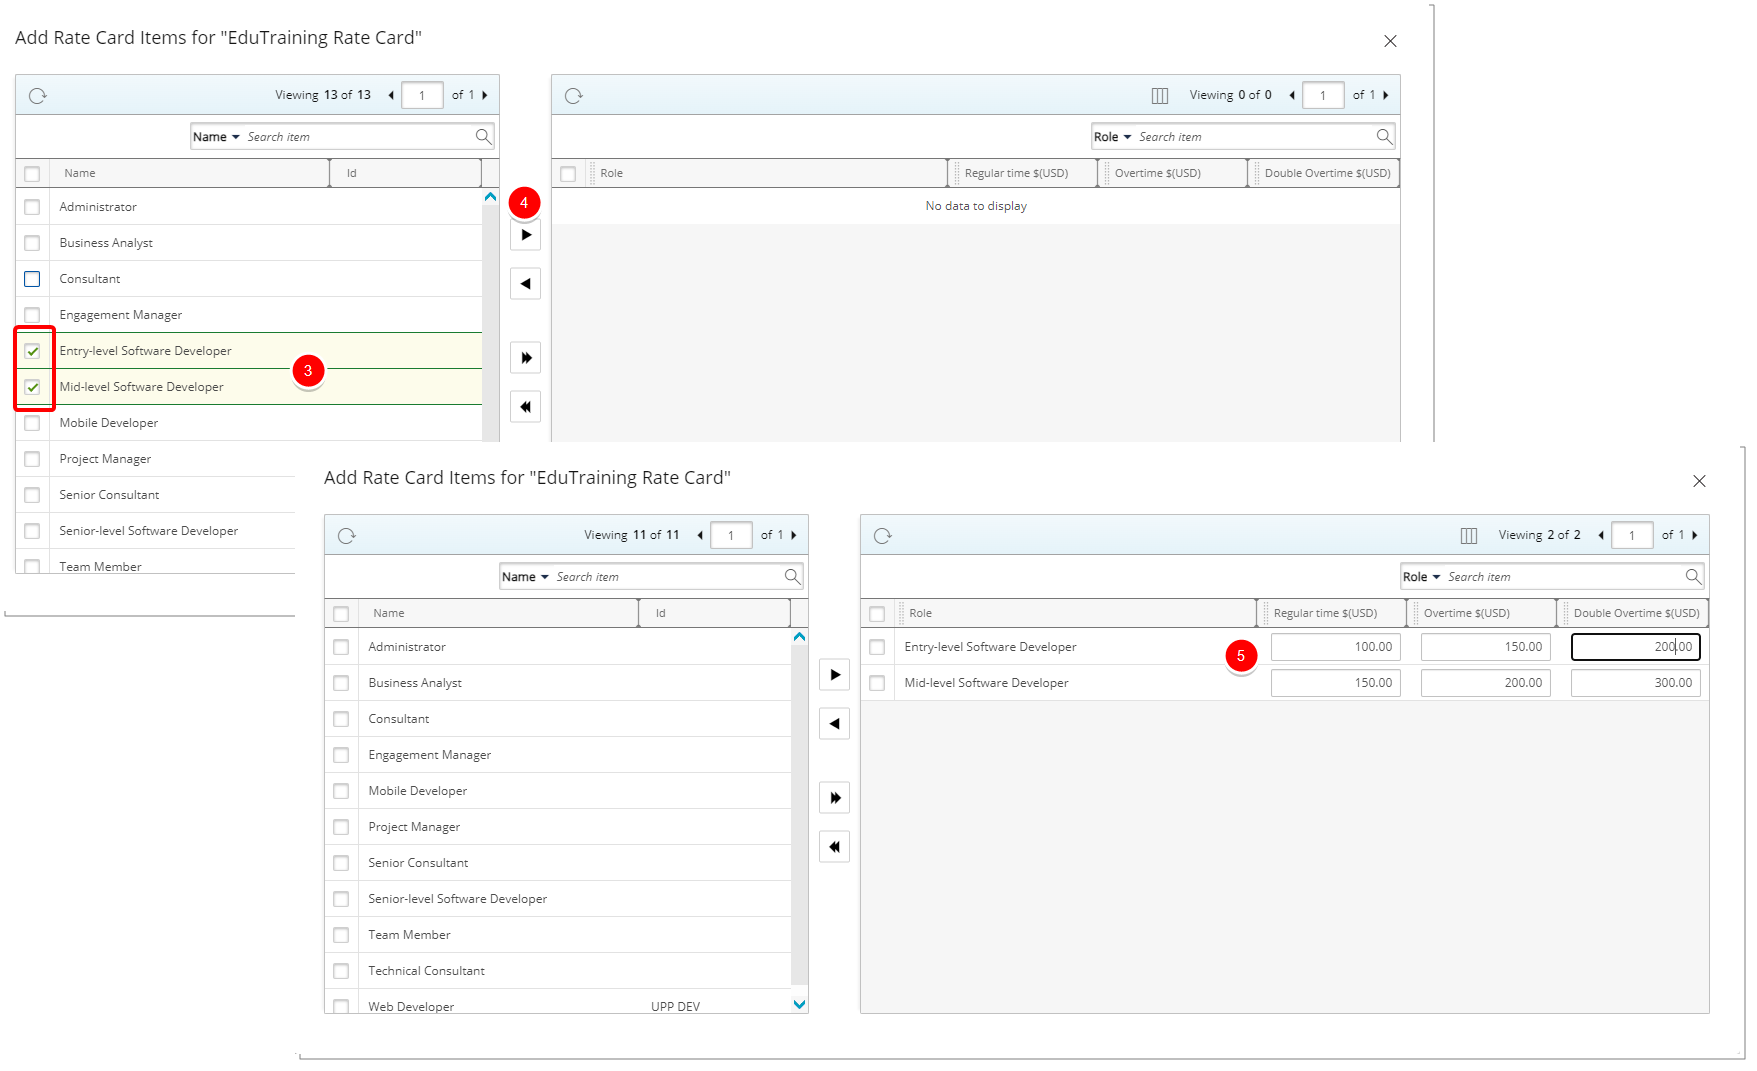
Note:
- Use the same Role for multiple Rate Items.
- Suspend/delete a Role if it is used in Project Rate Card associations.
- Enter the Regular time, Overtime and Double overtime amounts for each Role.
- Click Close to exit the dialog box and return to the list page where you will see your Rate Card Items in the drawer.