The Associate User Defined Fields page can be accessed from the User Defined Fields root Navigation menu option under Setup.
This article details how to edit the properties of a User Defined Fields.
- From the Icon Bar click Setup
 .
. - From the Navigation Menu select User Defined Fields to access the Associate User Defined Fields page.
Tip: The Menu will automatically hide (collapse or minimize), allowing for more space on the Associate User Defined Fields page. While the menu is minimized, click the blue Collapse/Expand arrow to turn it back on.
- Click the Associate to box to access the list where you can select the Object (module) from the list of available options. User Defined Fields can be associated to: Business Units, Charges, Client Contacts, Client POs, Clients, Groups, Leave Request, Milestones, Portfolios, Products, Programs, Projects, Roles, Tasks, Users andWork Types
Note: Users must have access rights to at least one of the modules, listed here, to have access to the Associate User Defined Fields page, otherwise the User Defined Fields menu option will not display.
- Select the Tab where the UDF resides.
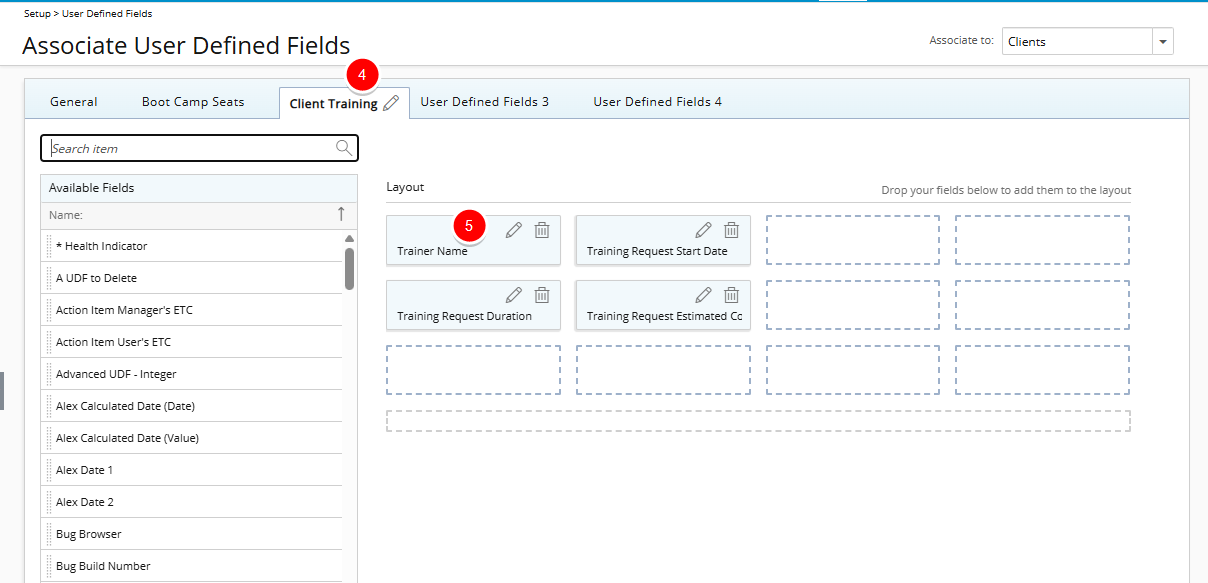
- Click Edit
 to open the fields properties modal and make the necessary changes.
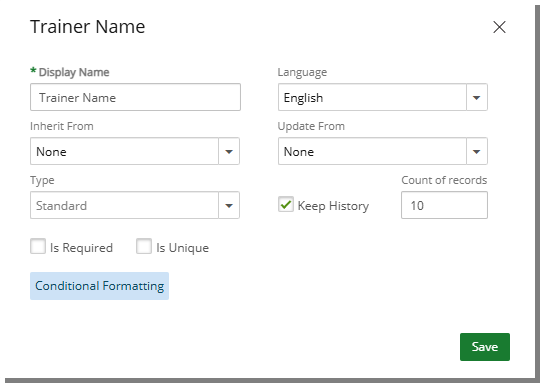
- Display Name: Specifies the label for this UDF that will appear.
- From the Language options select a language to enter a Display Name for each.
- The Type of a saved User Defined Field cannot be modified.
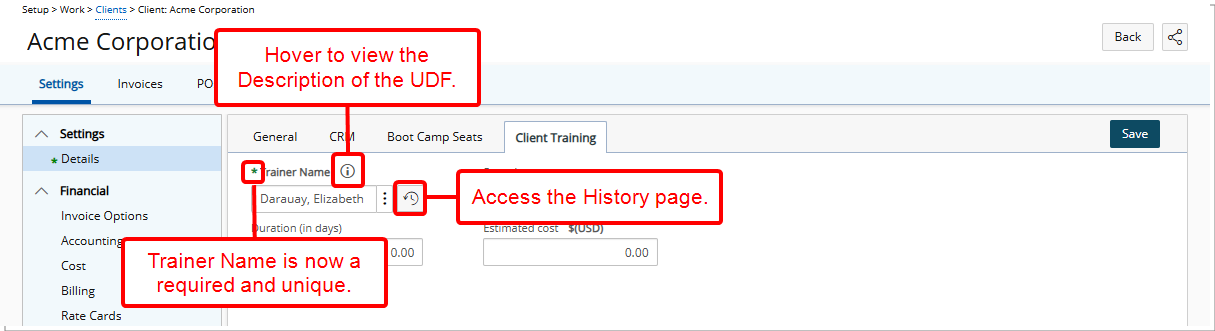
- The Keep History and Count of Records options are available only when associating a User-Defined Field (UDF) with the Projects, Users, or Clients objects. Enabling Keep History ensures that changes to field values are tracked. The number you enter in the Count of Records box determines how many historical entries are stored. You can view the details of these changes on the History page.
- Is Required: When cleared, the corresponding UDF will be an optional field.
- Is Unique: When cleared, the corresponding UDF will not be unique.
If required click the Conditional Formatting button to define conditional expressions. Conditional Formatting is only available for User Defined Fields associated to Projects. For further details refer to Using Conditional Formatting for Project User-Defined Fields.
- Click Save or Cancel to return to previous page.
- View the impact of your changes: Navigate to the a Client Edit page, Select the Client Training Tab where the UDF was added and edit/view your changes.