The Setup options for a Work Item Workflow allow you to customize various aspects of the process. This includes configuring the tracking number, adjusting how information appears on the Work Item Entry Edit page, and associating User Defined Fields to this page for the purpose of inputting extra details. These configurations play a pivotal role in providing administrators with the tools to finely tailor the Work Item Entry Edit page to align precisely with the unique requirements of their organization.
This article details the Work Item Setup page and the available options to you.
- From the Icon Bar click Setup
 .
. - From the Navigation Menu click Work to expand the corresponding menu.
- From the Work menu items, click Work Item Workflows.
- From the Work Item Workflows list that displays, click the Name of the workflow you wish to access.
- Click Setup.
- Upon the Work Setup dialog box displaying, navigate to the Setup tab and select/enter the following:
- Prefix: Define the prefix for the tracking number; defaults to the first four characters of the workflow’s name.
- Language: Define the language for generating the tracking number, options include English and French.
- Digits: Define the length of the prefix number; defaults to the number 6.
- Next number: Define the next number used for a new entry; defaults to the number 1.
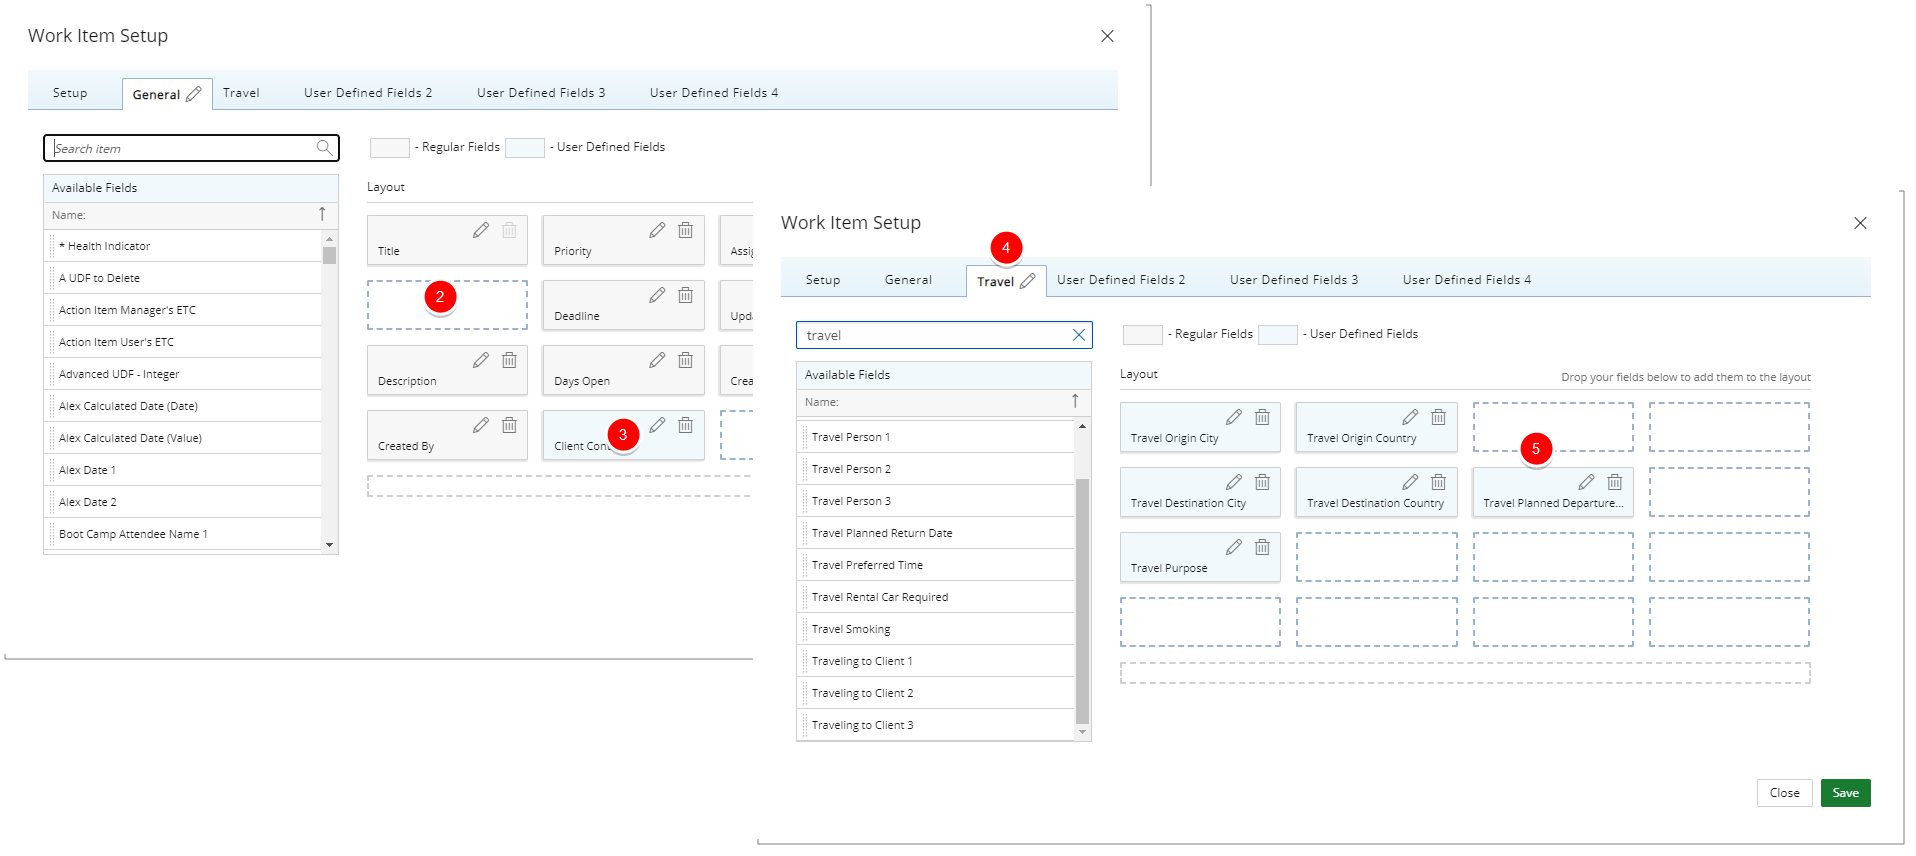
- Navigate to the General tab tab. Note that by default the following Fields are added automatically to the layout: Title*, Priority, Assigned To, Project*, Deadline, Updated On, Description, Days Open, Created On and Created By.
- To add more fields to the layout Search for Available Fields:
- Enter your search criteria in the Search box.
- The Available Fields list will be refreshed with a list of all Fields containing the text you searched for.
- From the Available Fields section select the desired field.
- Drop the selected Field in the Layout section.
- The field properties modal window will display automatically. For information on how to modify the properties, refer to Editing Field Properties.
- Repeat Step 8 to add as many Fields as necessary.
Tip: To remove any Fields from the layout simply click the respective Delete
 button. For more information refer to Removing UDF Association.
- You can easily associate User Defined Fields and have the option to organize them in four tabs. Simply navigate to the tab under which you want to display the User Defined Field.
- Click the Edit
 button to rename the tab:
- Enter the preferred tab name.
- Click Save
 .
.
- To add a User Defined Field:
- Enter your search criteria keyword(s) in the Search box.
- The Available Fields list will be refreshed with a list of all Fields containing the text you searched for.
- From the Available Fields section select the desired field.
- Drop the selected Field in the Layout section.
Tip: To add more UDF layout areas, simply drag a Field into the gray doted rectangle. You will notice a new line with 4 dotted rectangles will appear above the gray dotted rectangle. You can now add more UDFs in the available slots.
- Upon adding a field, the field properties modal window will be displayed allowing you to edit the UDF properties. , refer to Editing Field Properties.
Example
In our example we have:
- We have created a Travel Request work Item Workflow
- Removed the Project Field from the layout area. Which makes this workflow Project-independent.
- Added a User Defined Field in the General tab.
- Renamed the User Defined Fields 1 tab name to Travel.
- Associated six UDFs to the Travel tab.
Impact of the changes:
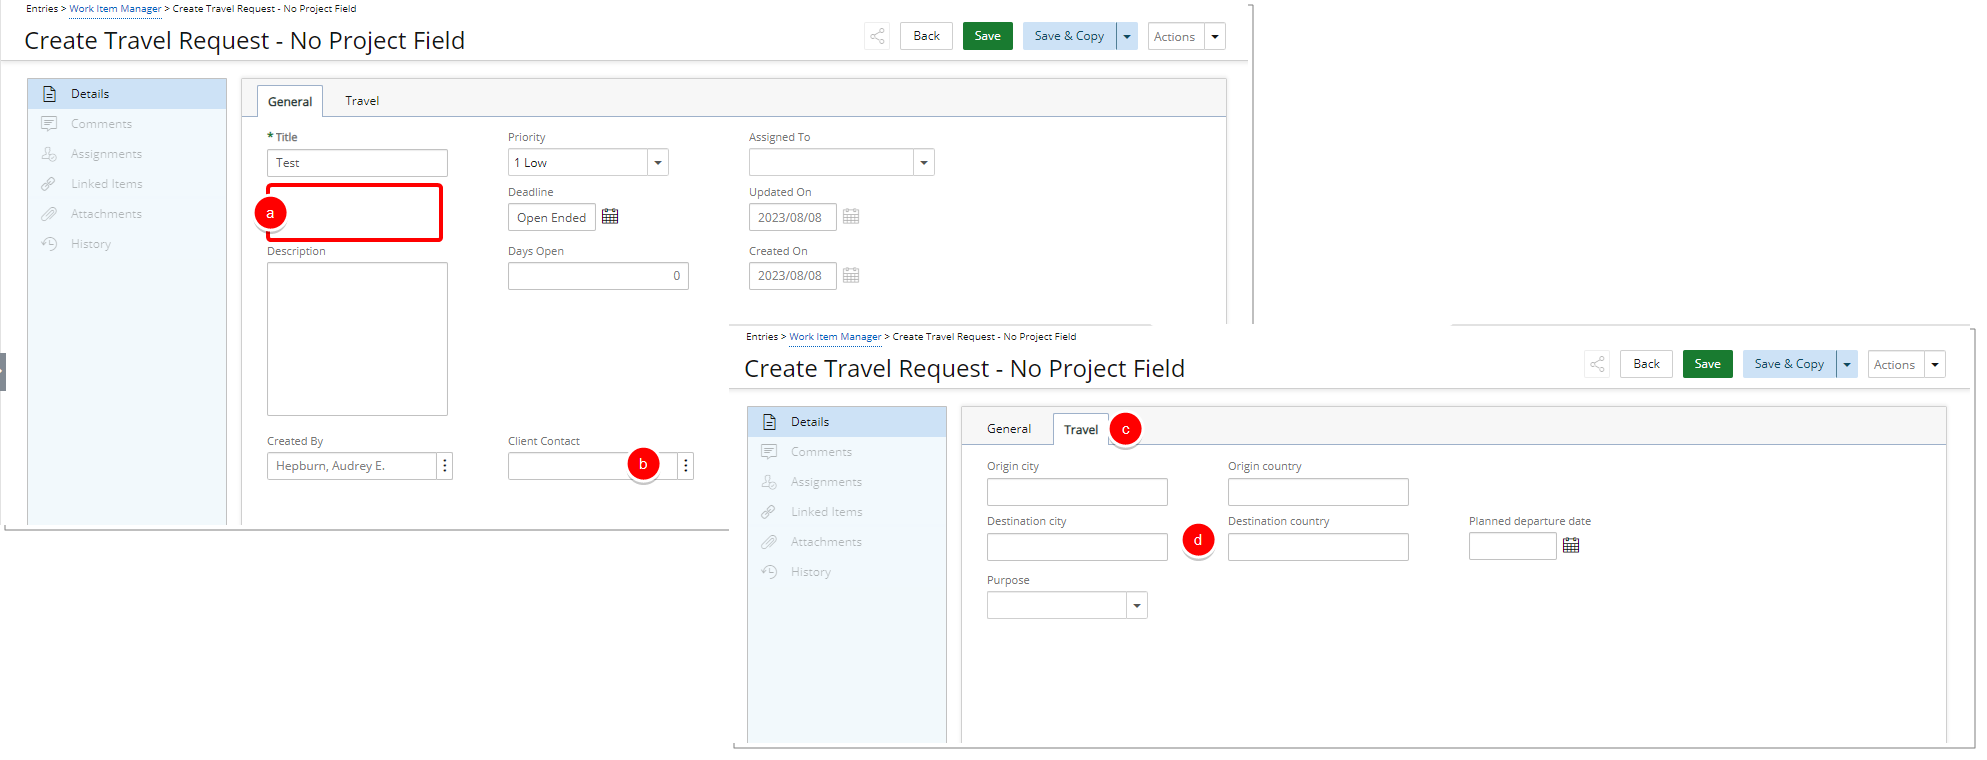
- Since we omitted the Project Field from the layout, this Work Item Type will only be available from the Work Item Manager.
- When creating a Work Item Entry, note that:
- The Project Field is not displayed.
- There is a User Defined Field to the General tab.
- There is a Travel tab.
- Six UDFs Fields are present in the Travel tab.
Editing Field Properties
- Access the field properties modal window by choosing one of the following methods:
- When adding a field to the Layout area, the field properties modal window will automatically open.
- Alternatively, click the Edit button next to a Field within the Layout area.
- Display Name: Allows defining a display name for the field in the selected language. By default, the Field Name will be used and system terminology will be applied.
- Language: Allows selecting the language for which the display name will be set.
- From the Type selection list choose Standard or Calculated.
- Select whether the Field is:
- Required
- Unique
- Click Save to apply your changes or Cancel to return to the previous page.
Removing Fields or UDF Associations
- Click the Delete button to remove a field/UDF from the Layout area.
Note:
- Removing a UDF association will delete all related data. The deleted data is not be recoverable.
- Regular Fields will retain their value when later returned to the layout.
- Click Yes to confirm deletion or No to cancel.
Note: Changes are saved automatically.