Upon navigating to the Transitions tab, you must first click on a Transition to access the Details, Workflow Roles, Notifications and Format sub-tabs located within the right-hand pane. From these sub-tabs you can edit the Transition properties.
Depending on the workflow type selected, the Workflow State Attributes and State Transition Properties can vary.
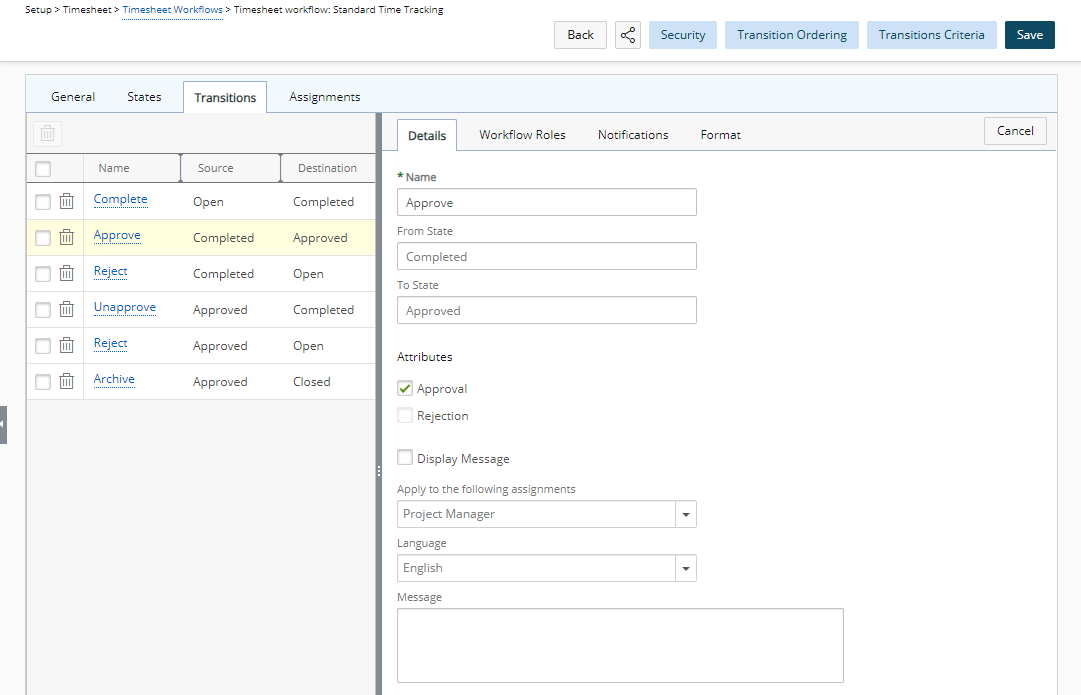
Within the Details sub-tab, you can define the Names and the properties of the Transition.
- Name: Transition Name.
- From State: Displays the From State Name.
- To State: Displays the To State Name.
- Approval: A single Approval transition is defined for a State; the Approval transition is mutually exclusive with the Rejection, transition. When selected, the options Create Time Entries on Approval and Notify Project Manager(s) on Approval are enabled.
- Rejection: Can be selected on an Rejection Transition. When selected, the option Delete Time Entries on Rejection is enabled.
- The following options are available for the Leave Request Workflows:
- Delete Time Entries on Rejection: When selected, the system will delete time entries against the Leave Time upon rejection of the Leave Request.
- Create Time Entries on Approval: When selected, the system will create the appropriate Time Entries upon approval of the Leave Request. Note: The option, “Create Time Entries on Approval”, applicable only on Approval, will insert the approved Leave Time in the Time Sheet and set those dates as “Non-Working” in the Calendar.
- Notify Project Manager(s) on Approval: When selected, the system will notify Project Manager(s) upon approval of the Leave Request.
- Validate Data: When selected, the system will validate the following upon submission of a Leave Request:
- That Reason is not created against a Holiday.
- That the selected Reason exists for that user, based on the Timesheet Template settings.
Note: If an error is generated based on either of the above, the state change is halted.
When making modifications in the Details sub-tab you can still navigate to other tabs and view your changes on the graphical interface. Click Save only once you are finished with all your modifications.
Clicking the Cancel button will display the graphical representation of the workflow within the right pane. Any changes made in the Details and Format tabs will be lost unless saved.
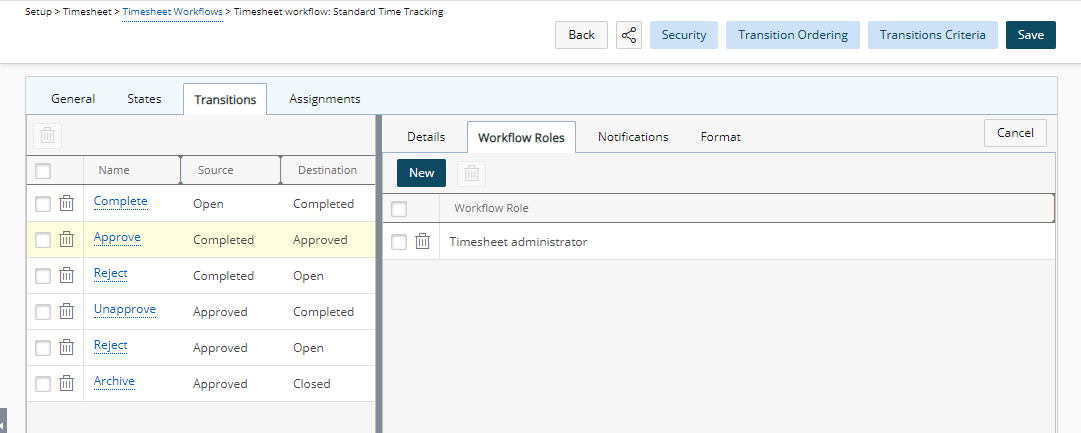
Within the Workflow Roles sub-tab, you can associate a user role created in the system with the workflow transition.
- Click the Add button to display all the user roles created in the system
- Click the Role that will be associated to the workflow Transition.
For further details refer to Associating a User Role to a Workflow Transition.
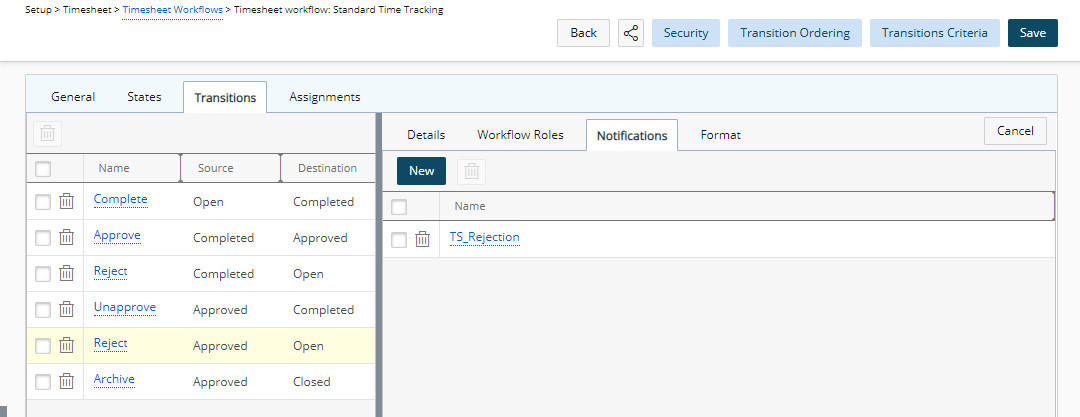
Within the Notifications tab you can setup the Workflow Notifications. The system automatically generates and sends email messages when the specified conditions are met.
For further details refer to Setting Up Notifications for the Workflows.
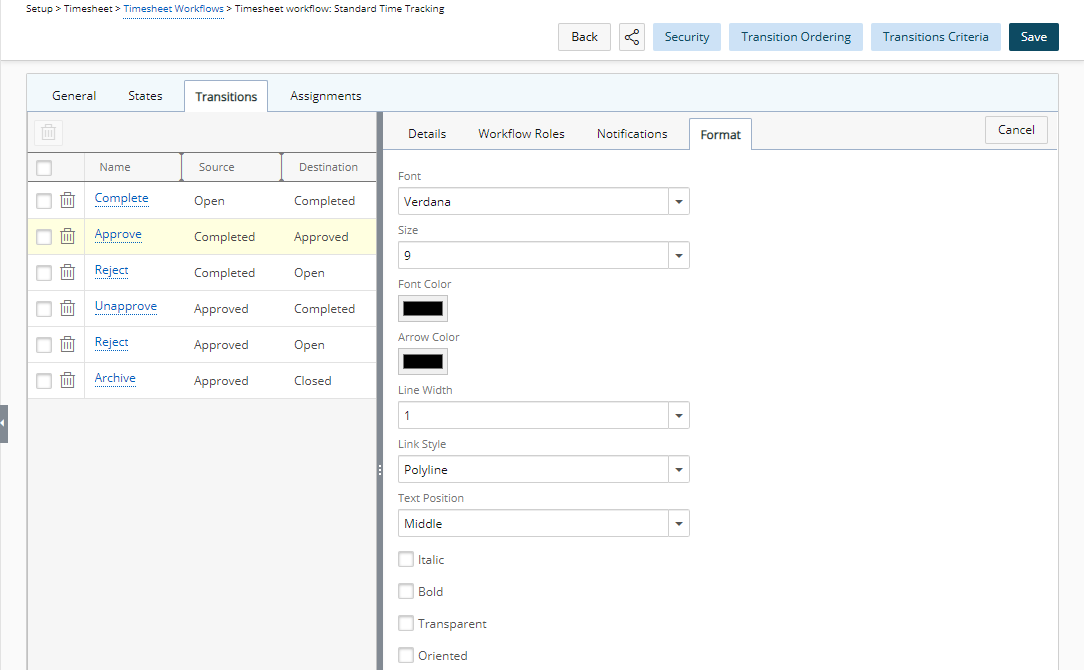
The options within the Format tab, allow you to define the formatting of the Workflow Transition. Under this sub-tab you can specify the following formatting for the selected Transition:
- Font face
- Font Size
- Font Color
- Arrow Color
- Line Width
- Link Style
- Text Position
- Back Color
- Gradient color
- Italic
- Bold
- Transparent
- Oriented
Example: If you want the text to be Italic or Bold, choose the appropriate selection boxes.